An Azure Virtual Network (VNet) is a logically isolated network in Microsoft Azure that provides:
- Secure communication between Azure resources (VMs, apps, databases).
- Internet connectivity (public IPs) and private connectivity (internal IPs).
- On-premises integration via VPN or Azure ExpressRoute.
step1 Create a new Subnet on an existing virtual network
Think of a VNet as an apartment building, subnets as floors, and IPs as apartment numbers.
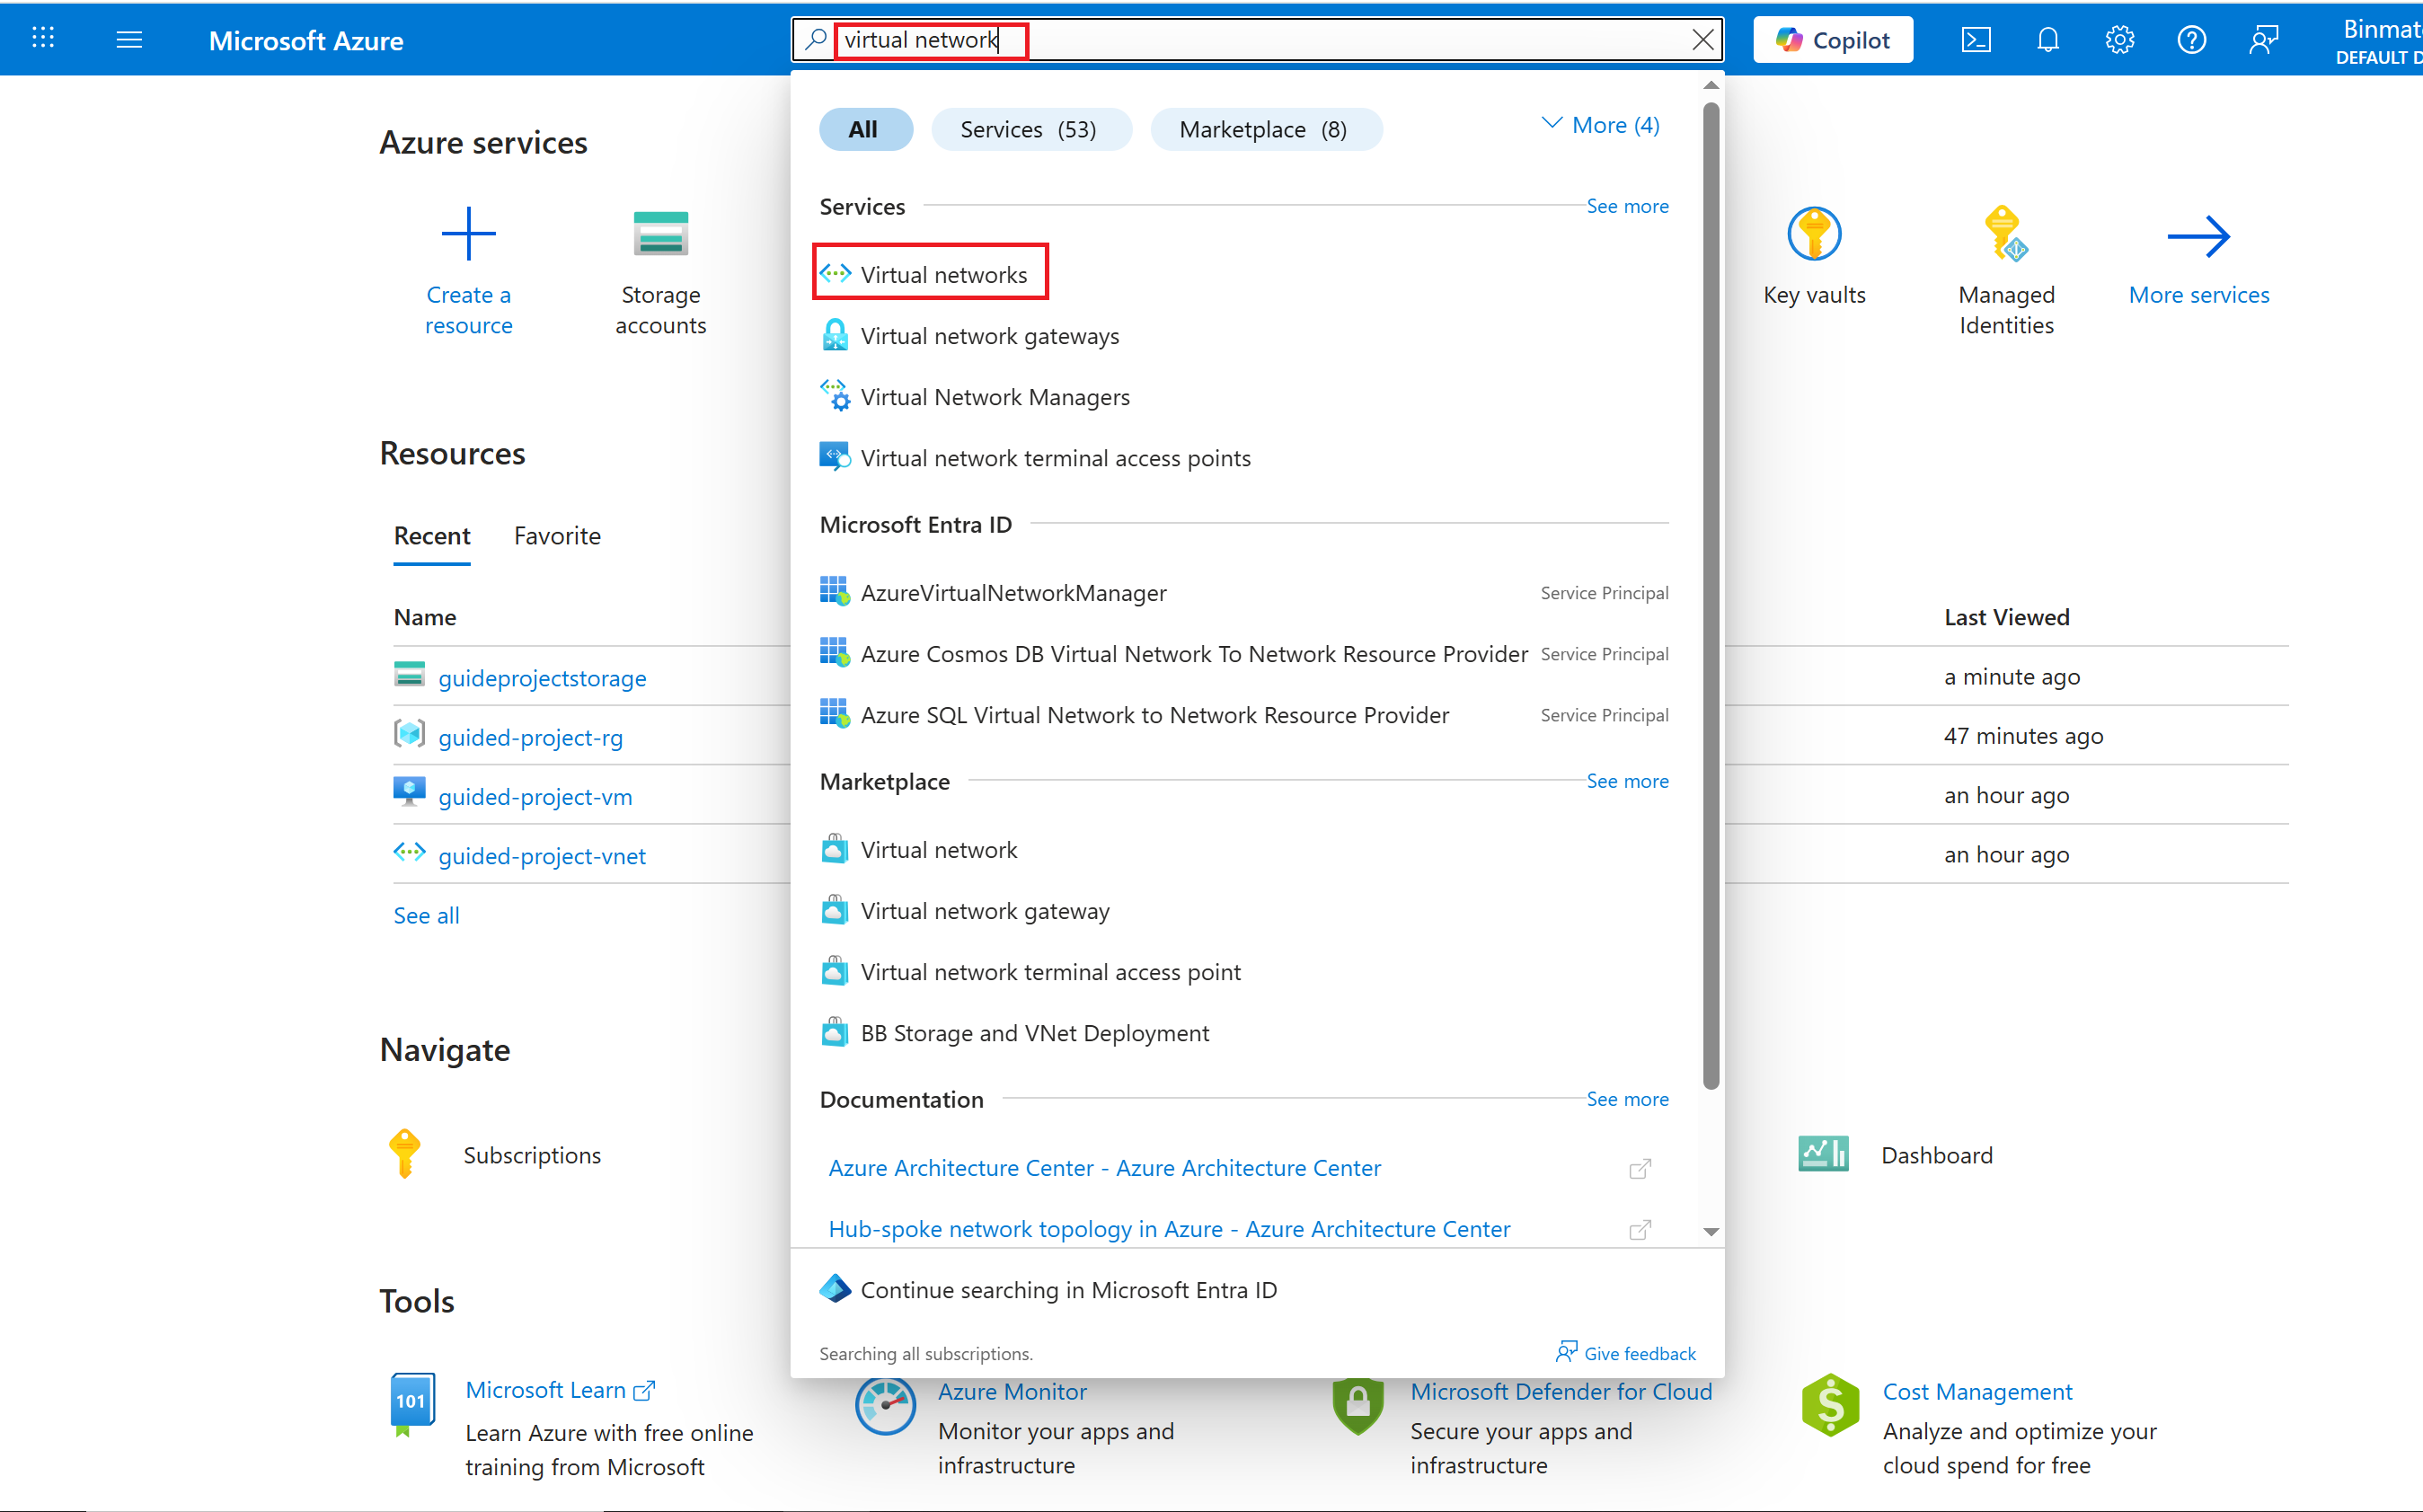
- From the Azure portal home page, in the search box, enter virtual networks.
- Select virtual networks under services.
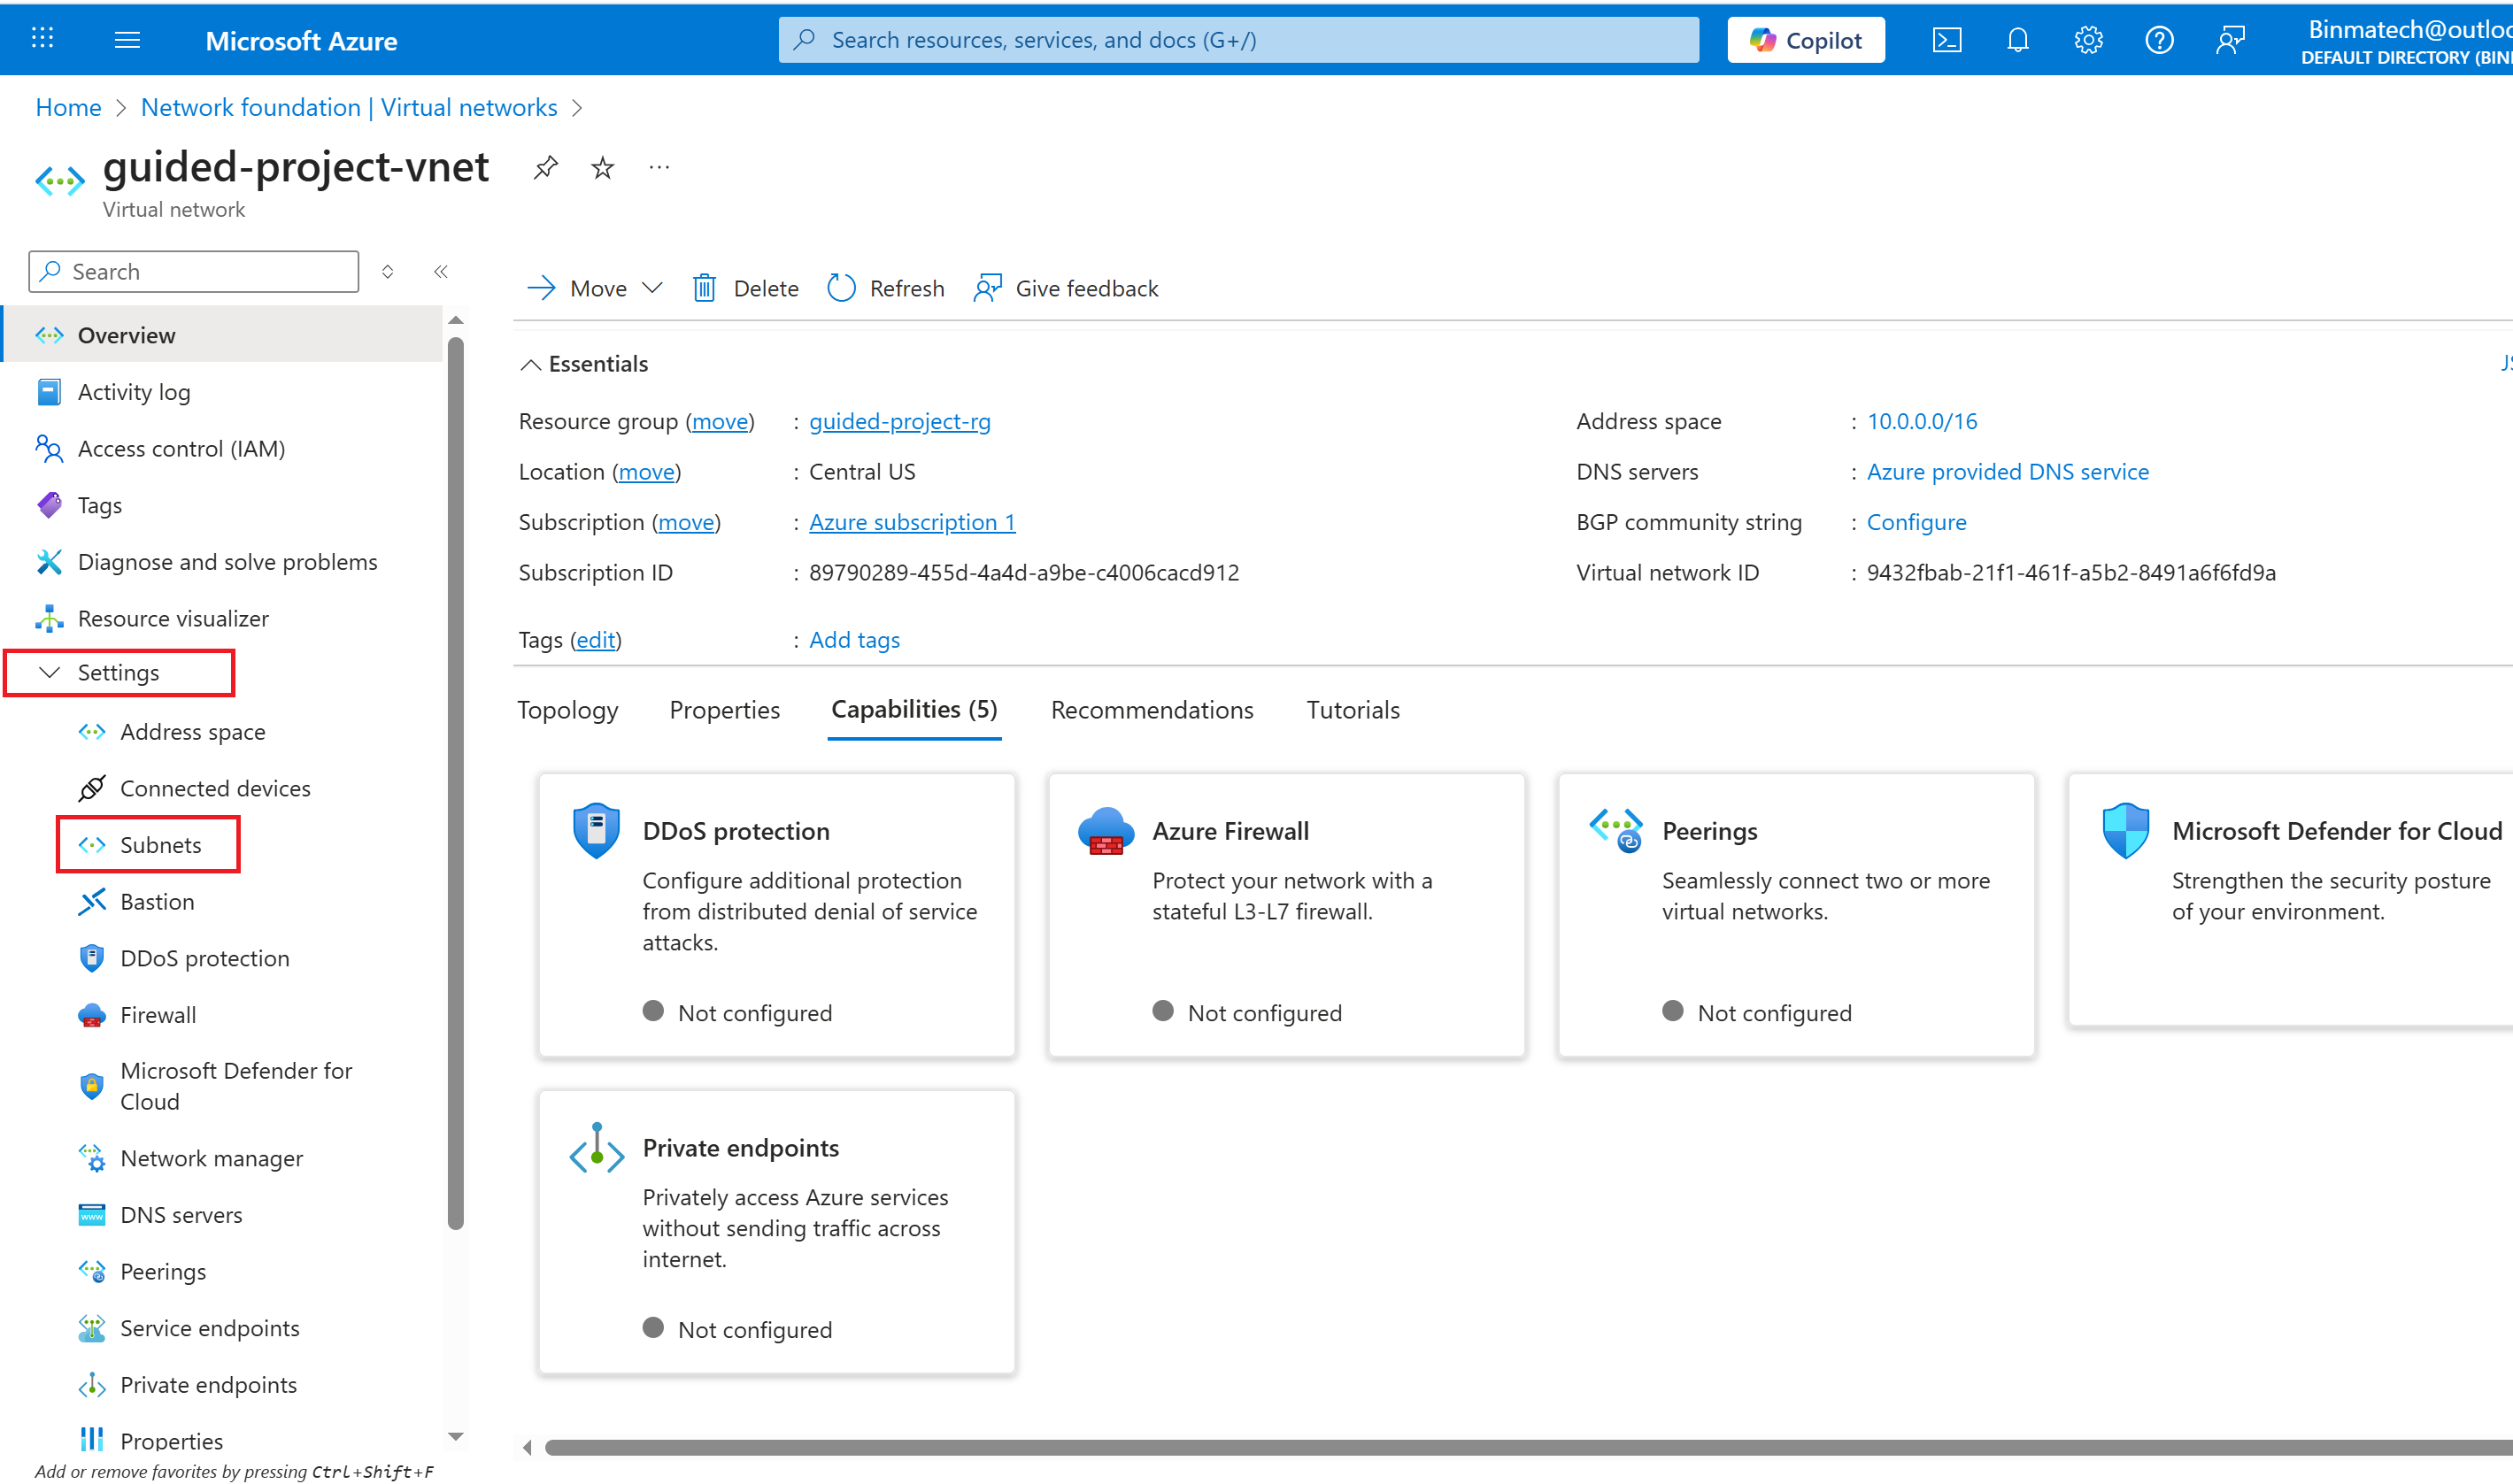
- Select the guided-project-vnet virtual network.

- From the guided-project-vnet blade, under settings, select Subnets.
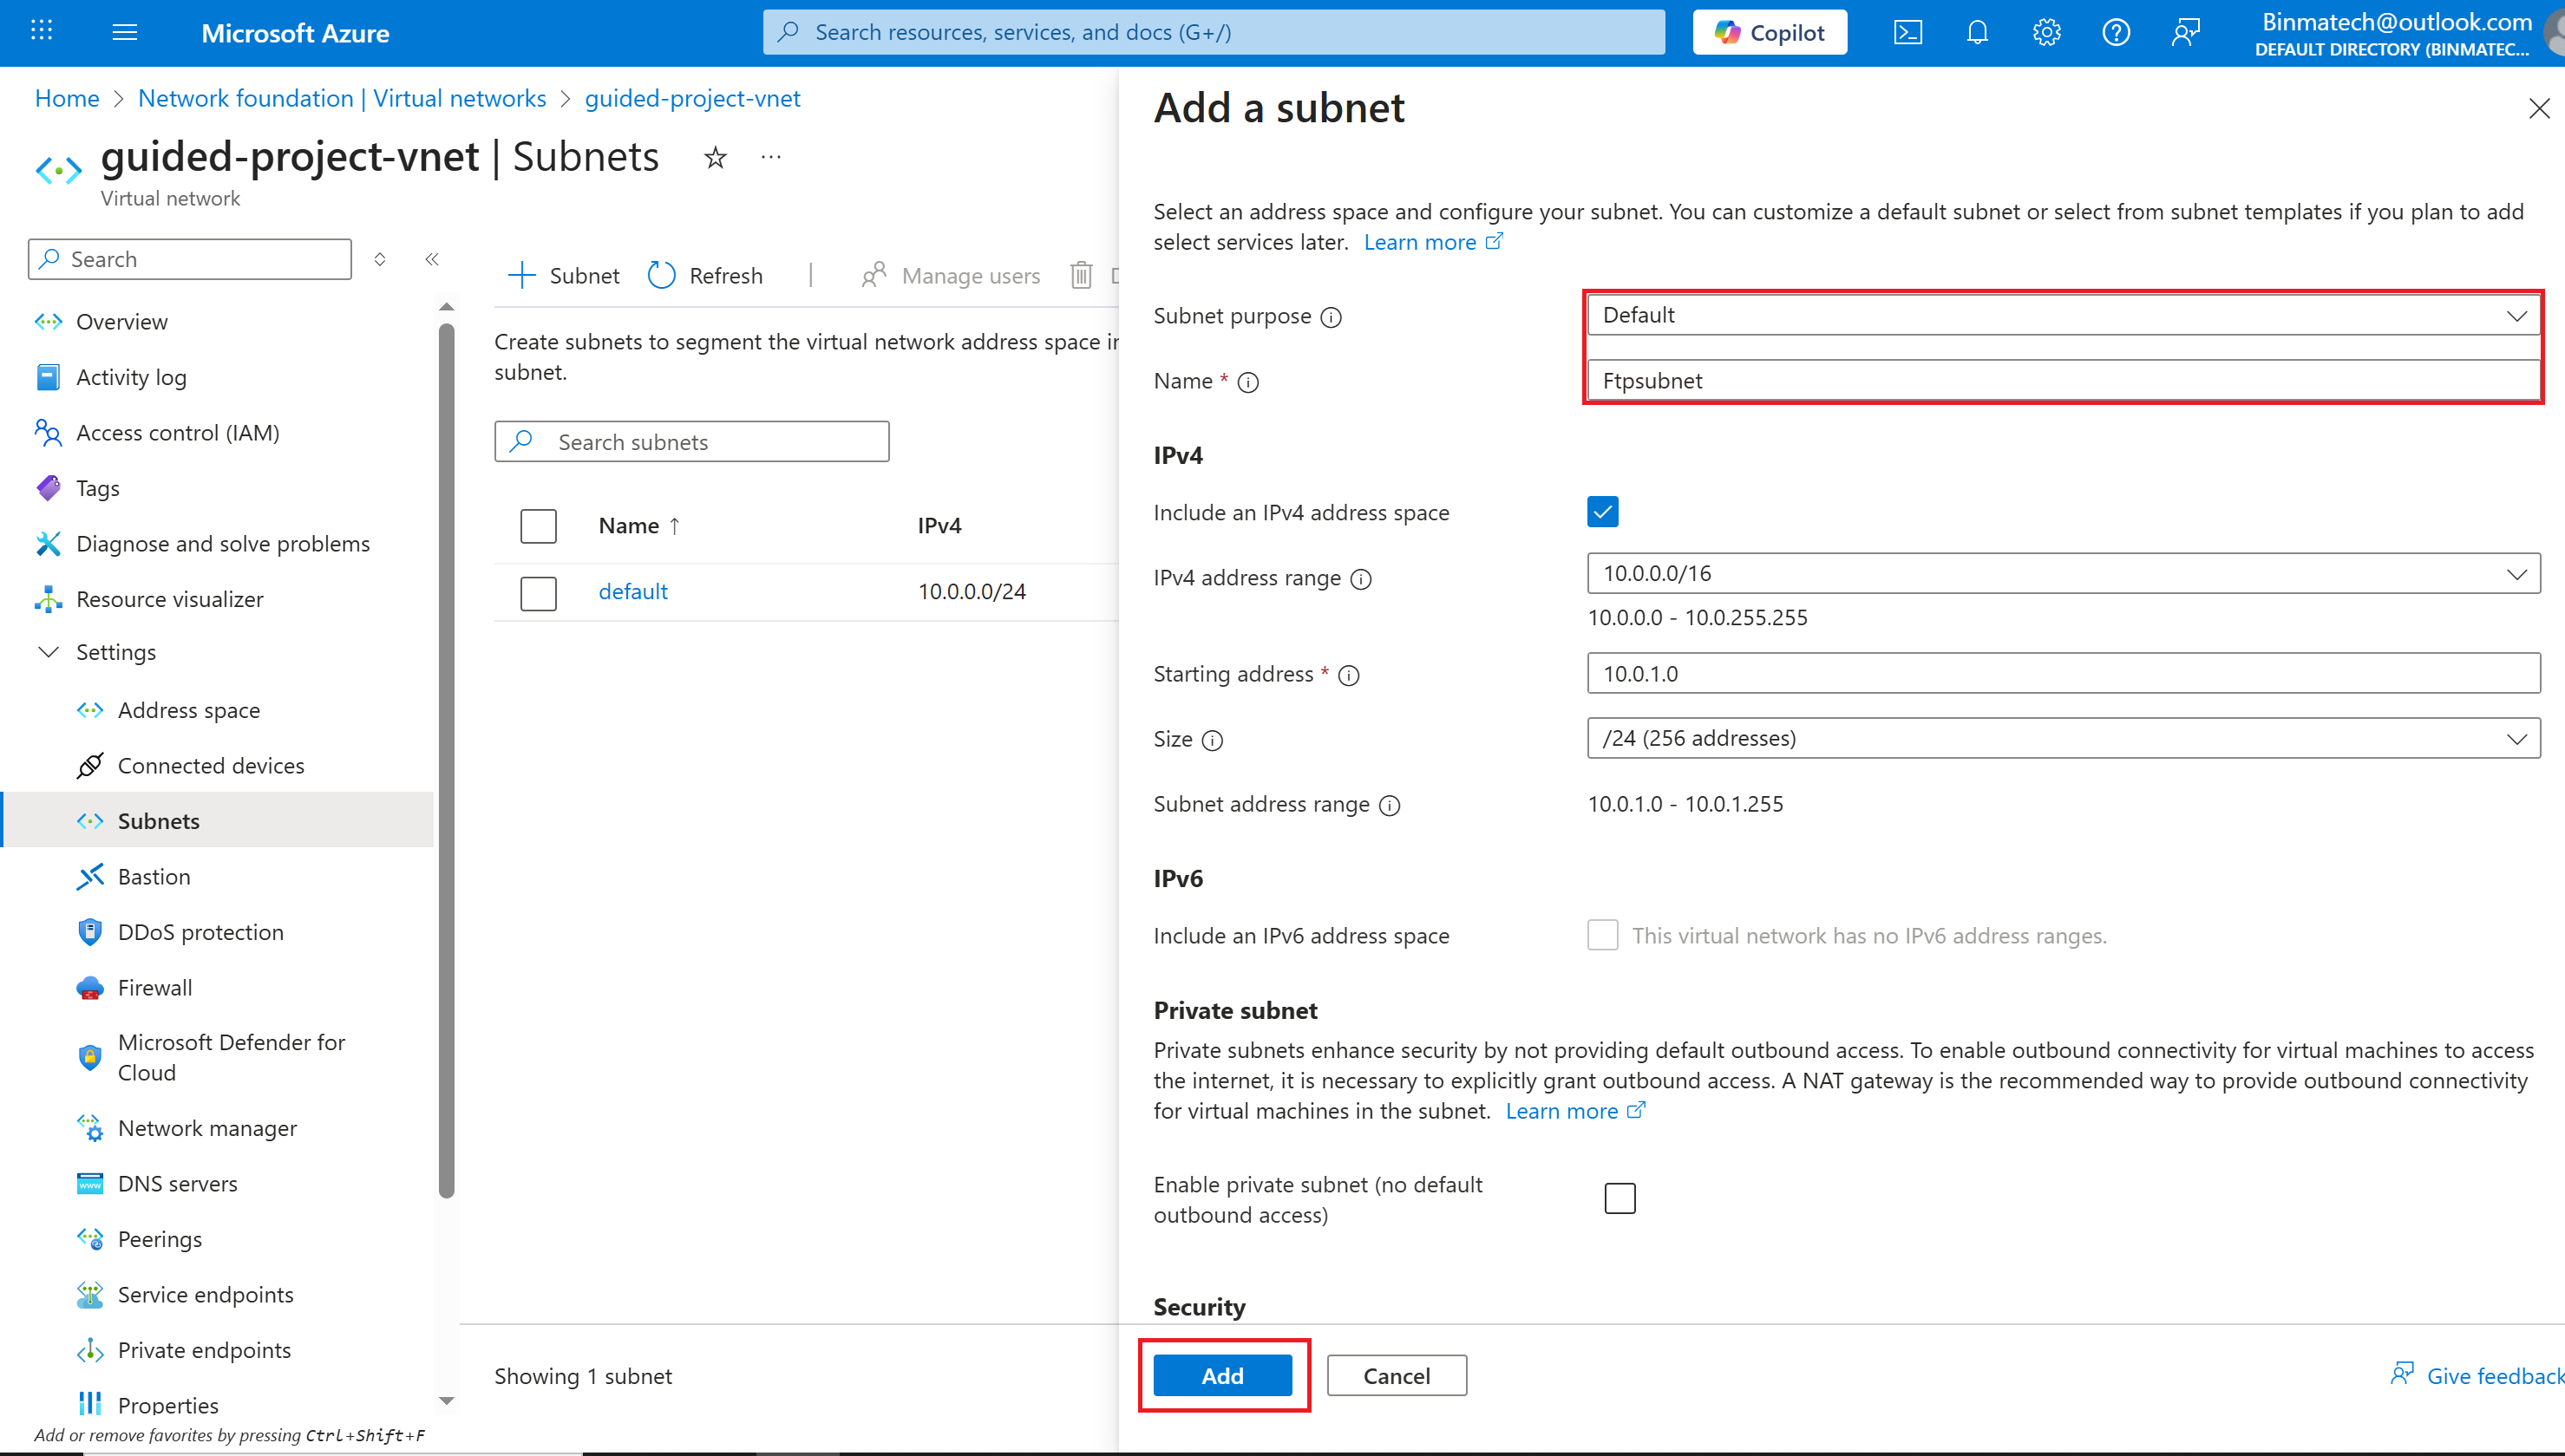
- To add a subnet, select + Subnet.
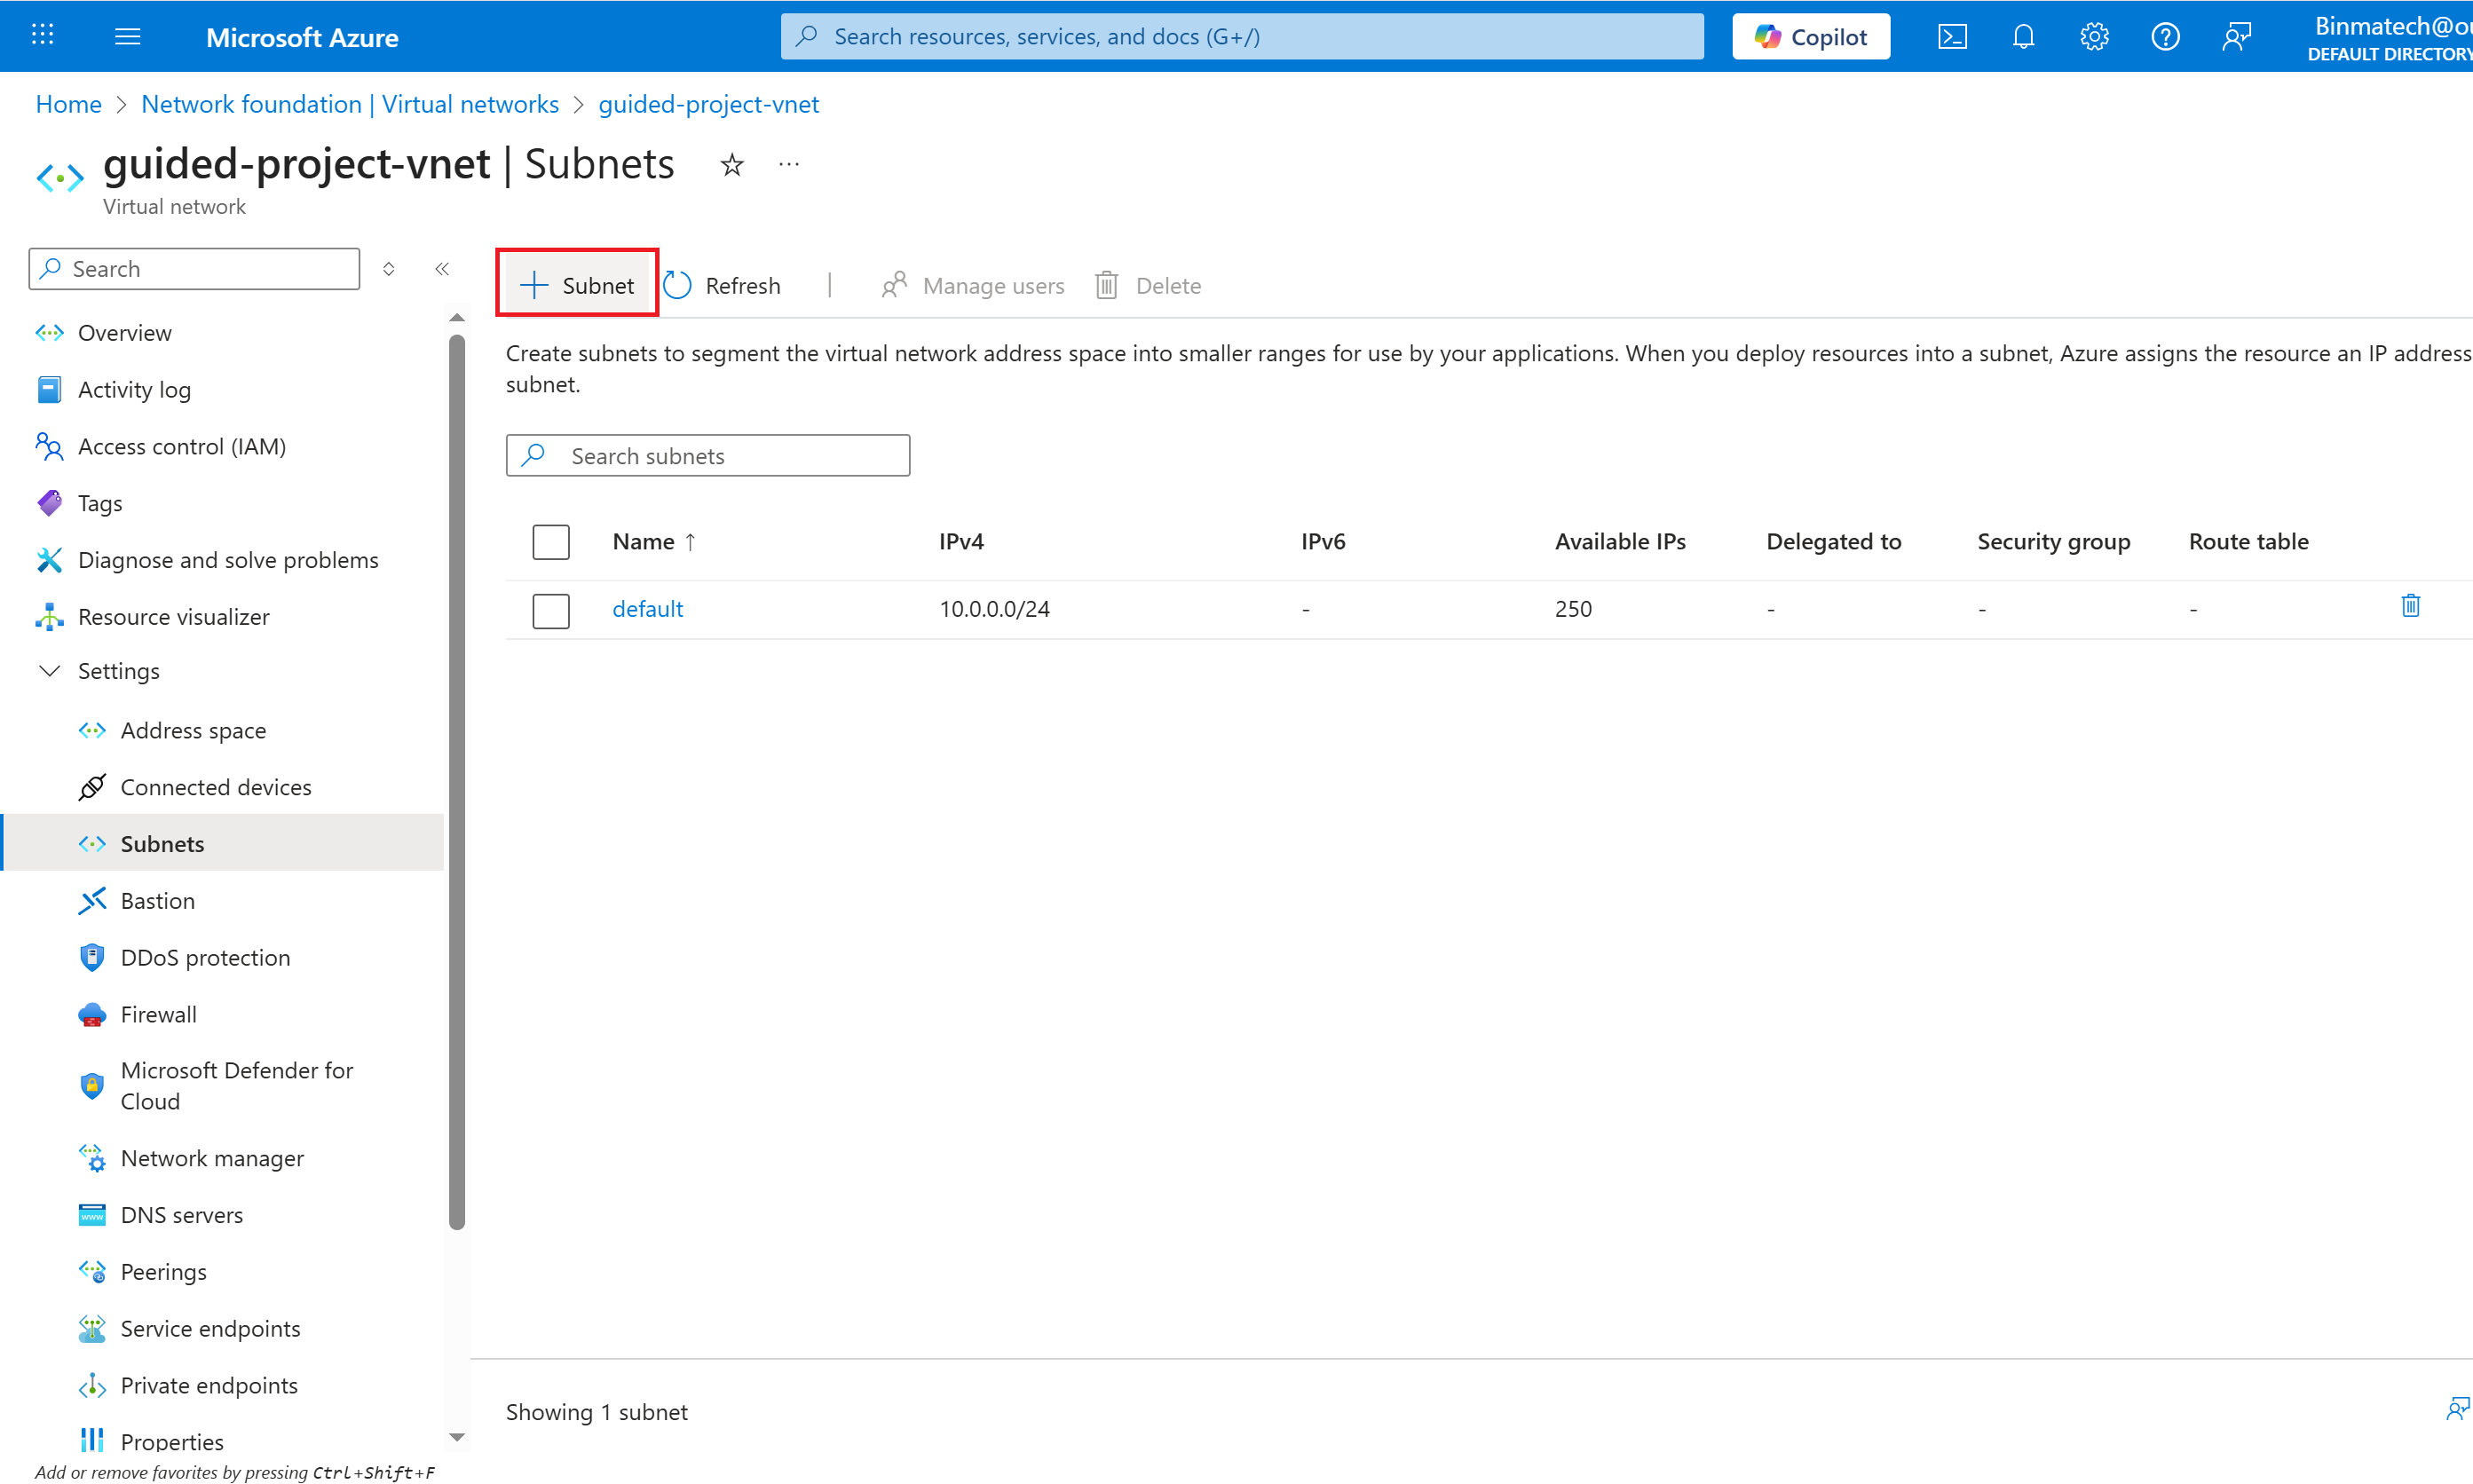
- For Subnet purpose leave it as Default.
- For Name enter: ftpSubnet.
- Leave the rest of the settings alone and select Add.
- you’ve completed the creation of a subnet.
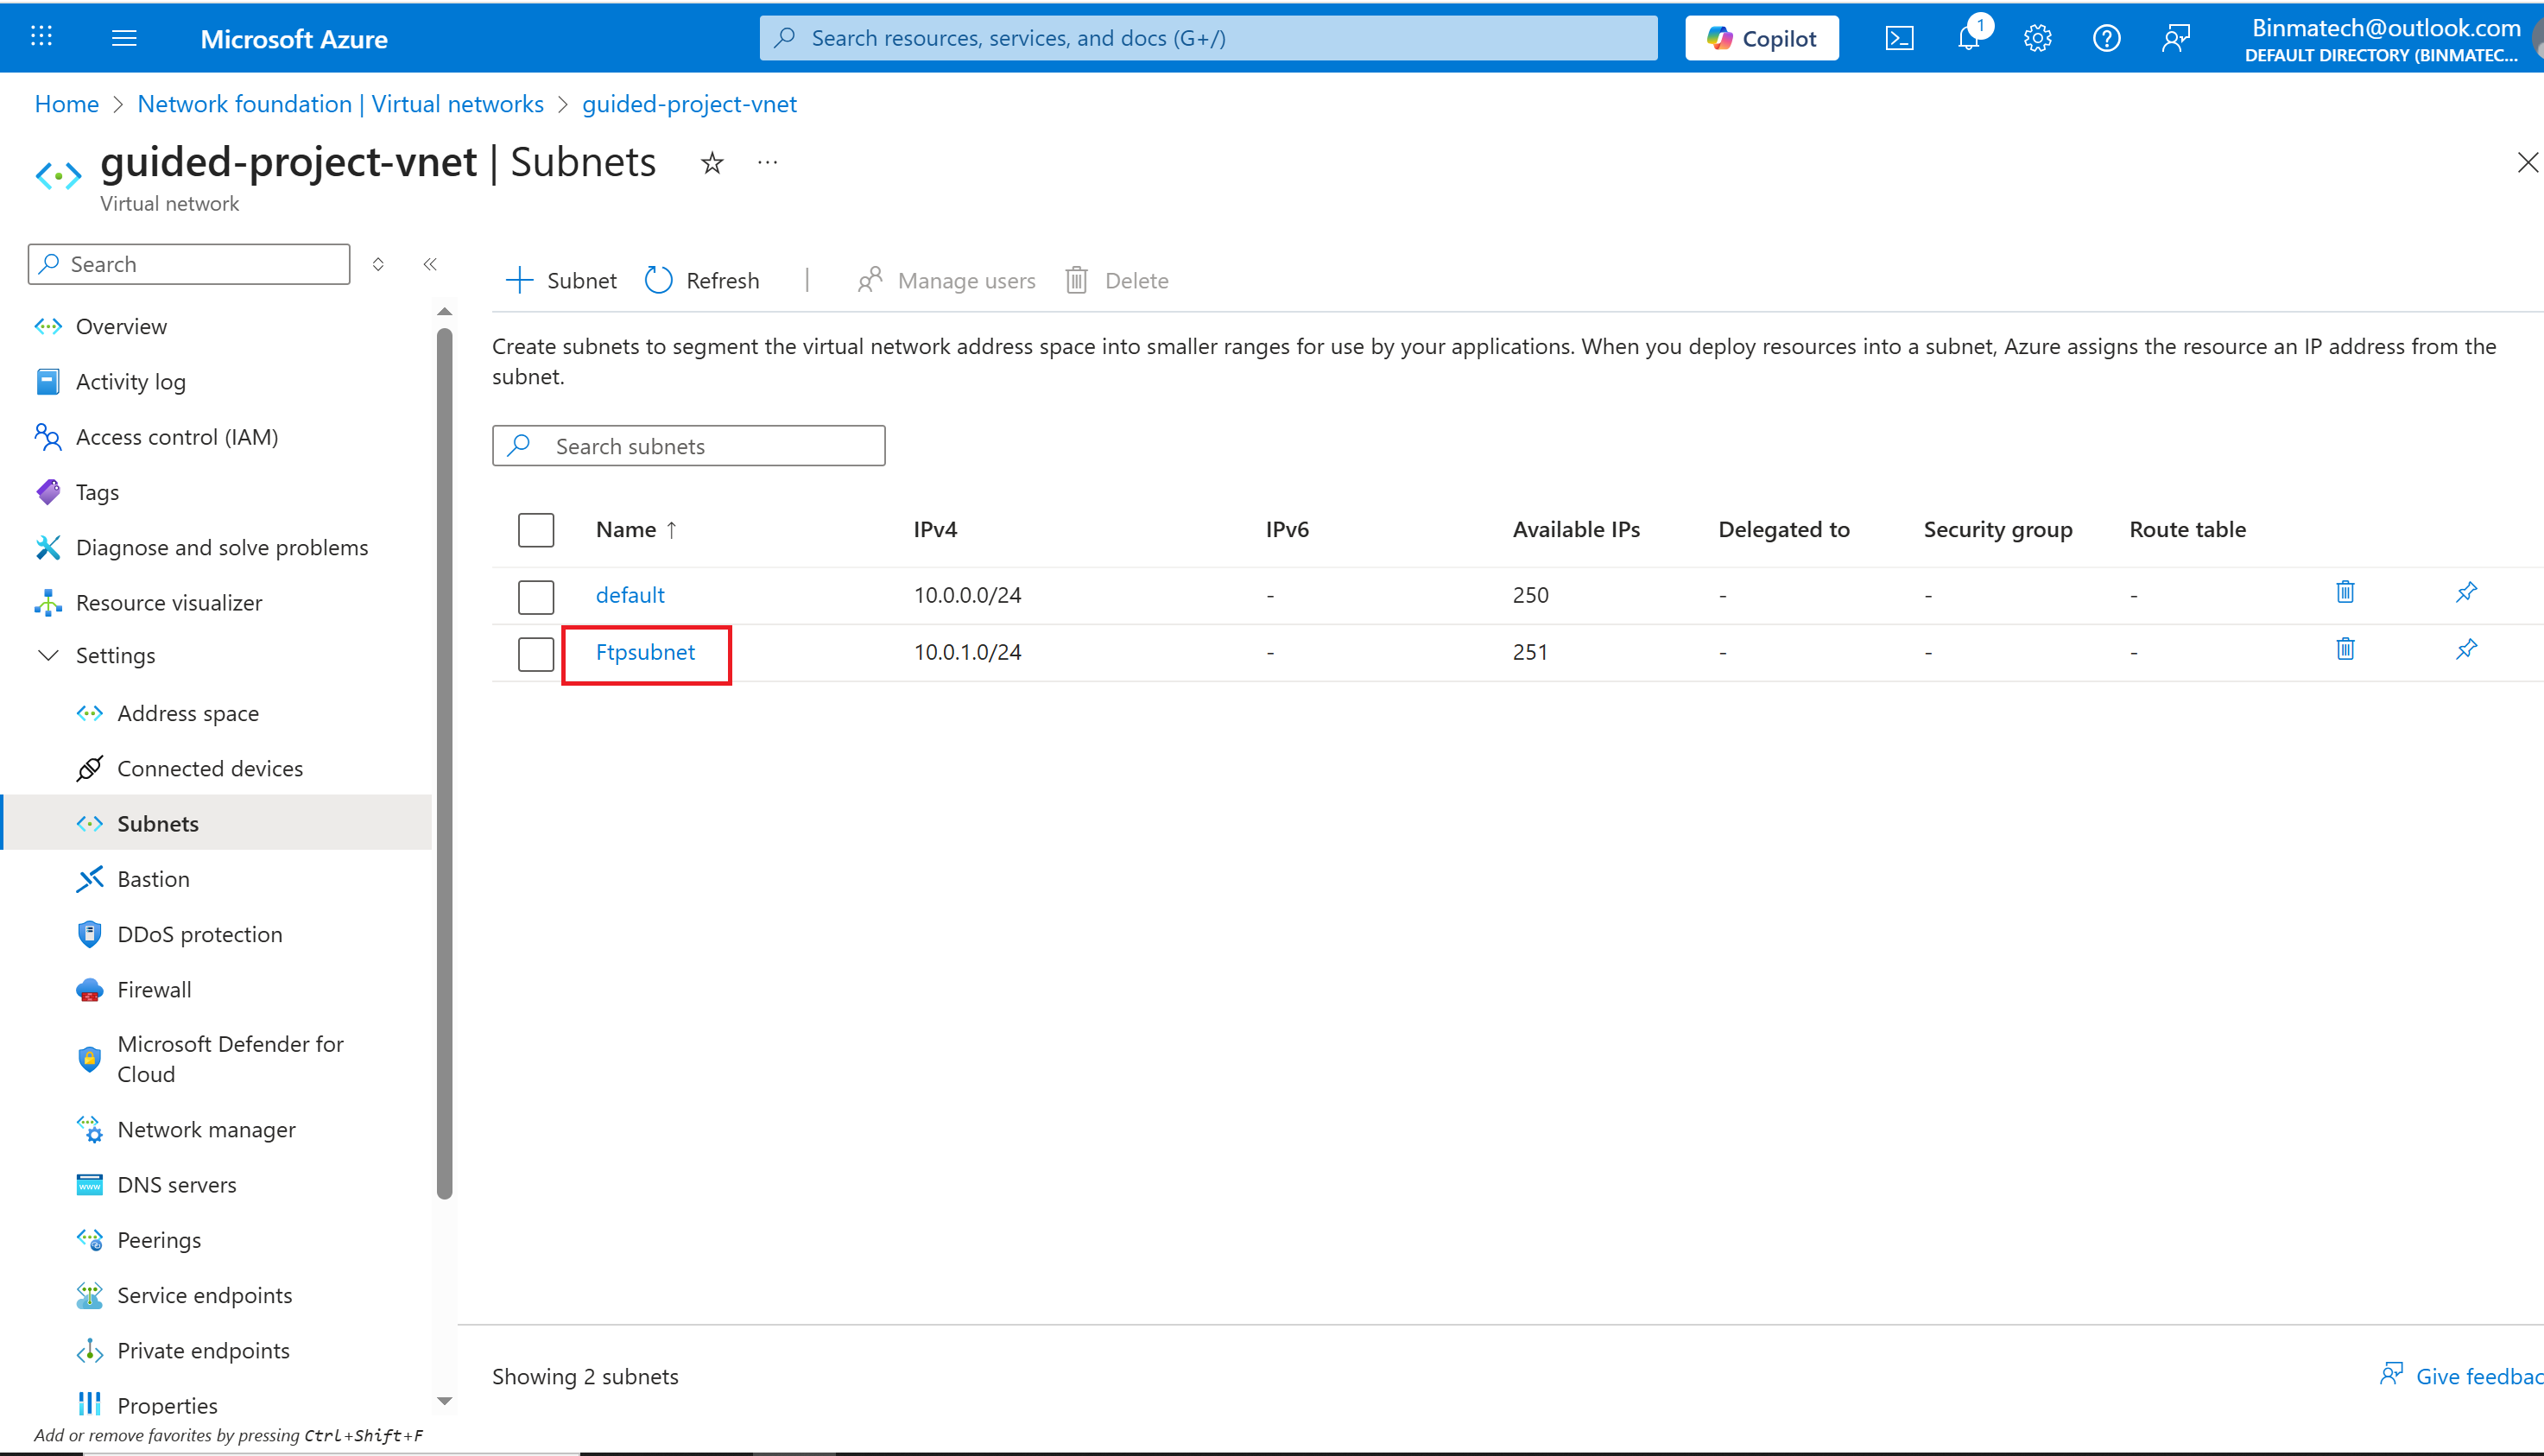
This subnet is only going to be used for SFTP traffic. To increase security, you need to configure a Network security group to restrict which ports are allowed on the subnet.
Step 2 Create a network security group
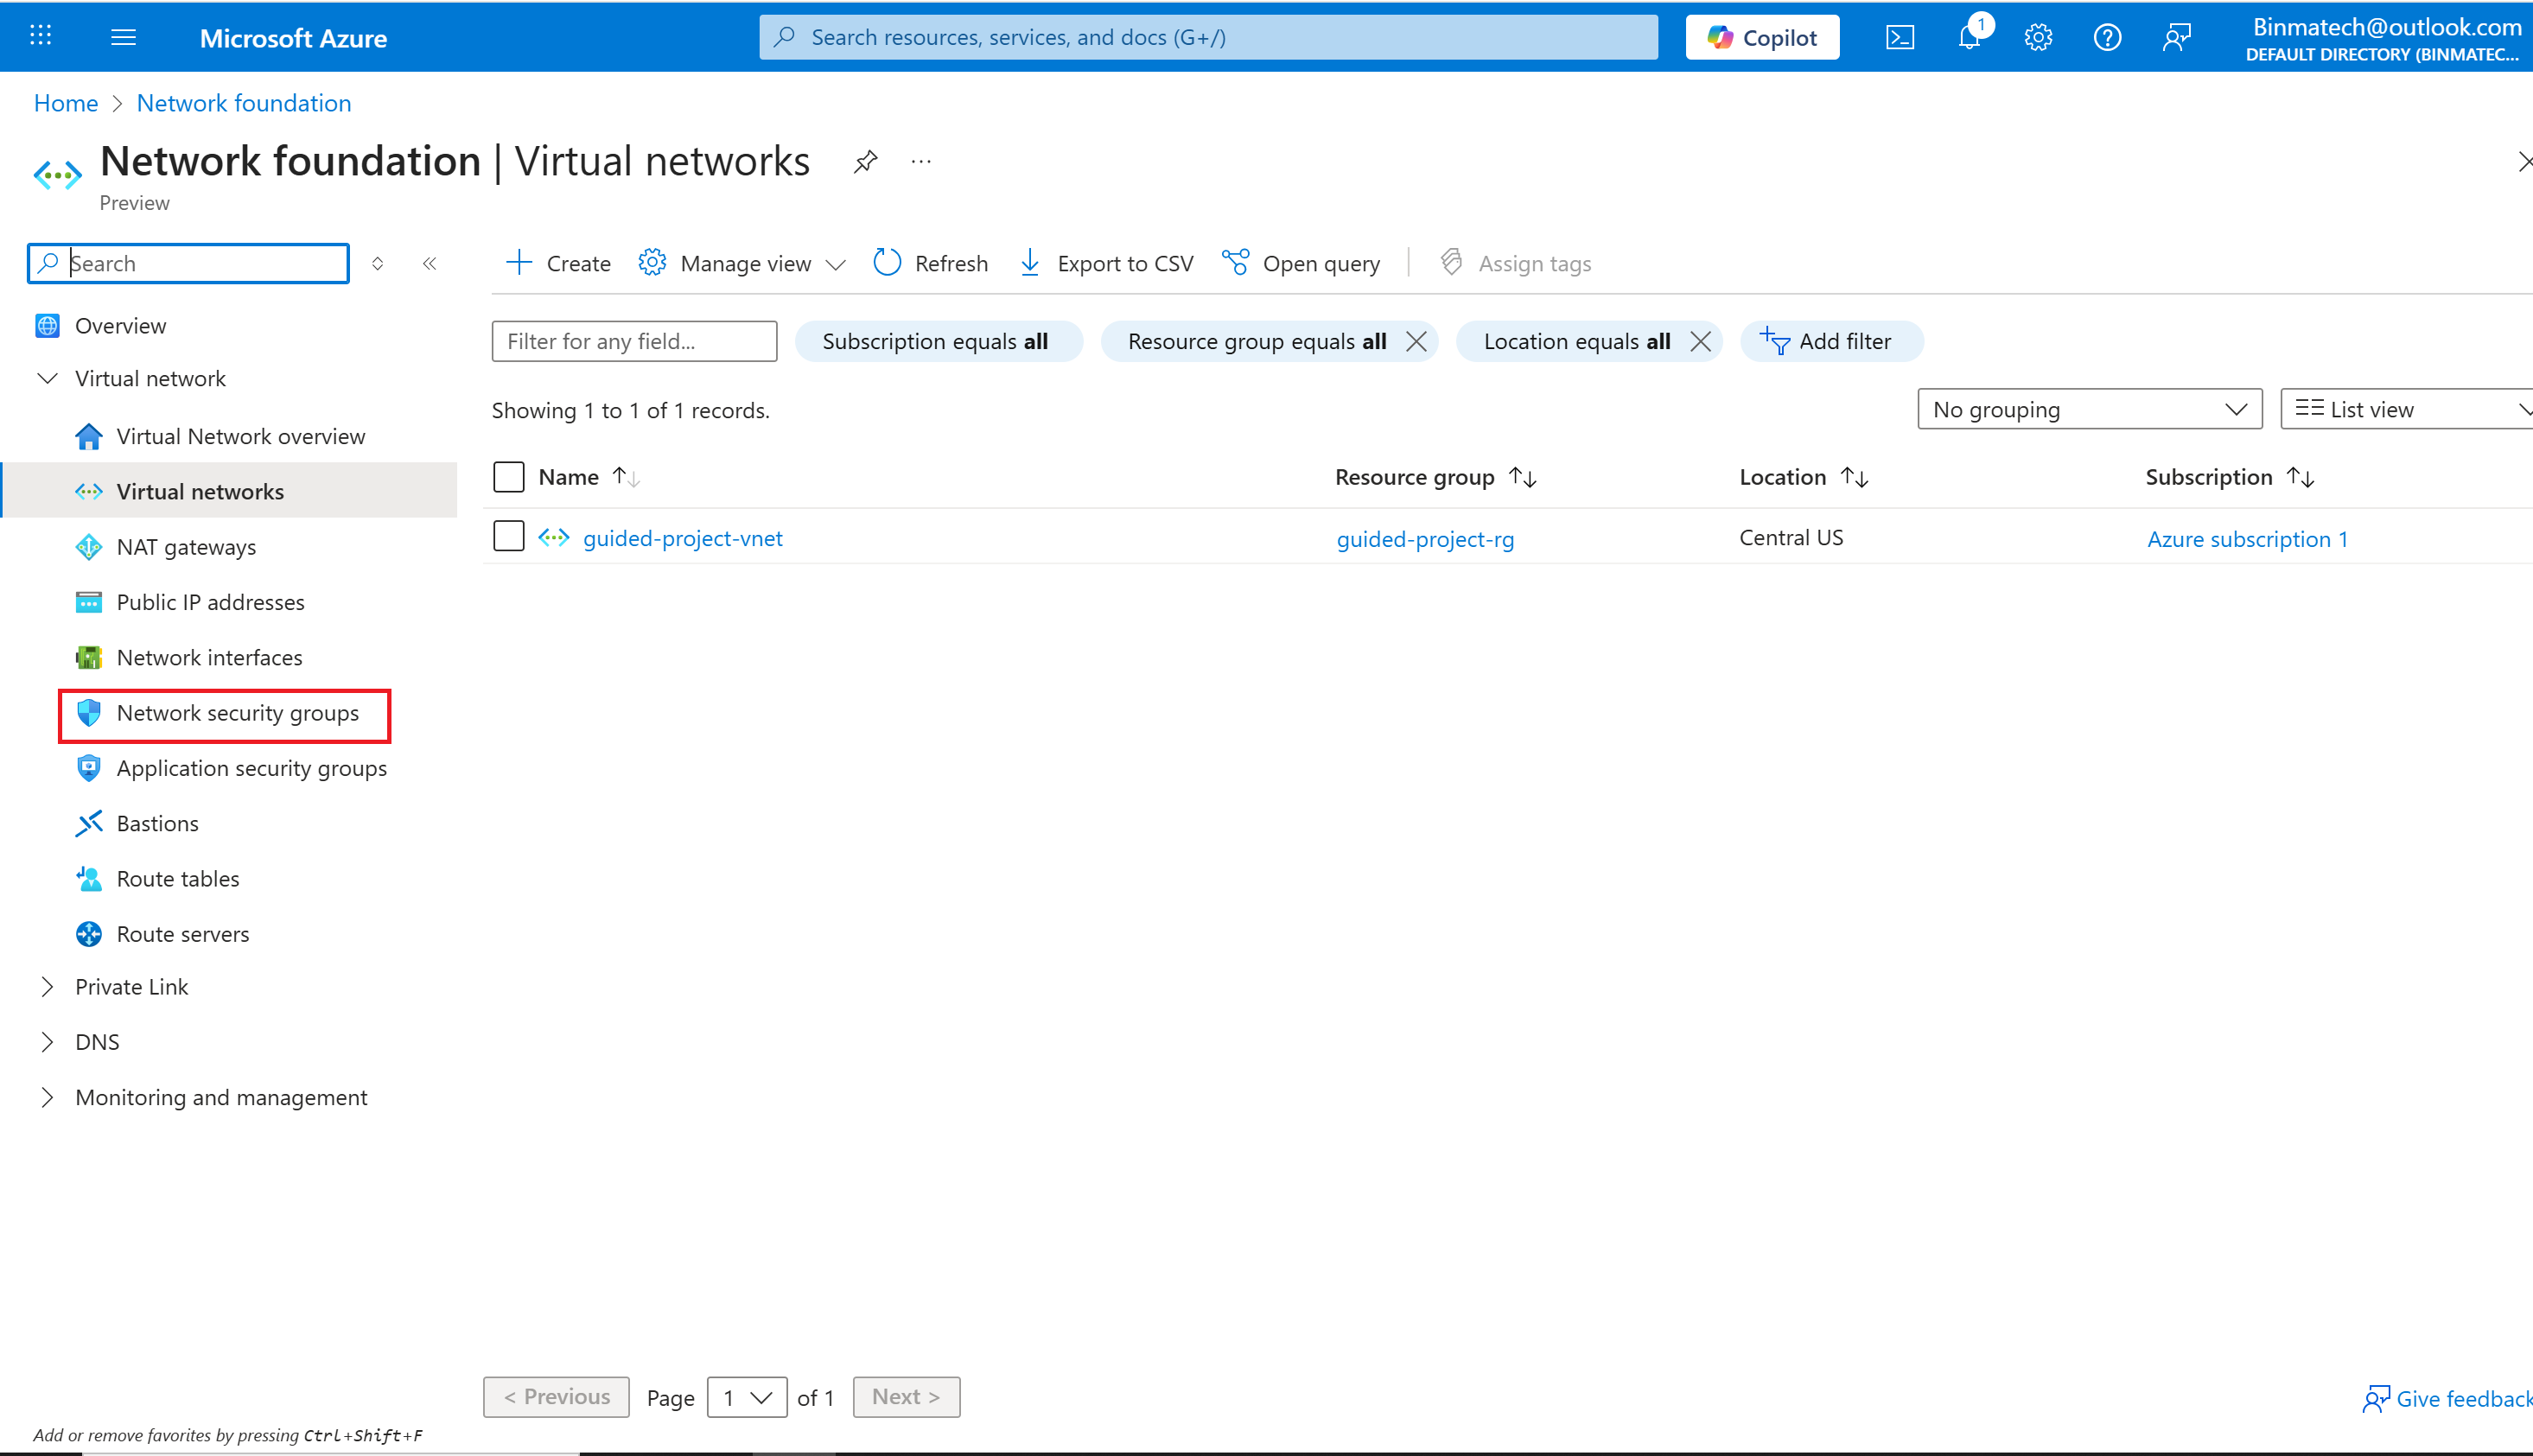
- From the Azure portal home page, in the search box, enter virtual networks.
- Select virtual networks under services.
- Select Network security groups.
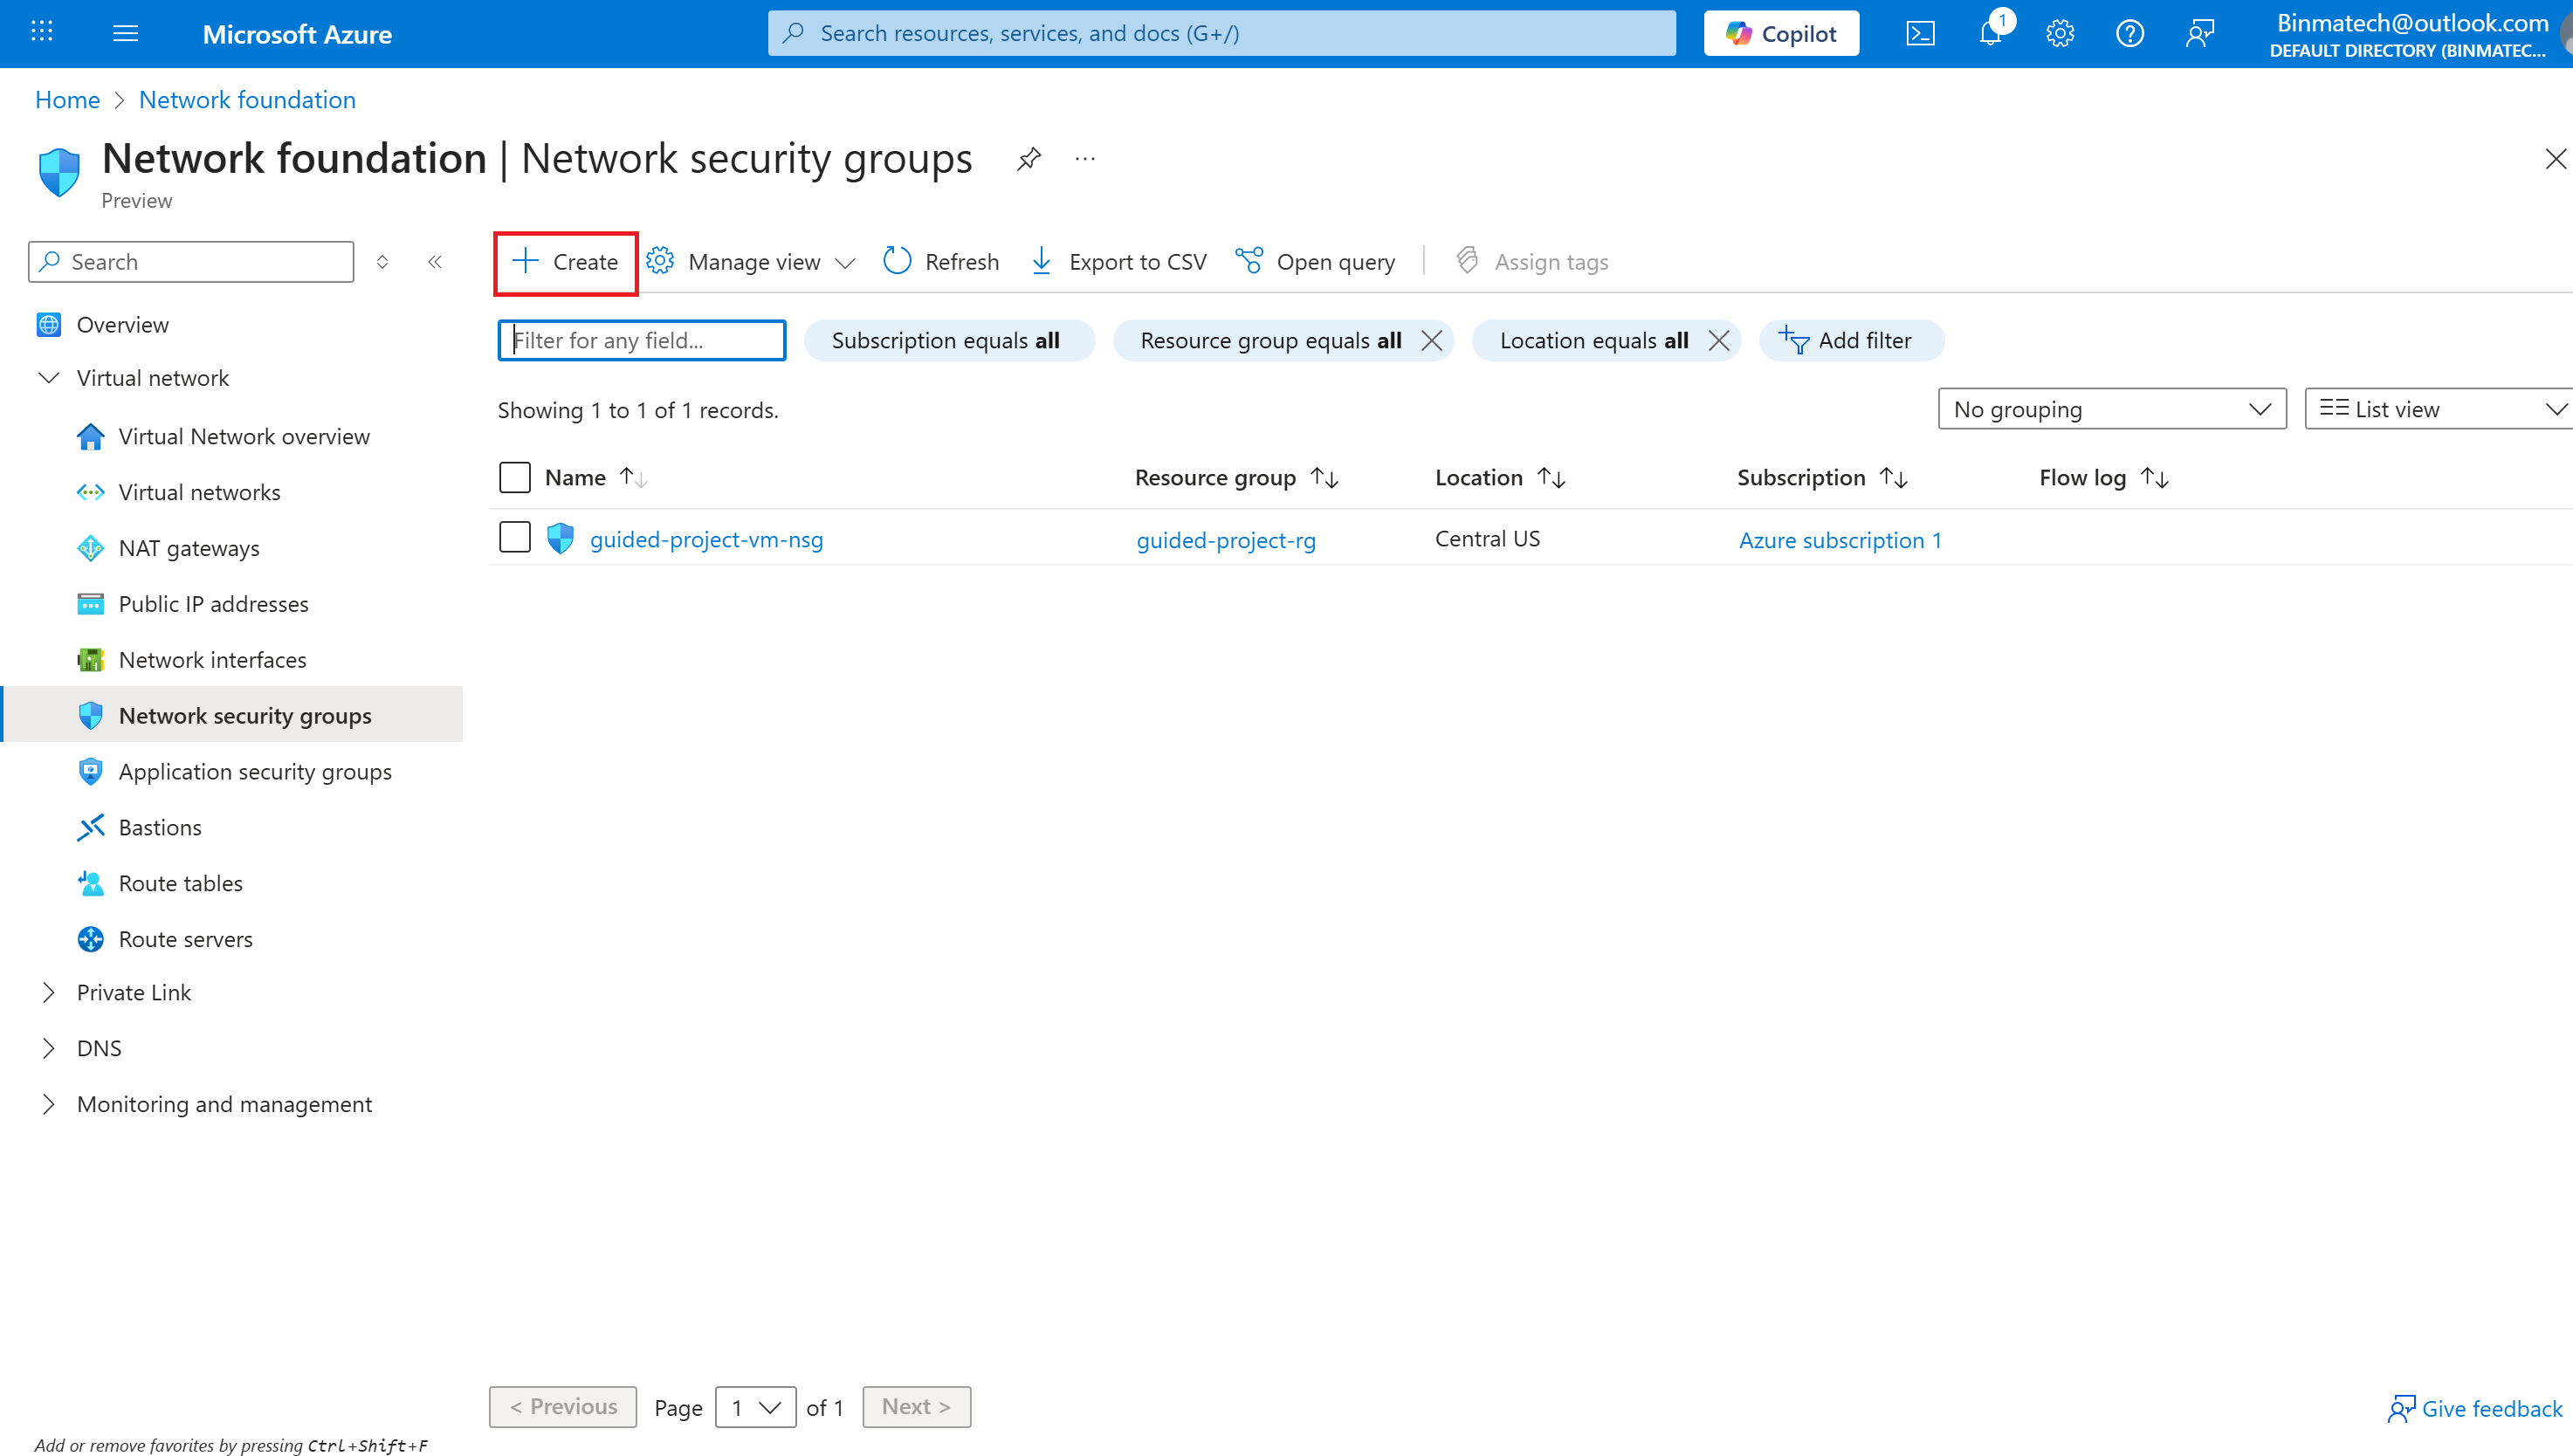
- Verify the subscription is correct.
- Select the guided-project-rg resource group.
- Enter ftpNSG for the network security group name.
- Select Review + create.
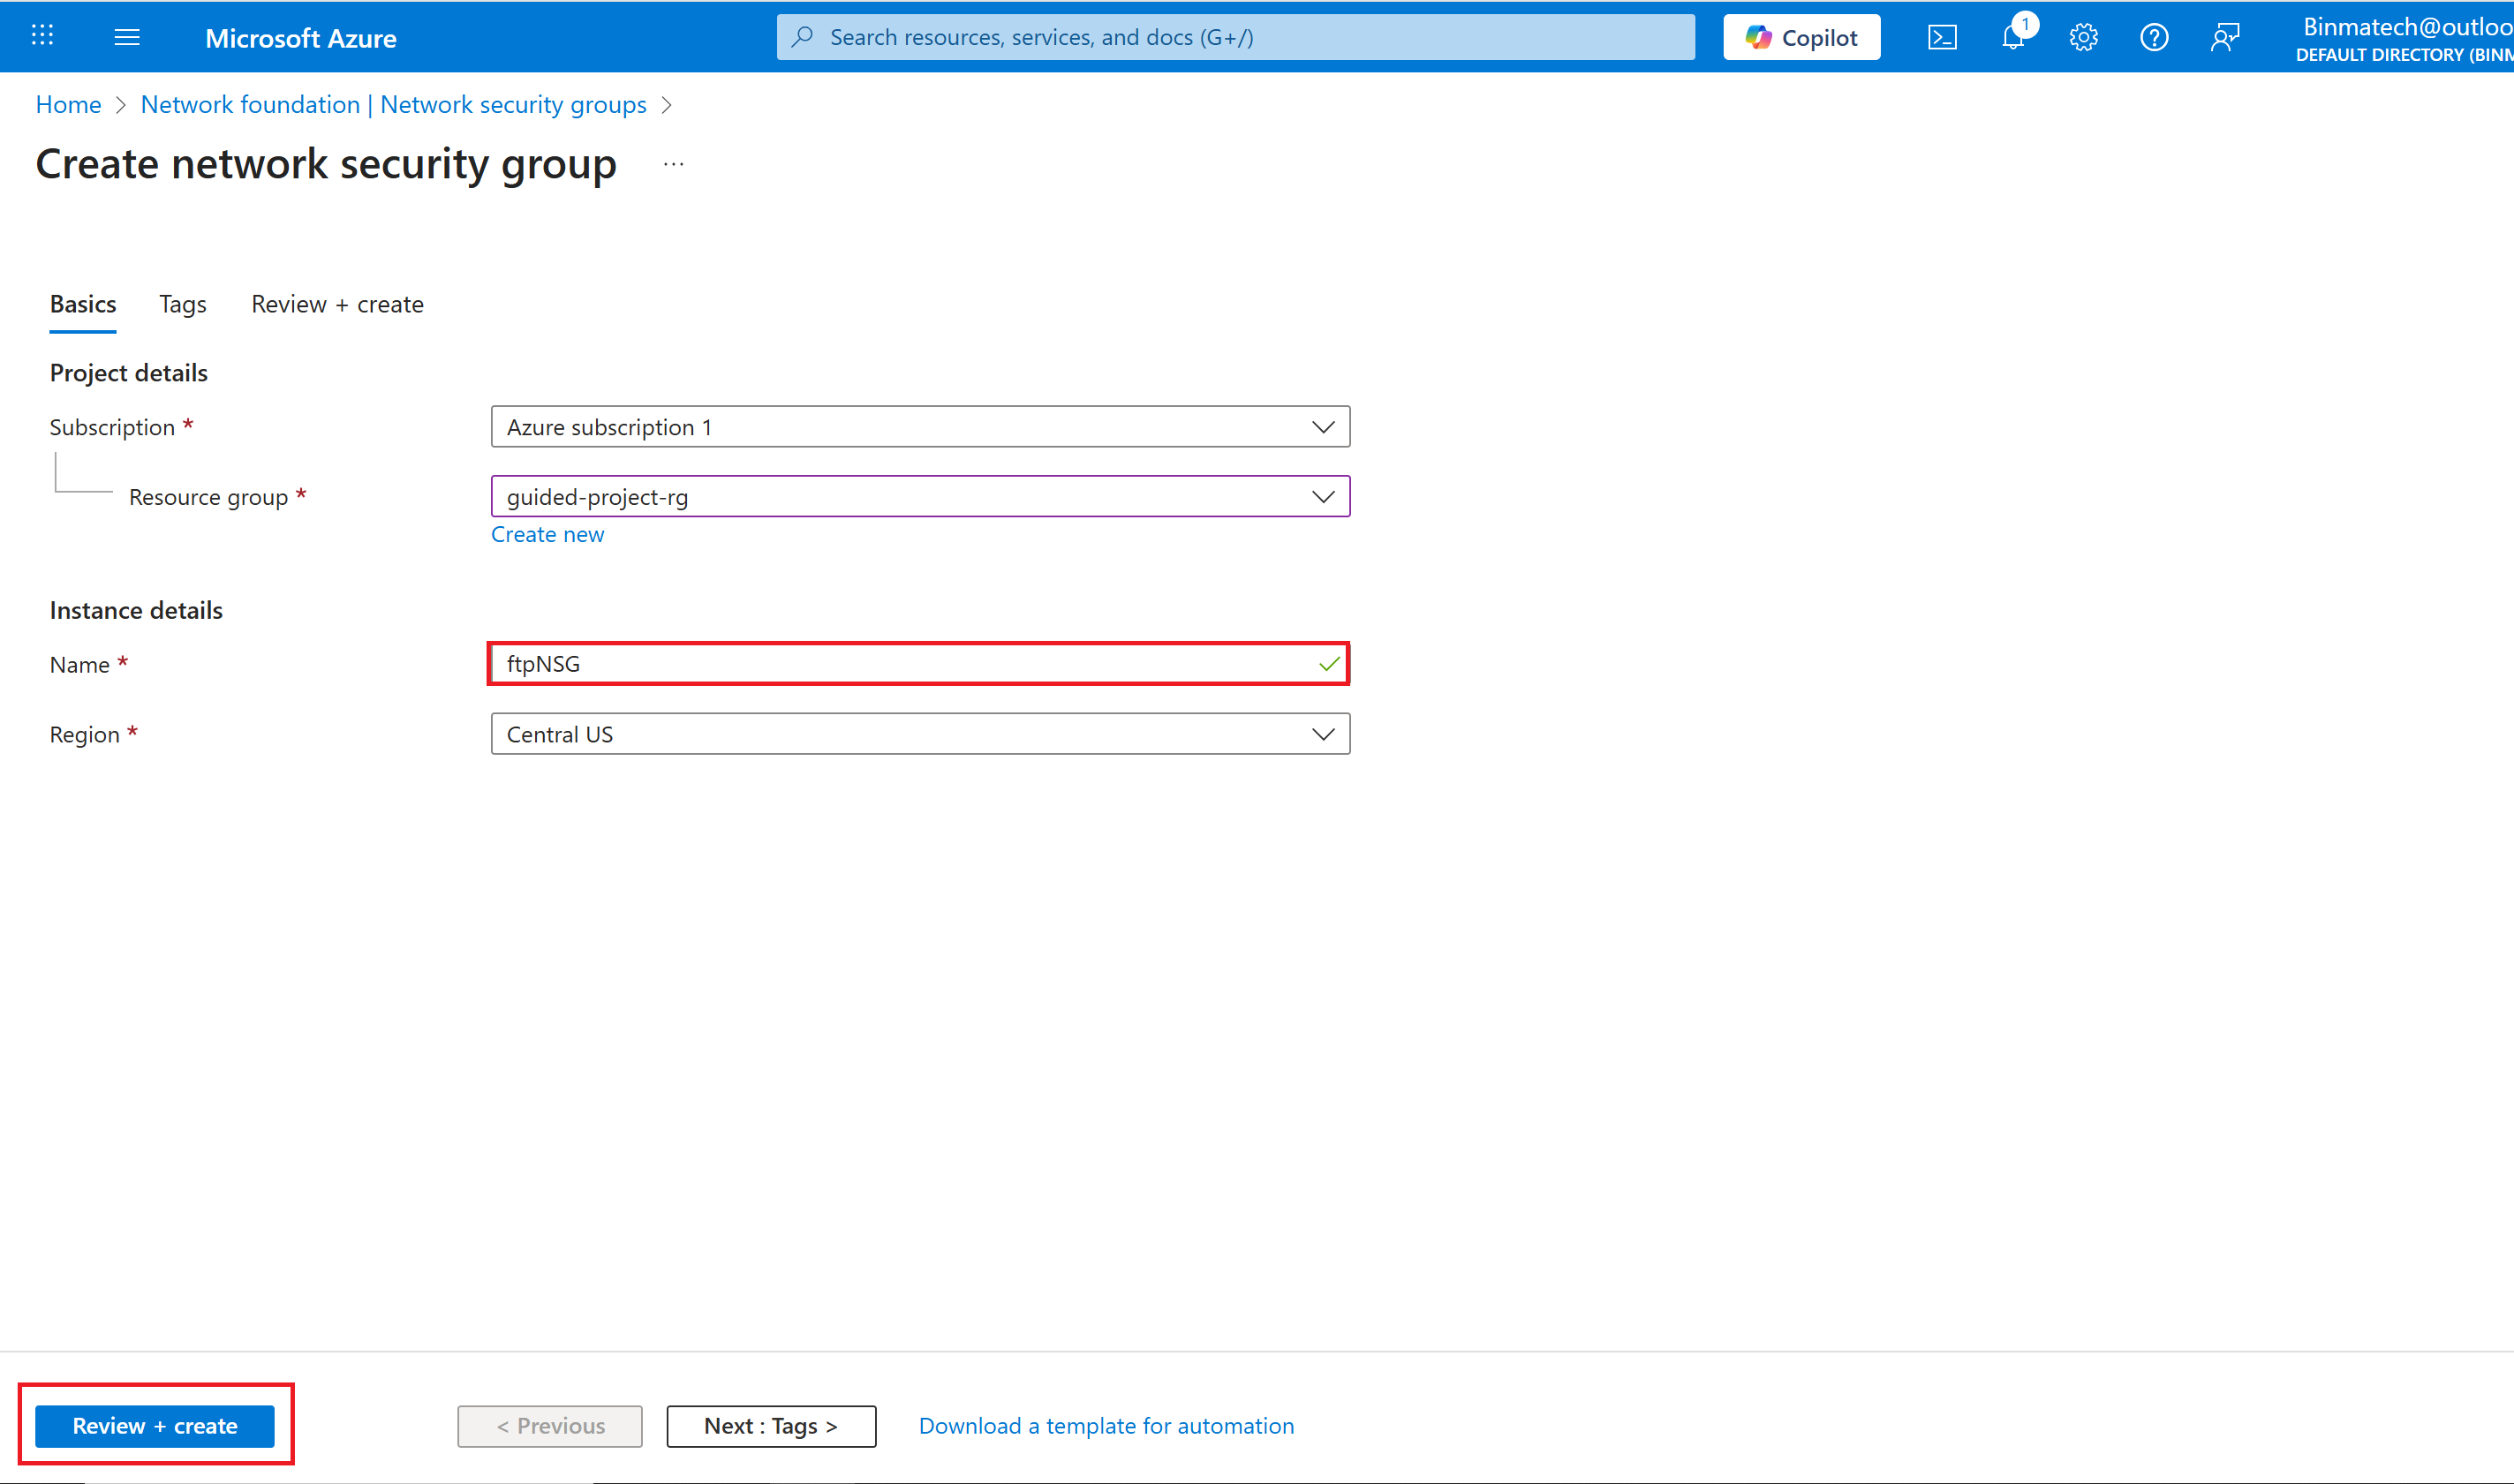
- Once the validation is complete, select Create.
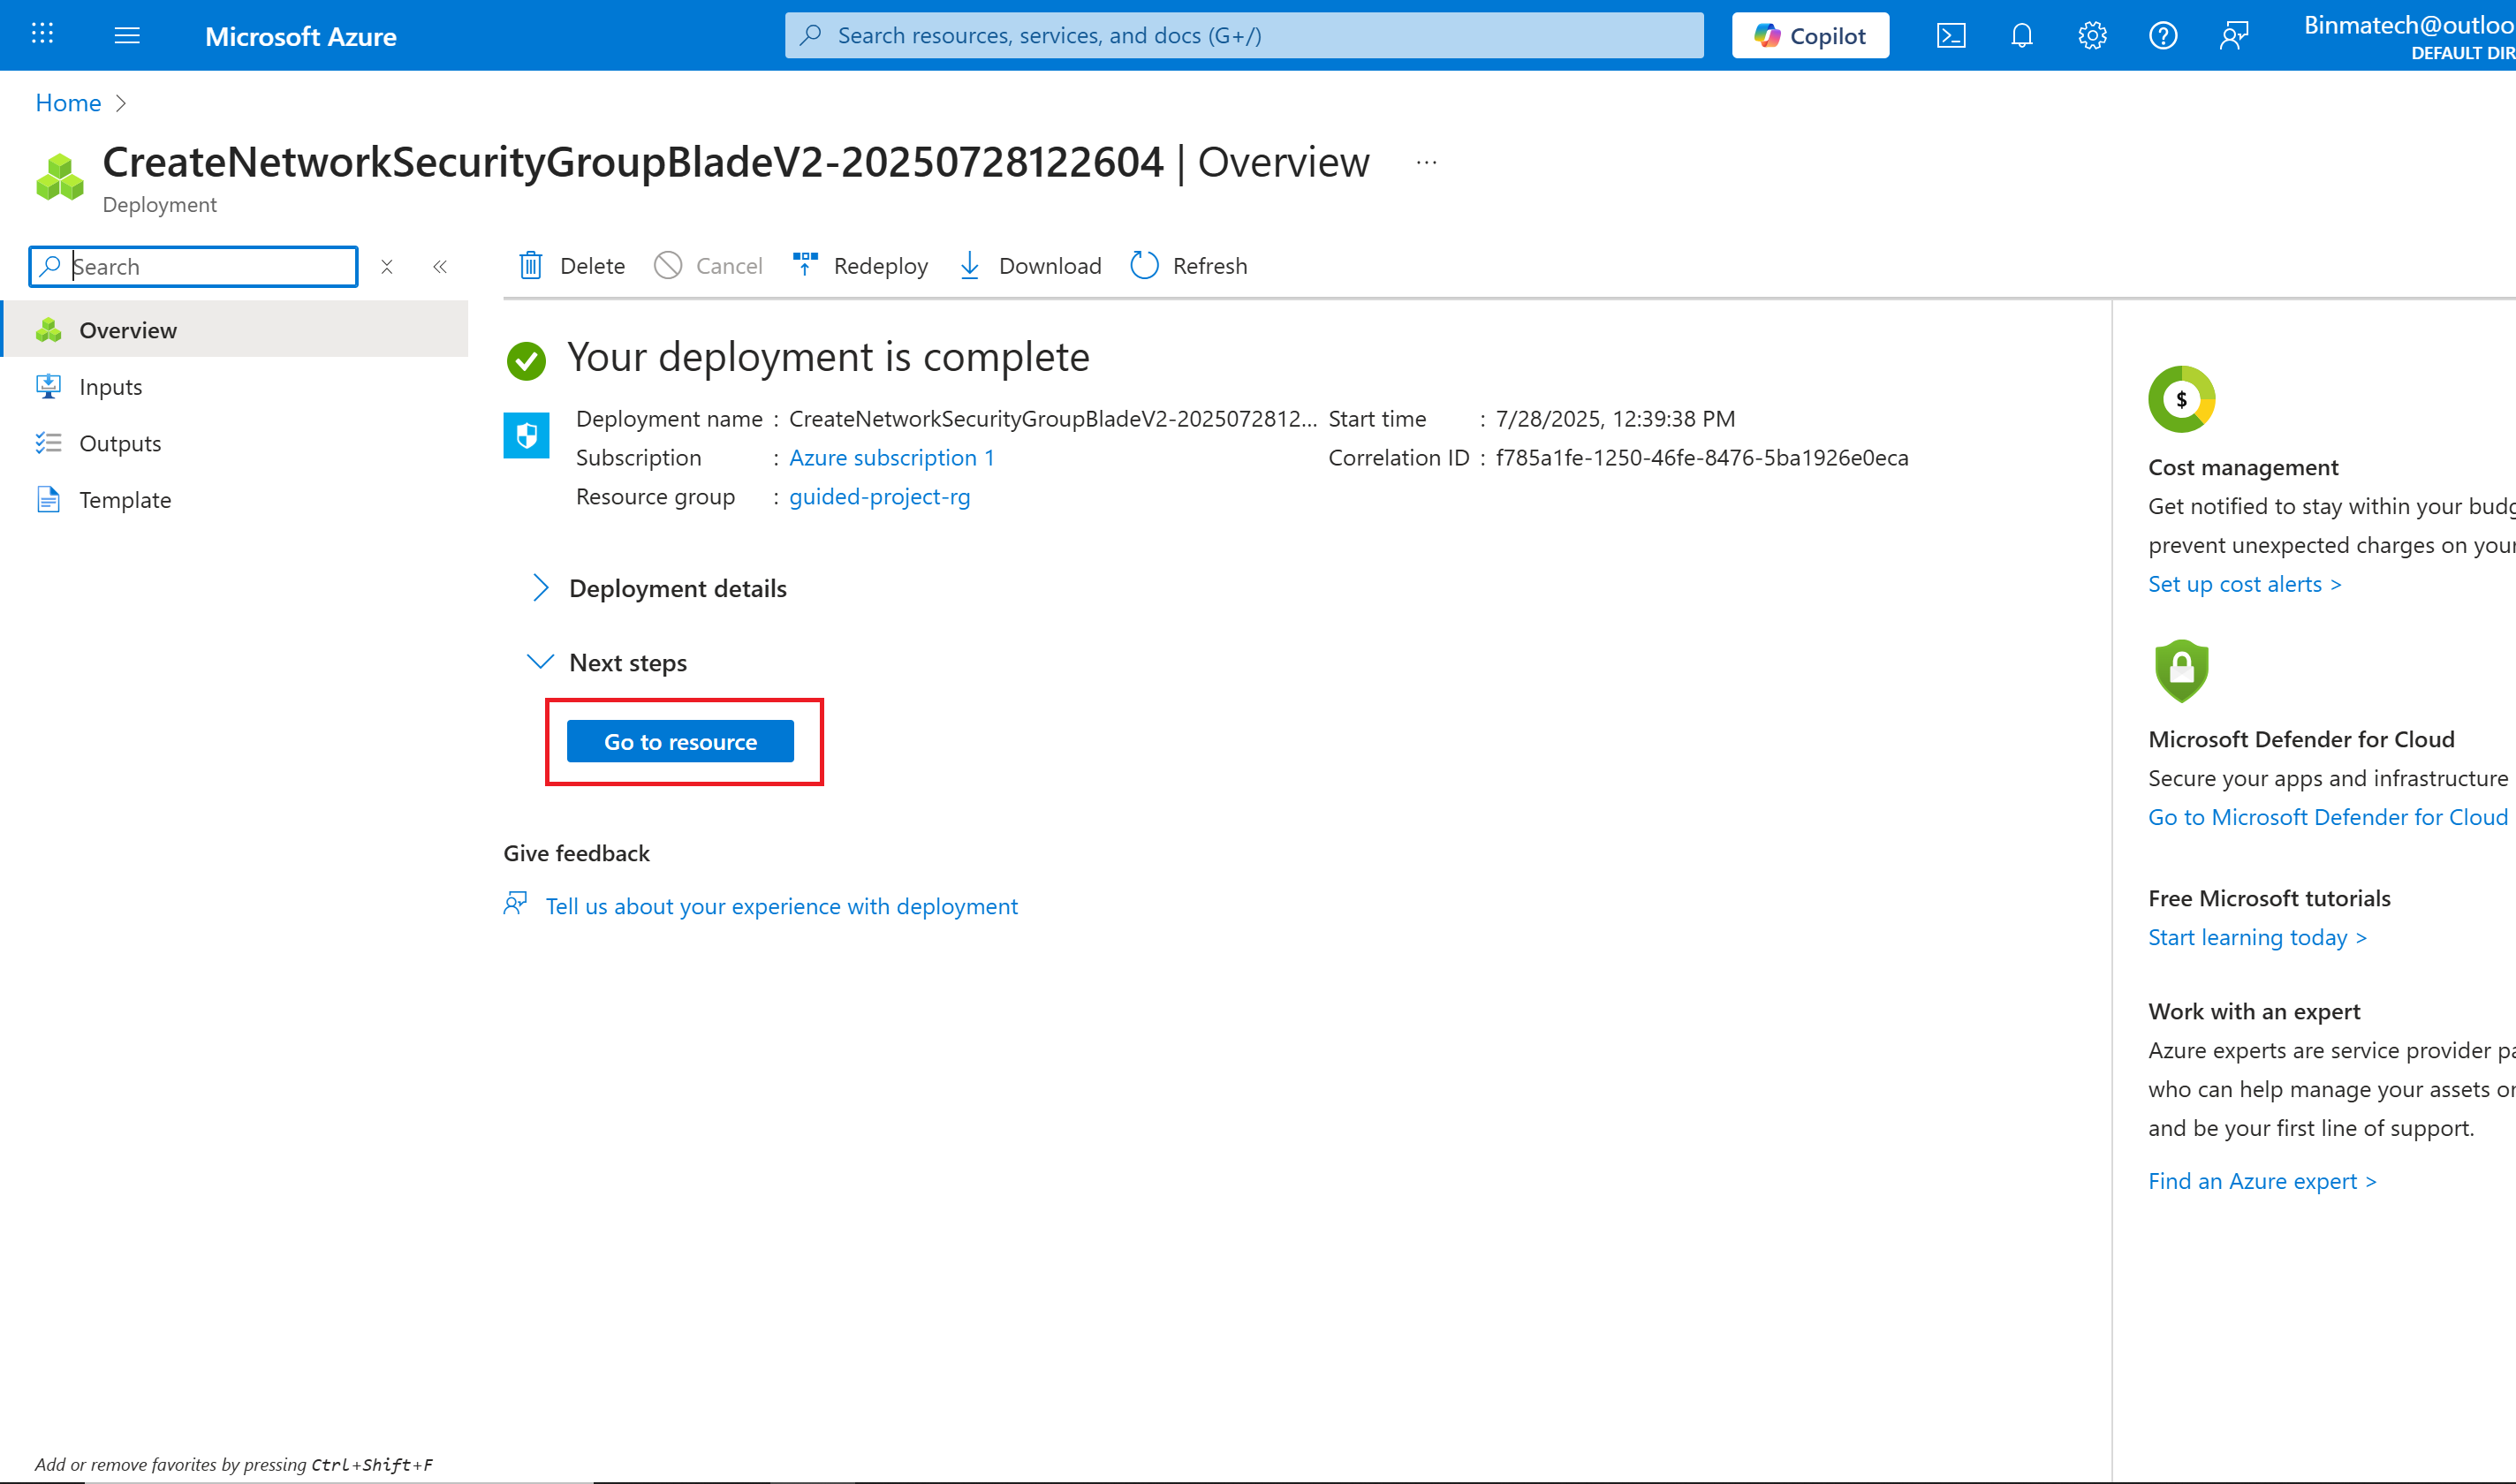
- Wait for the screen to refresh and display Your deployment is complete.
- Select Go to resource.
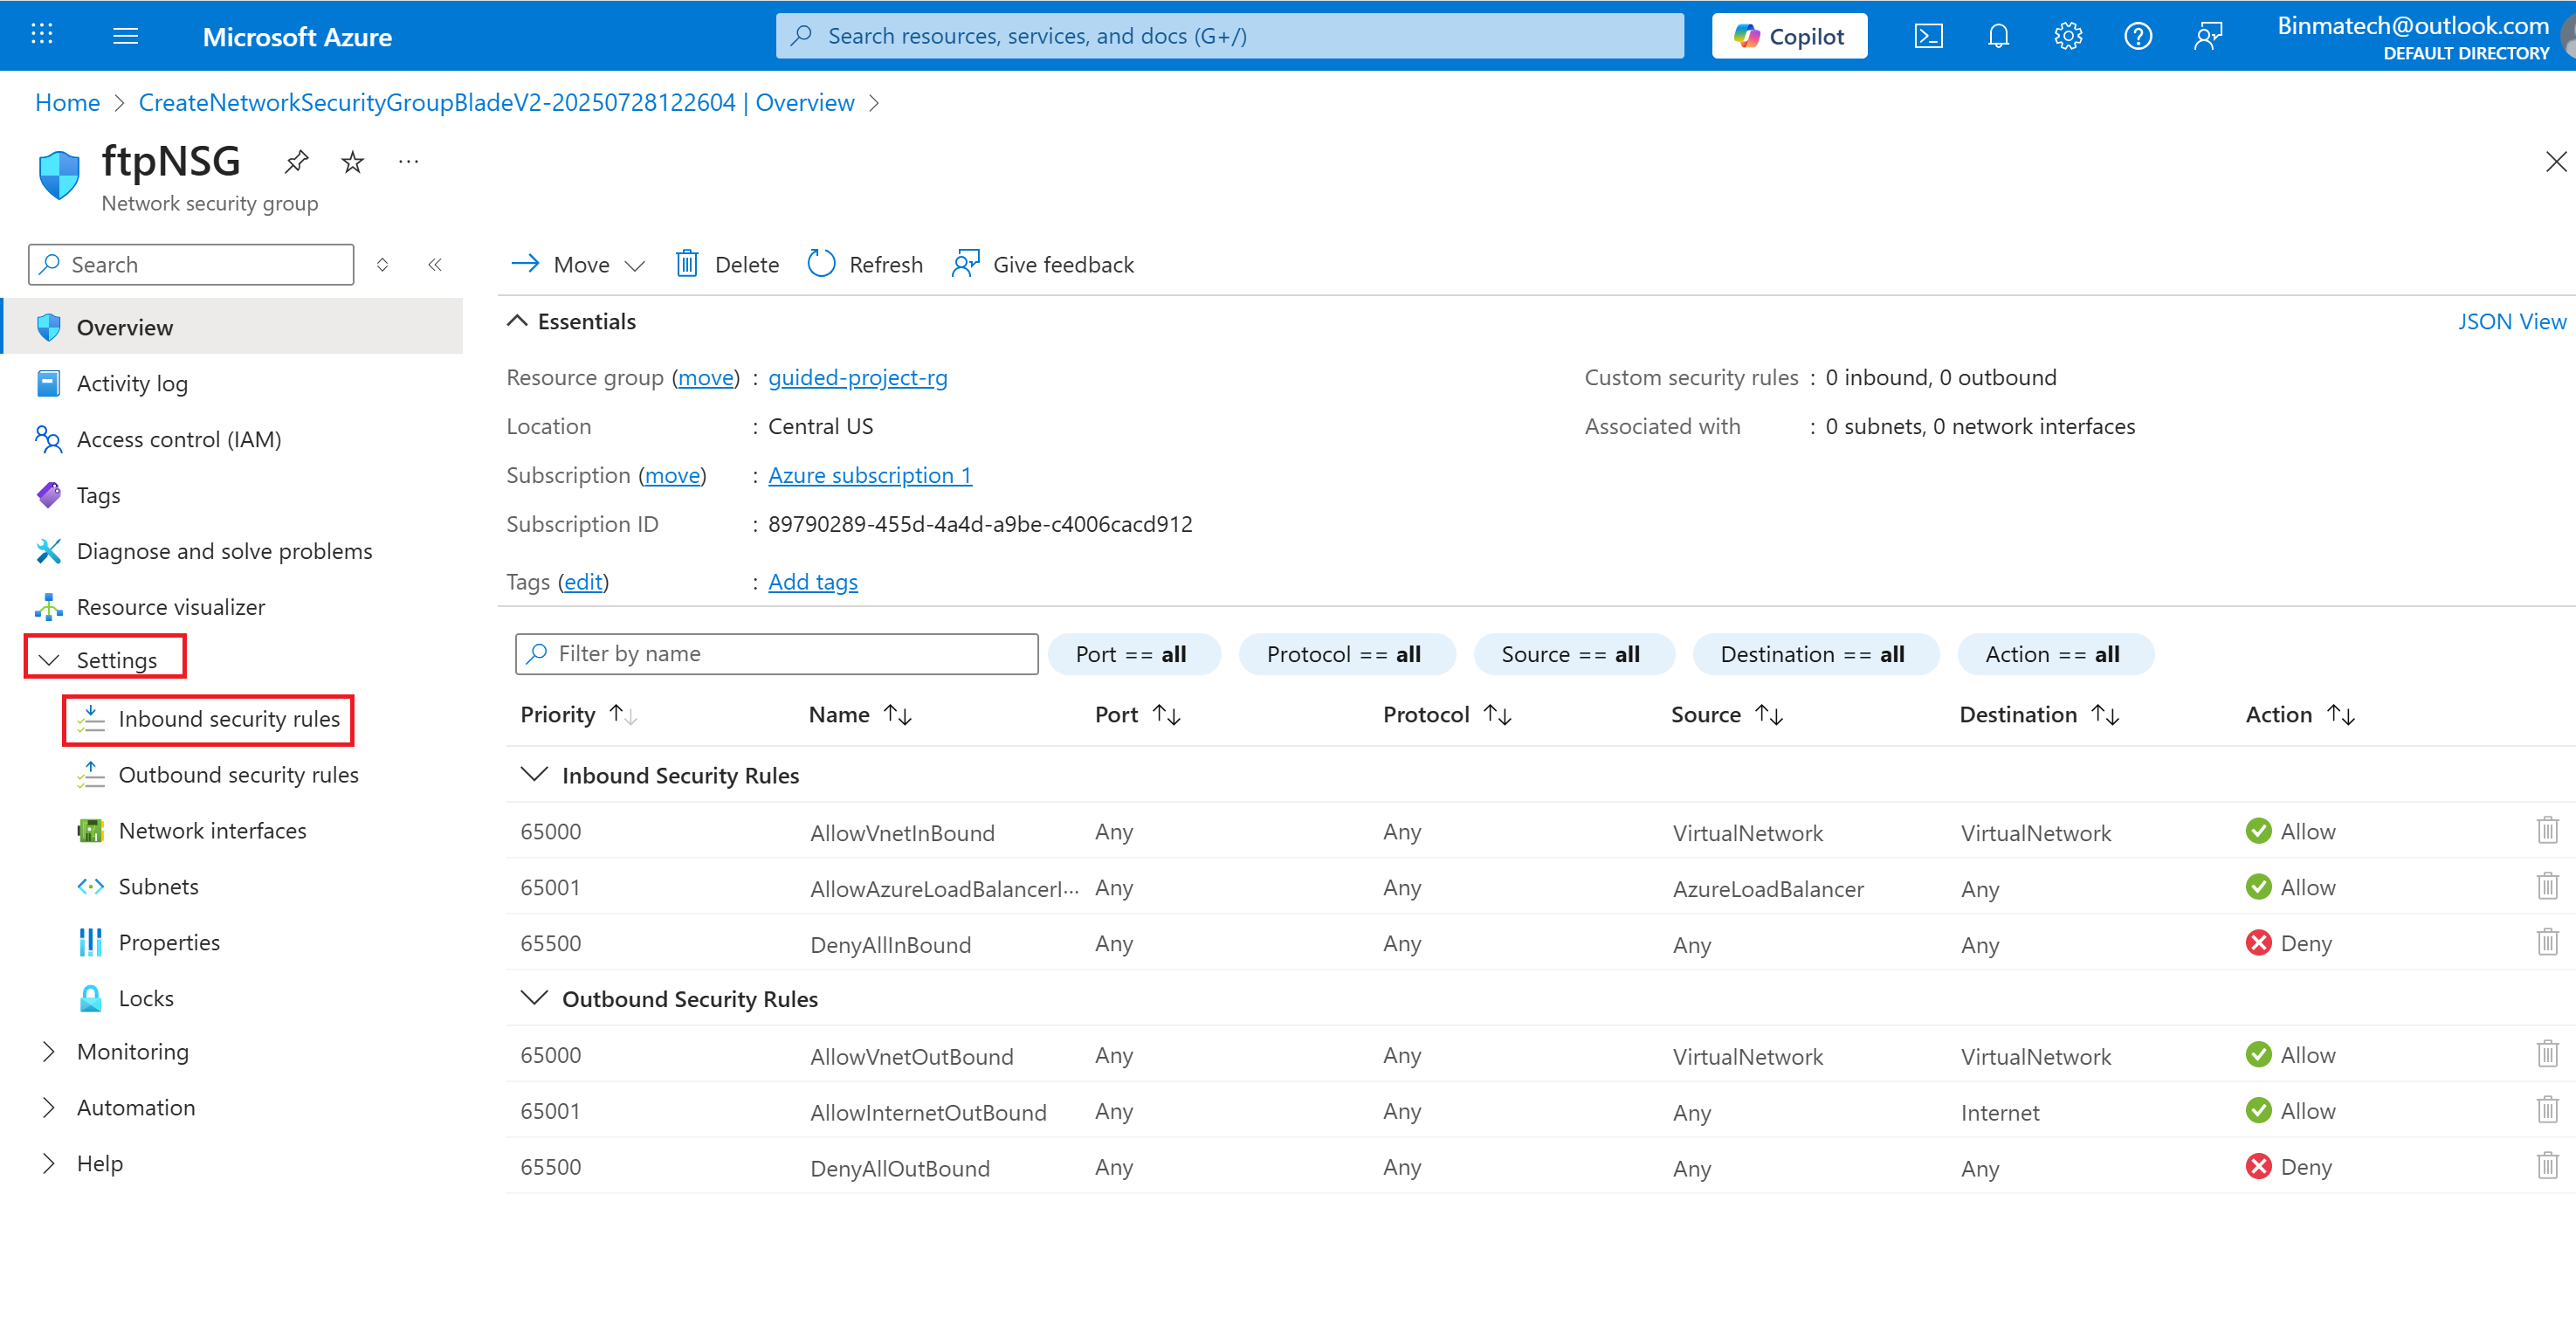
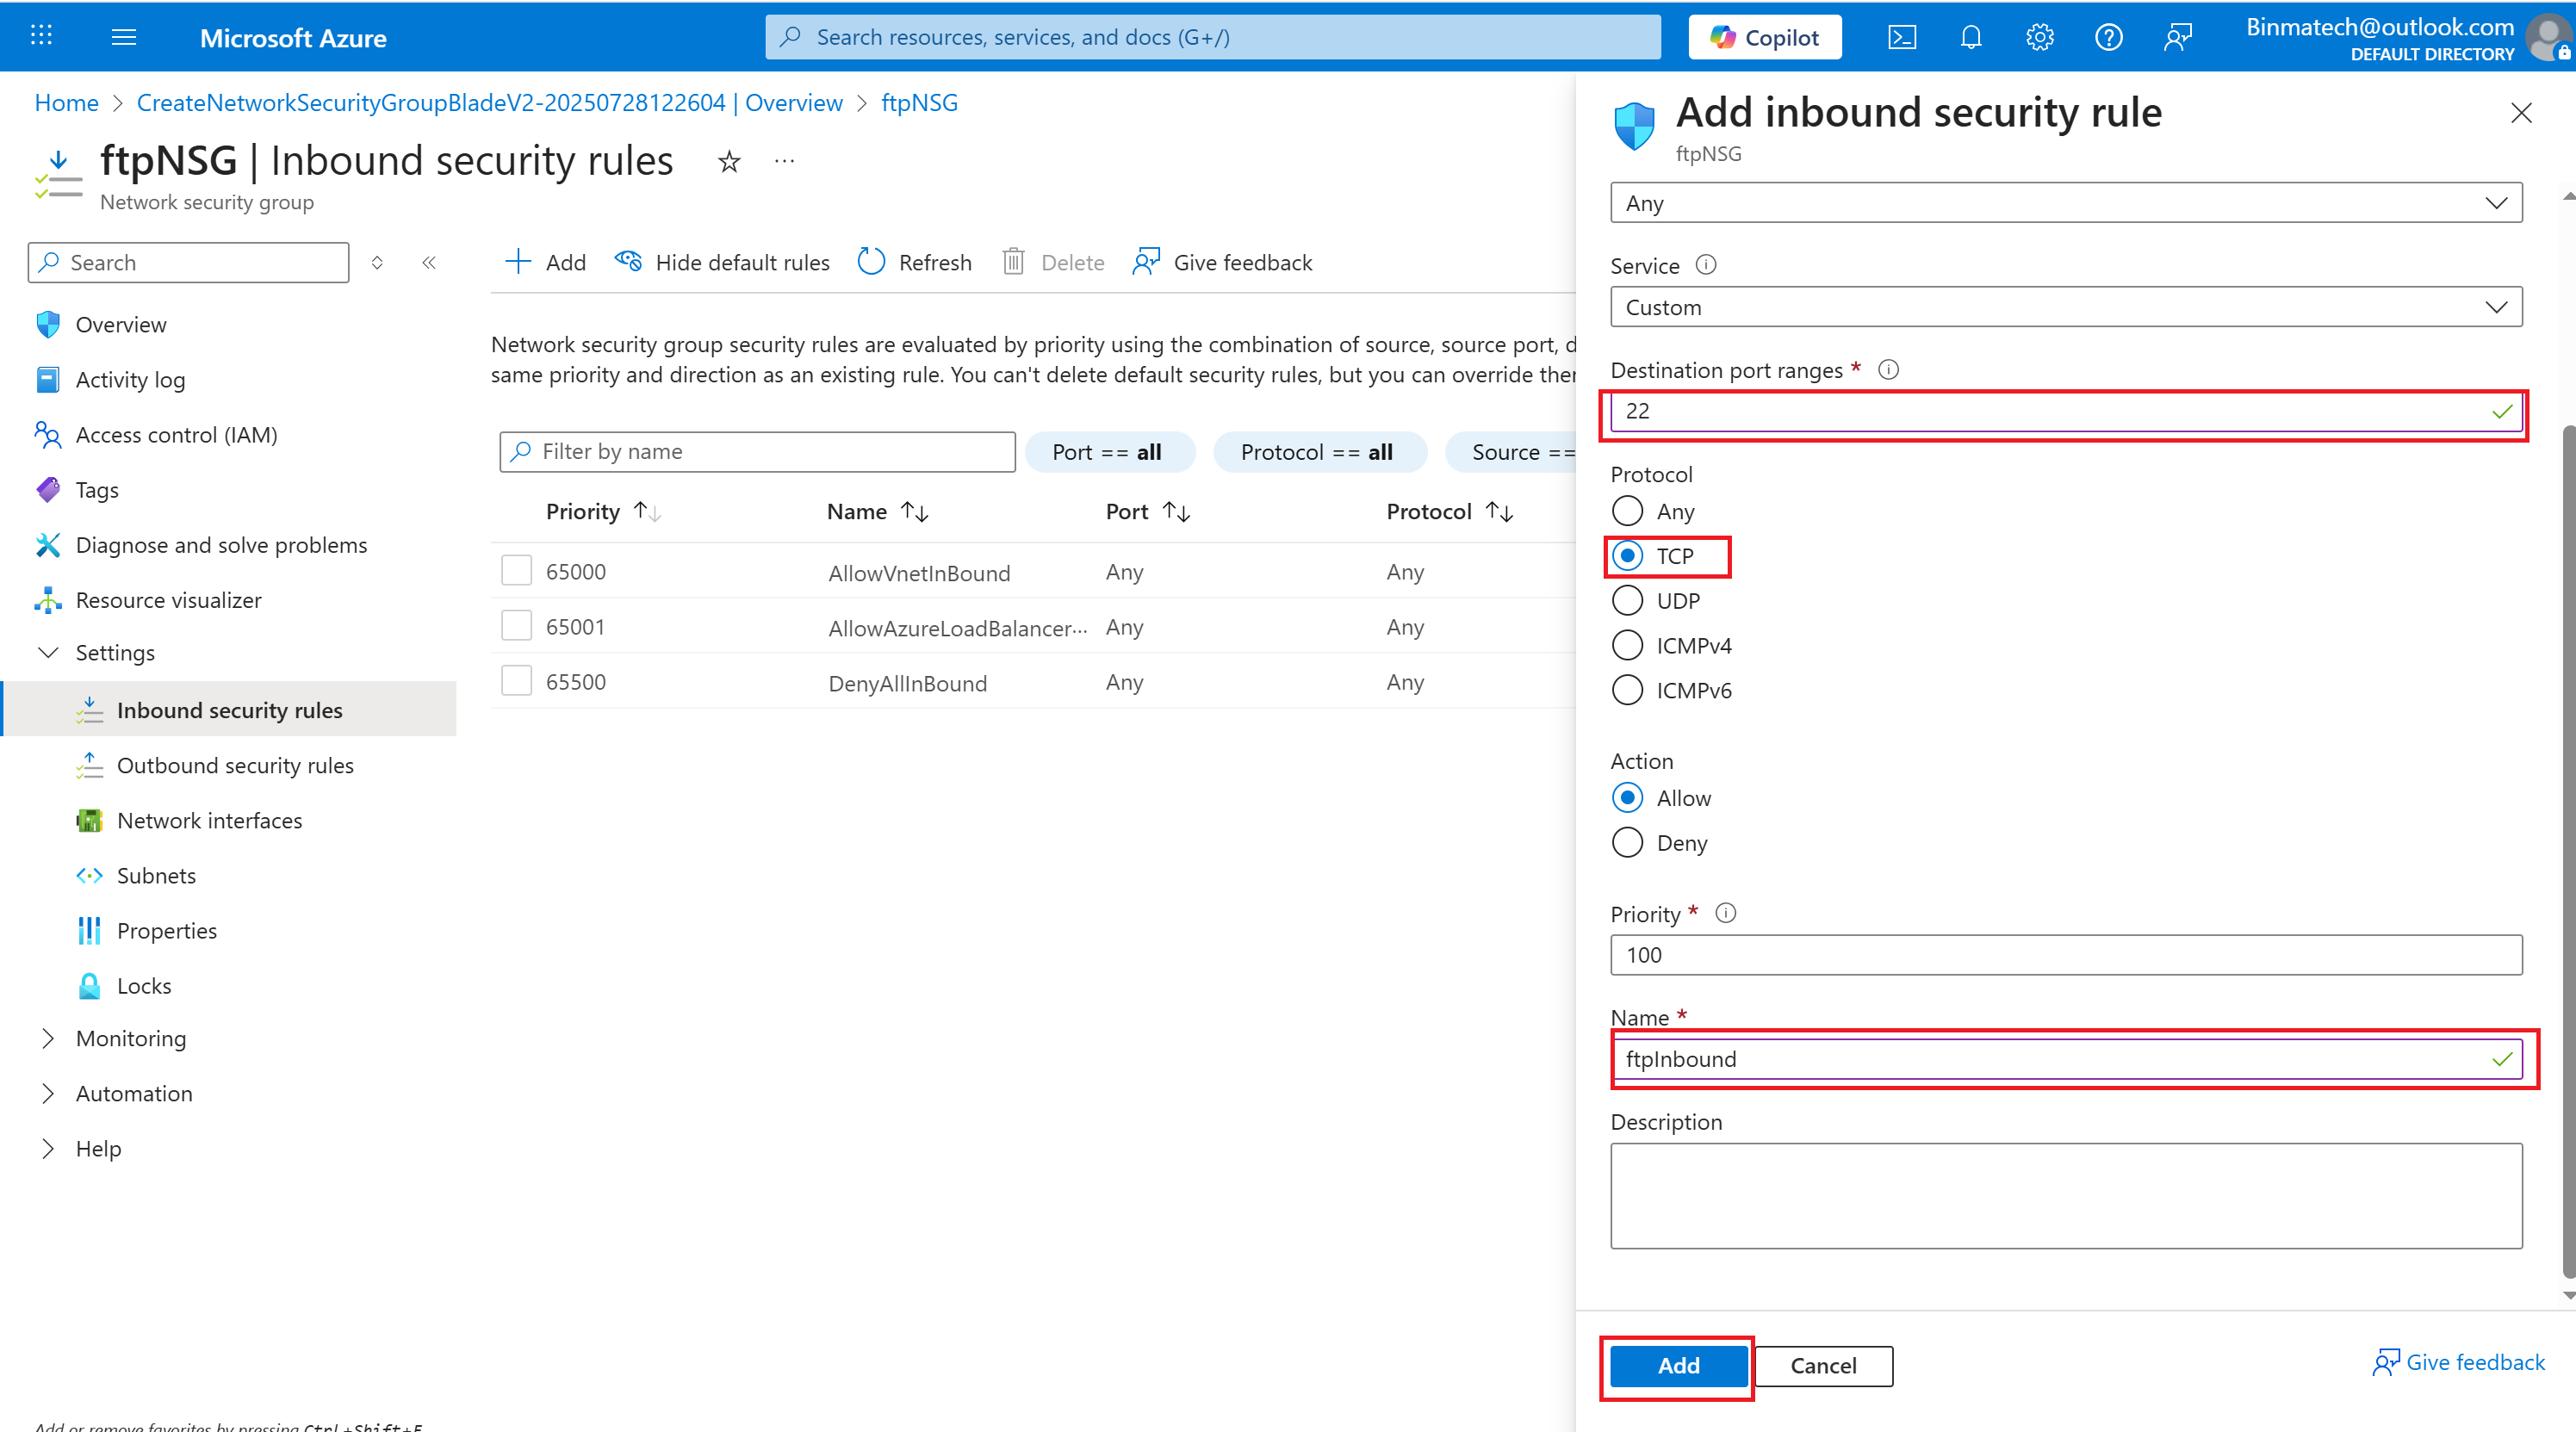
Create an inbound security rule
- Under settings, select Inbound security rules.
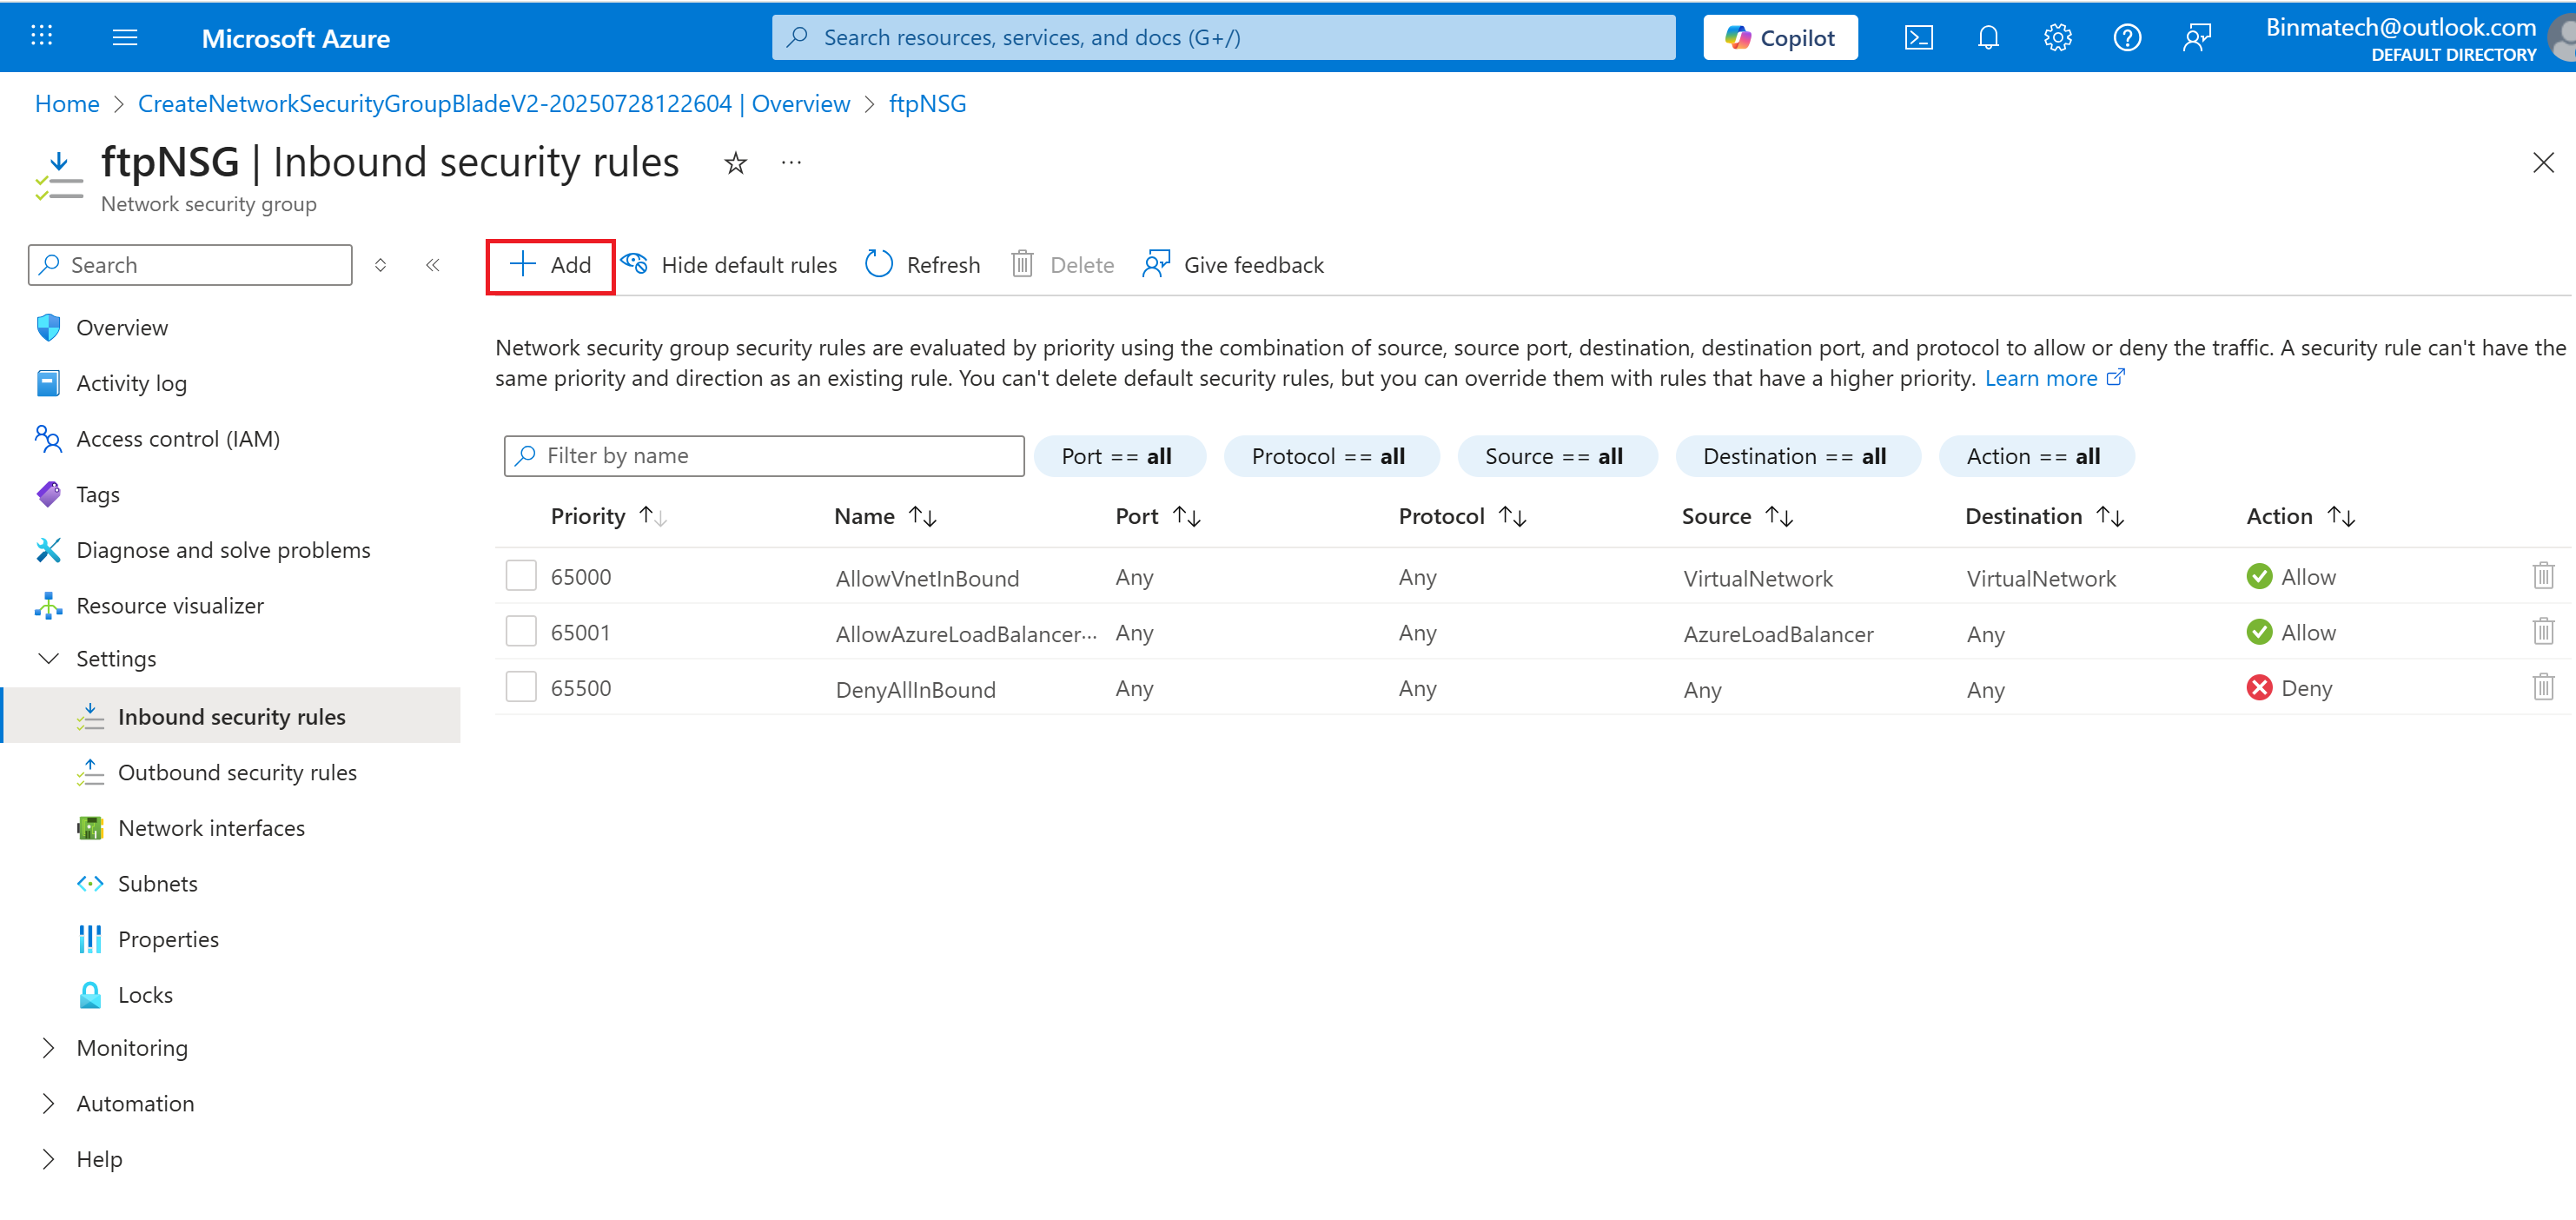
- Change the Destination port ranges from 8080 to 22.
- Select TCP for the protocol.
- Set the name to ftpInbound.
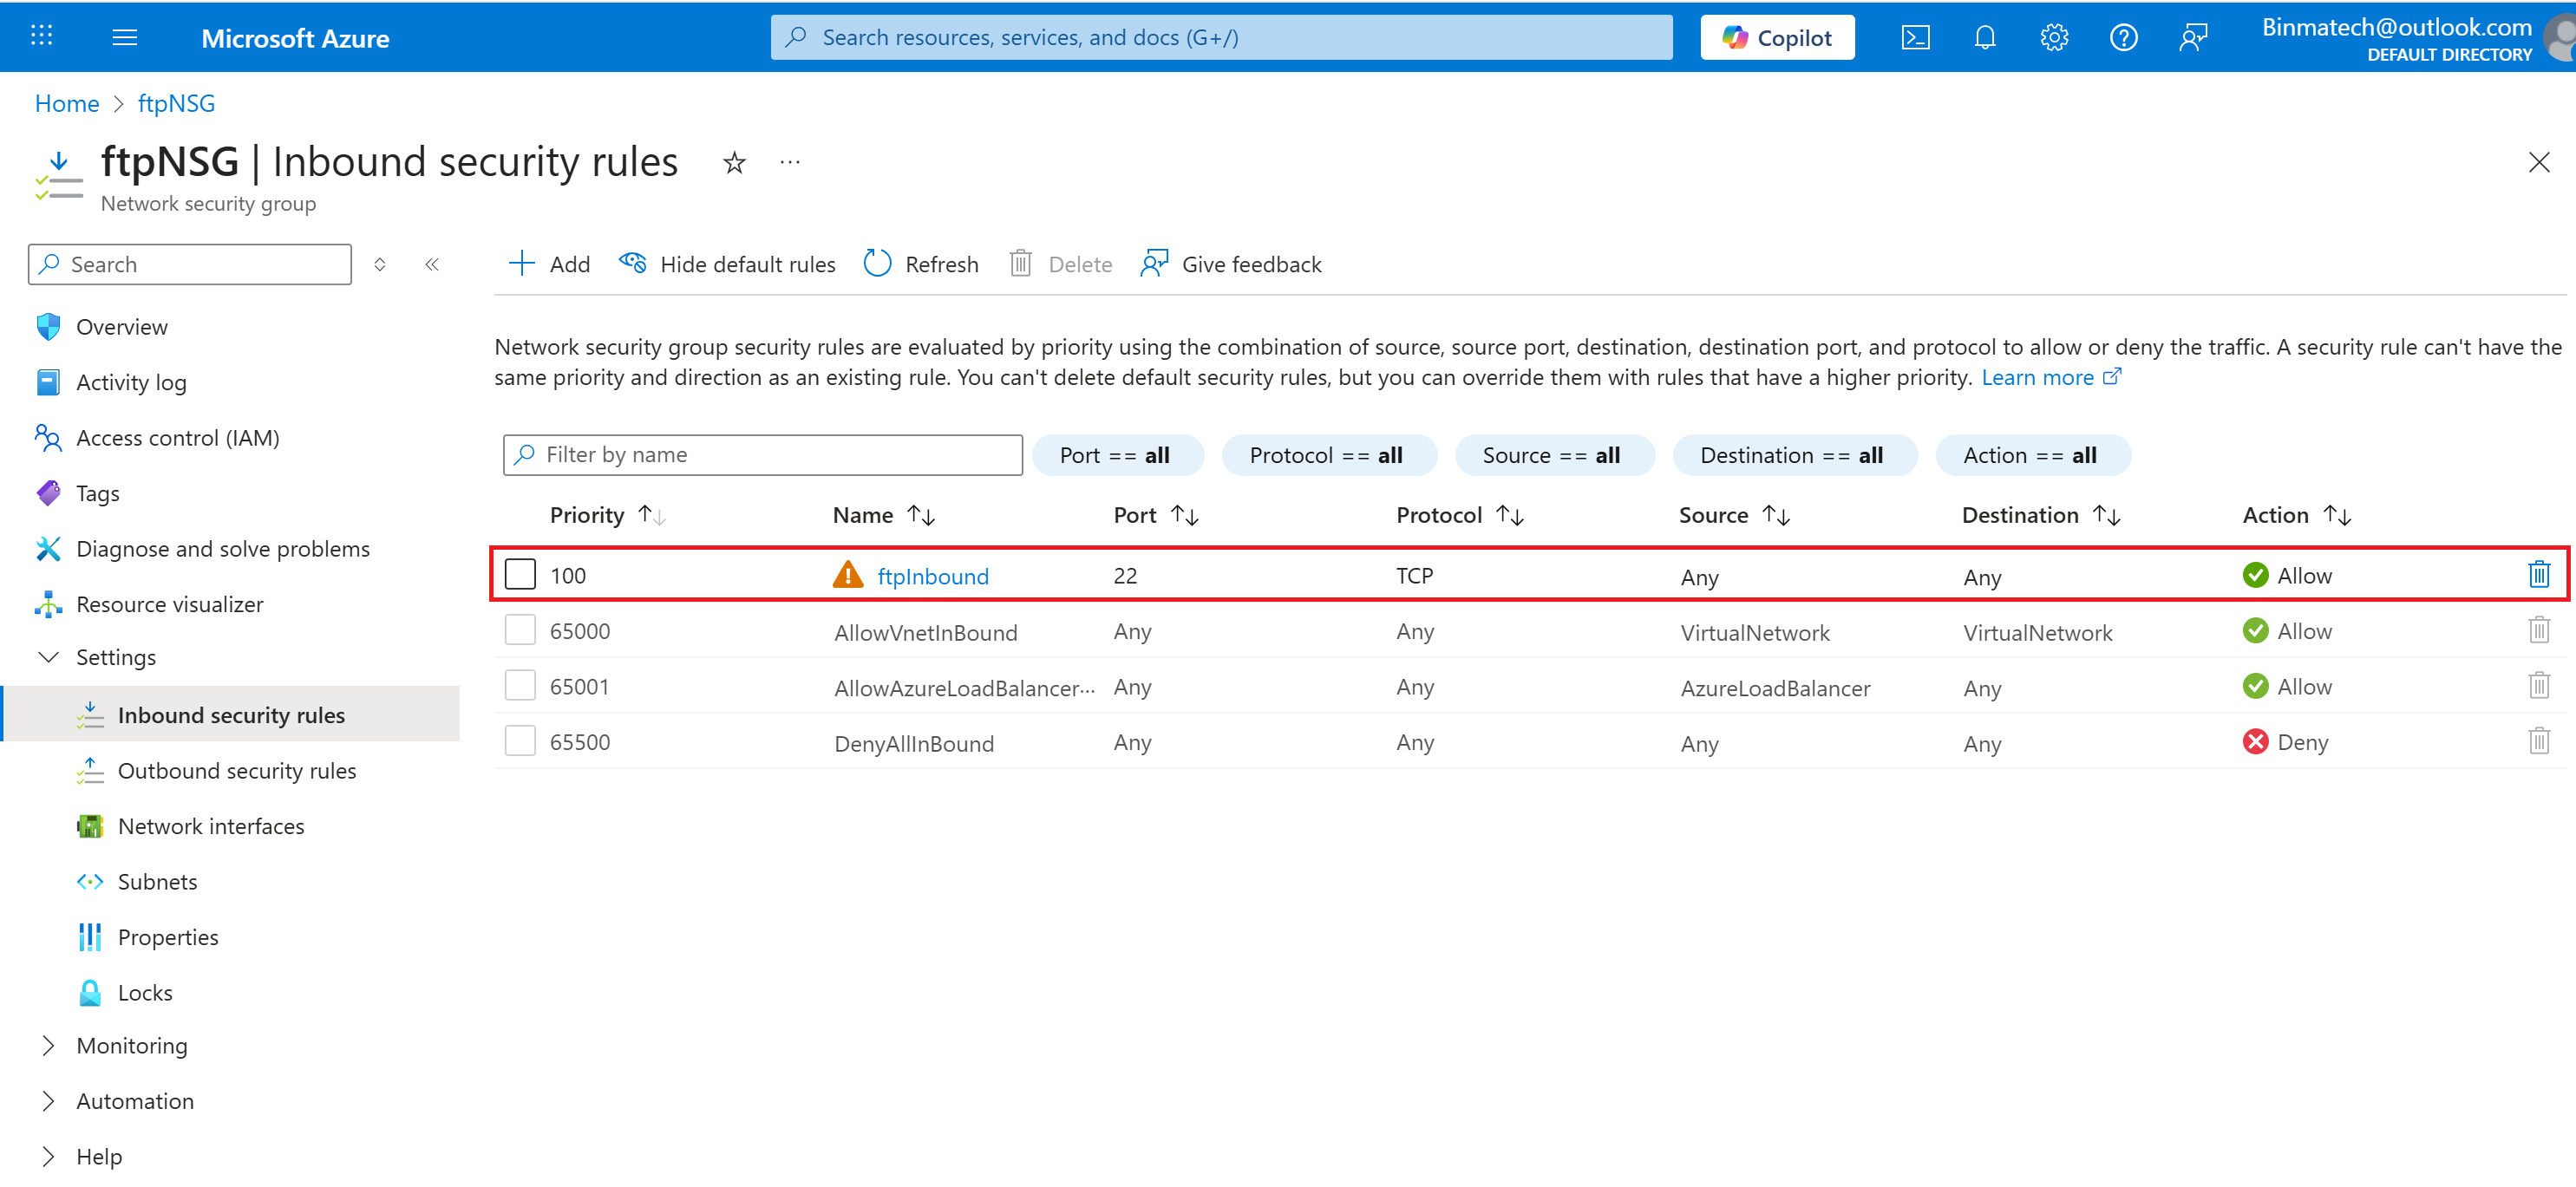
- Select Add.
- Select Home to return to the Azure portal home page.
- you’ve created a new Network security group configured rules to allow inbound FTP traffic.
Step 3 Associate the new network security group with the ftpSubnet.
- From the Azure portal home page, in the search box, enter virtual networks.
- Select virtual networks under services.
- Select the guided-project-vnet virtual network.
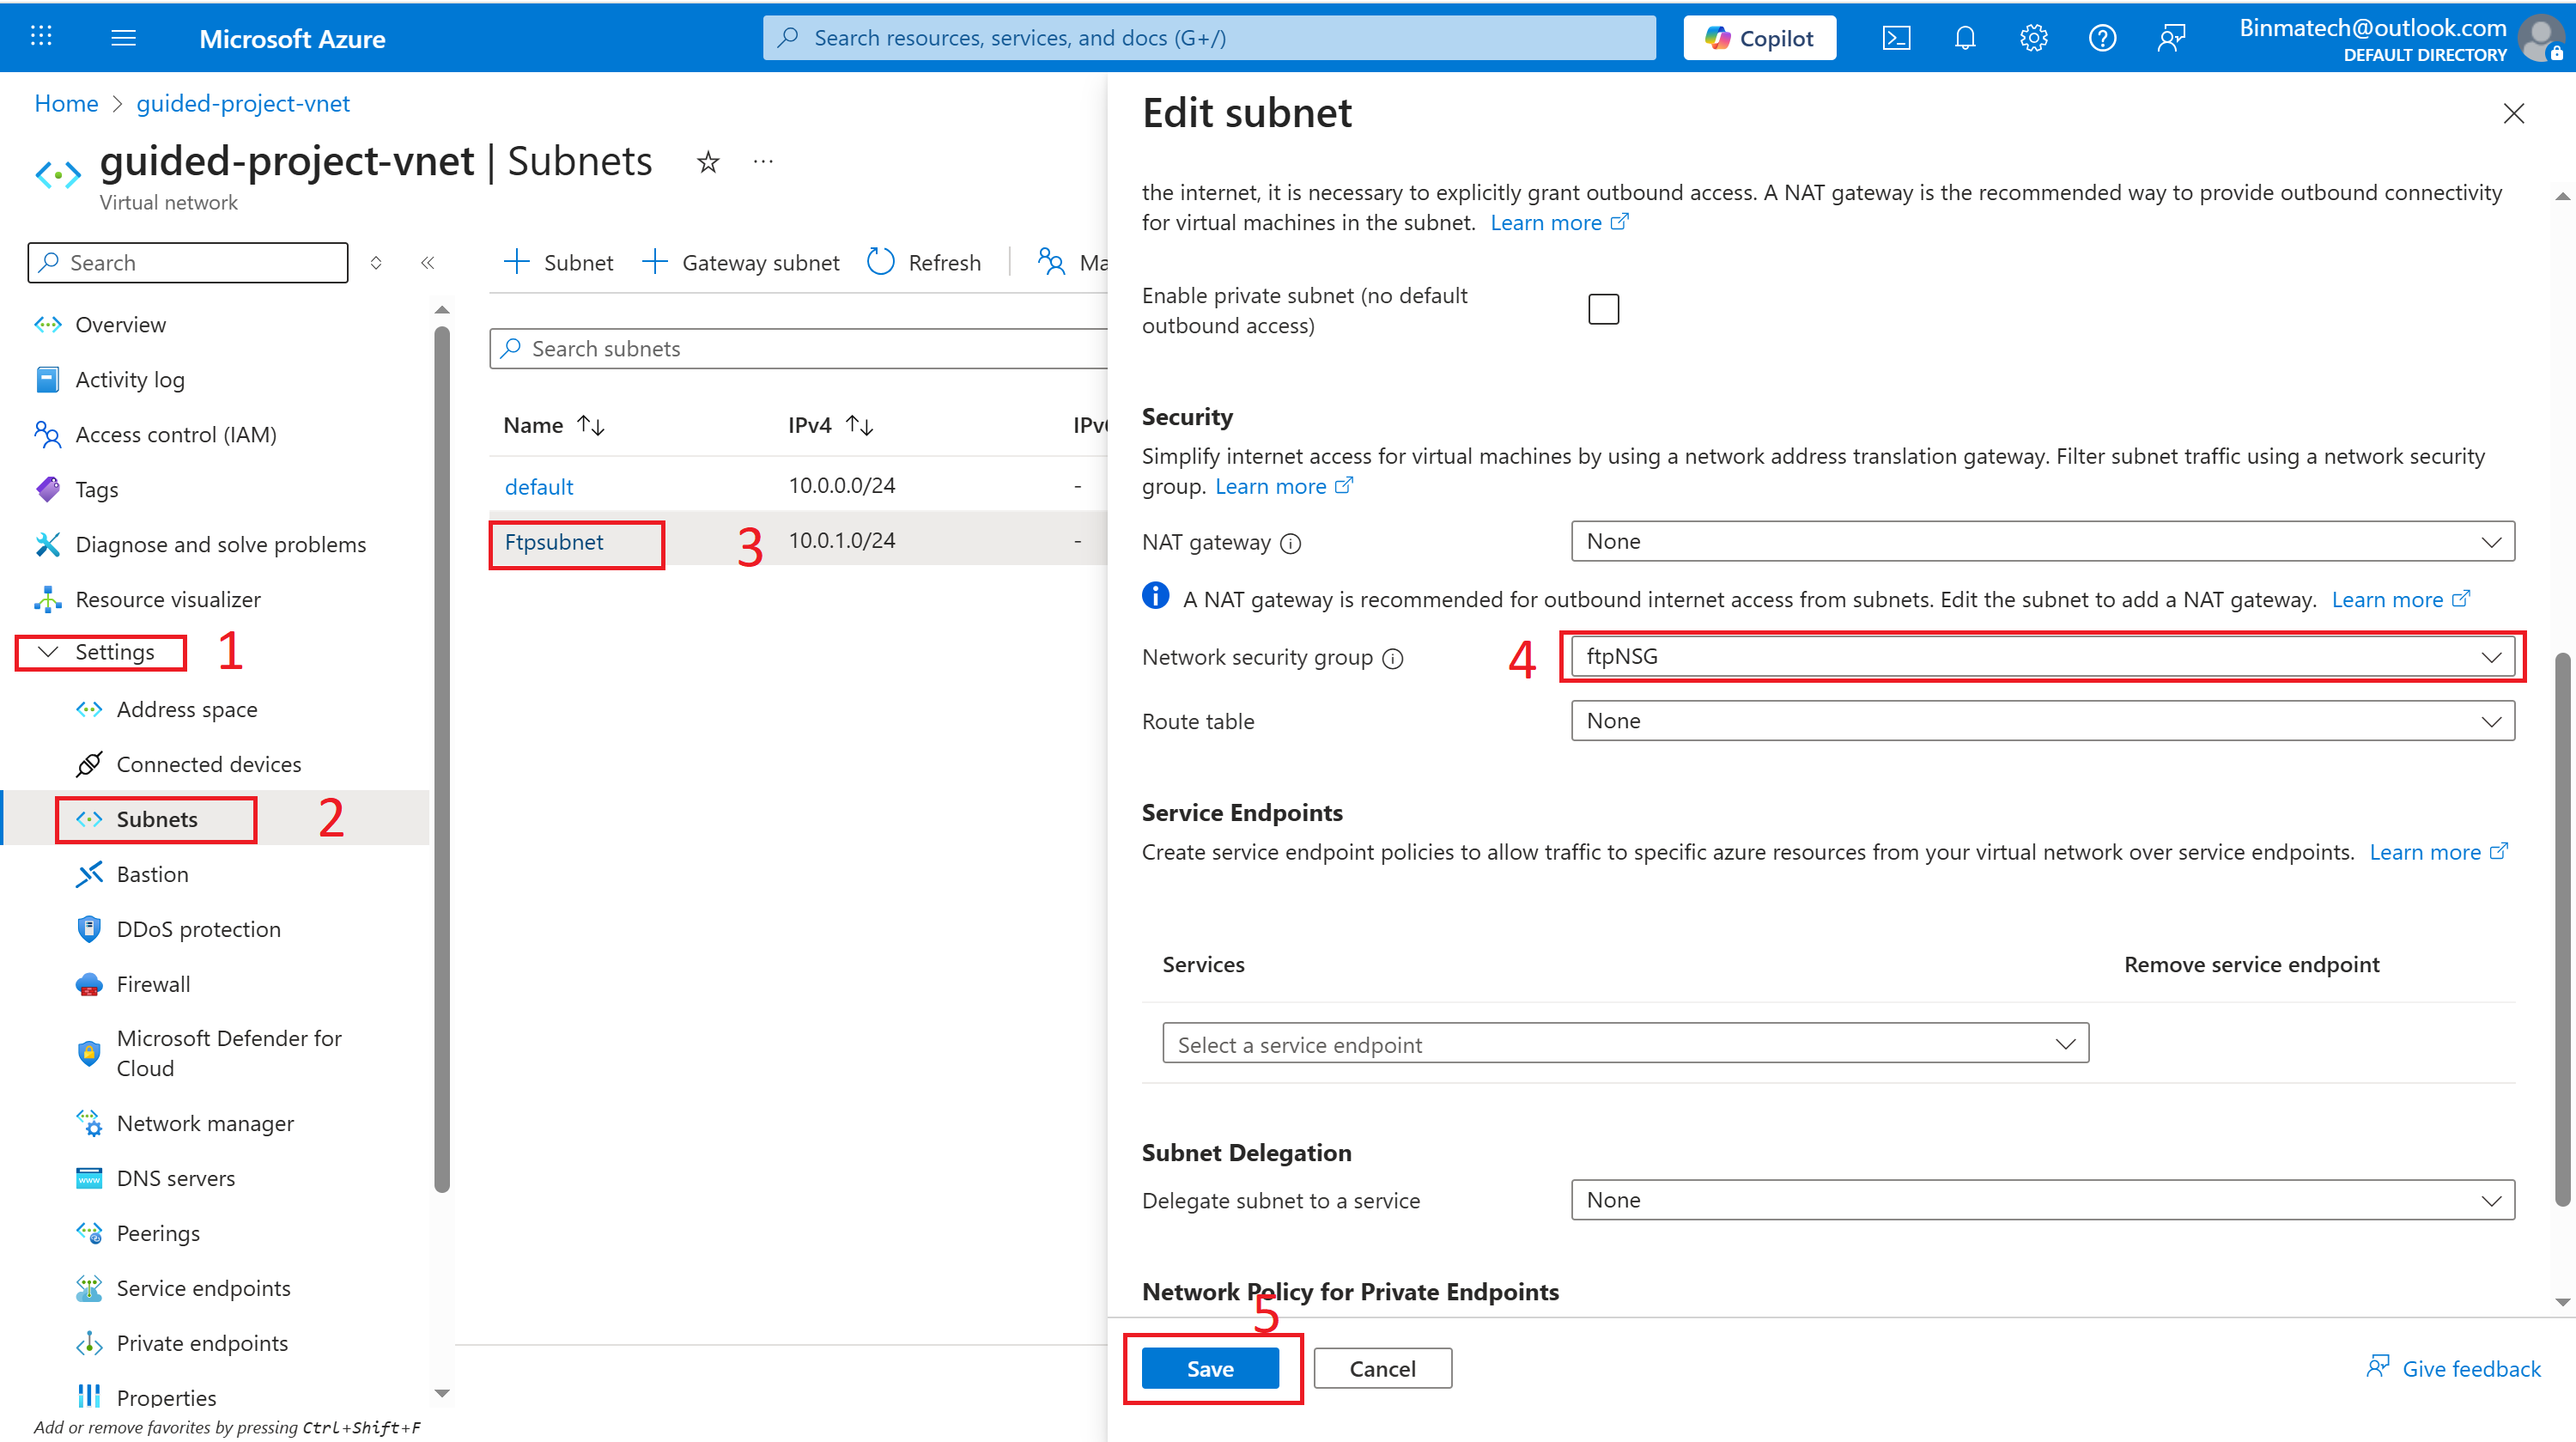
- Under settings, select Subnets.
- Select the ftpSubnet you created.
- On the Edit subnet page, under the Security section heading, update the Network security group field to ftpNSG.
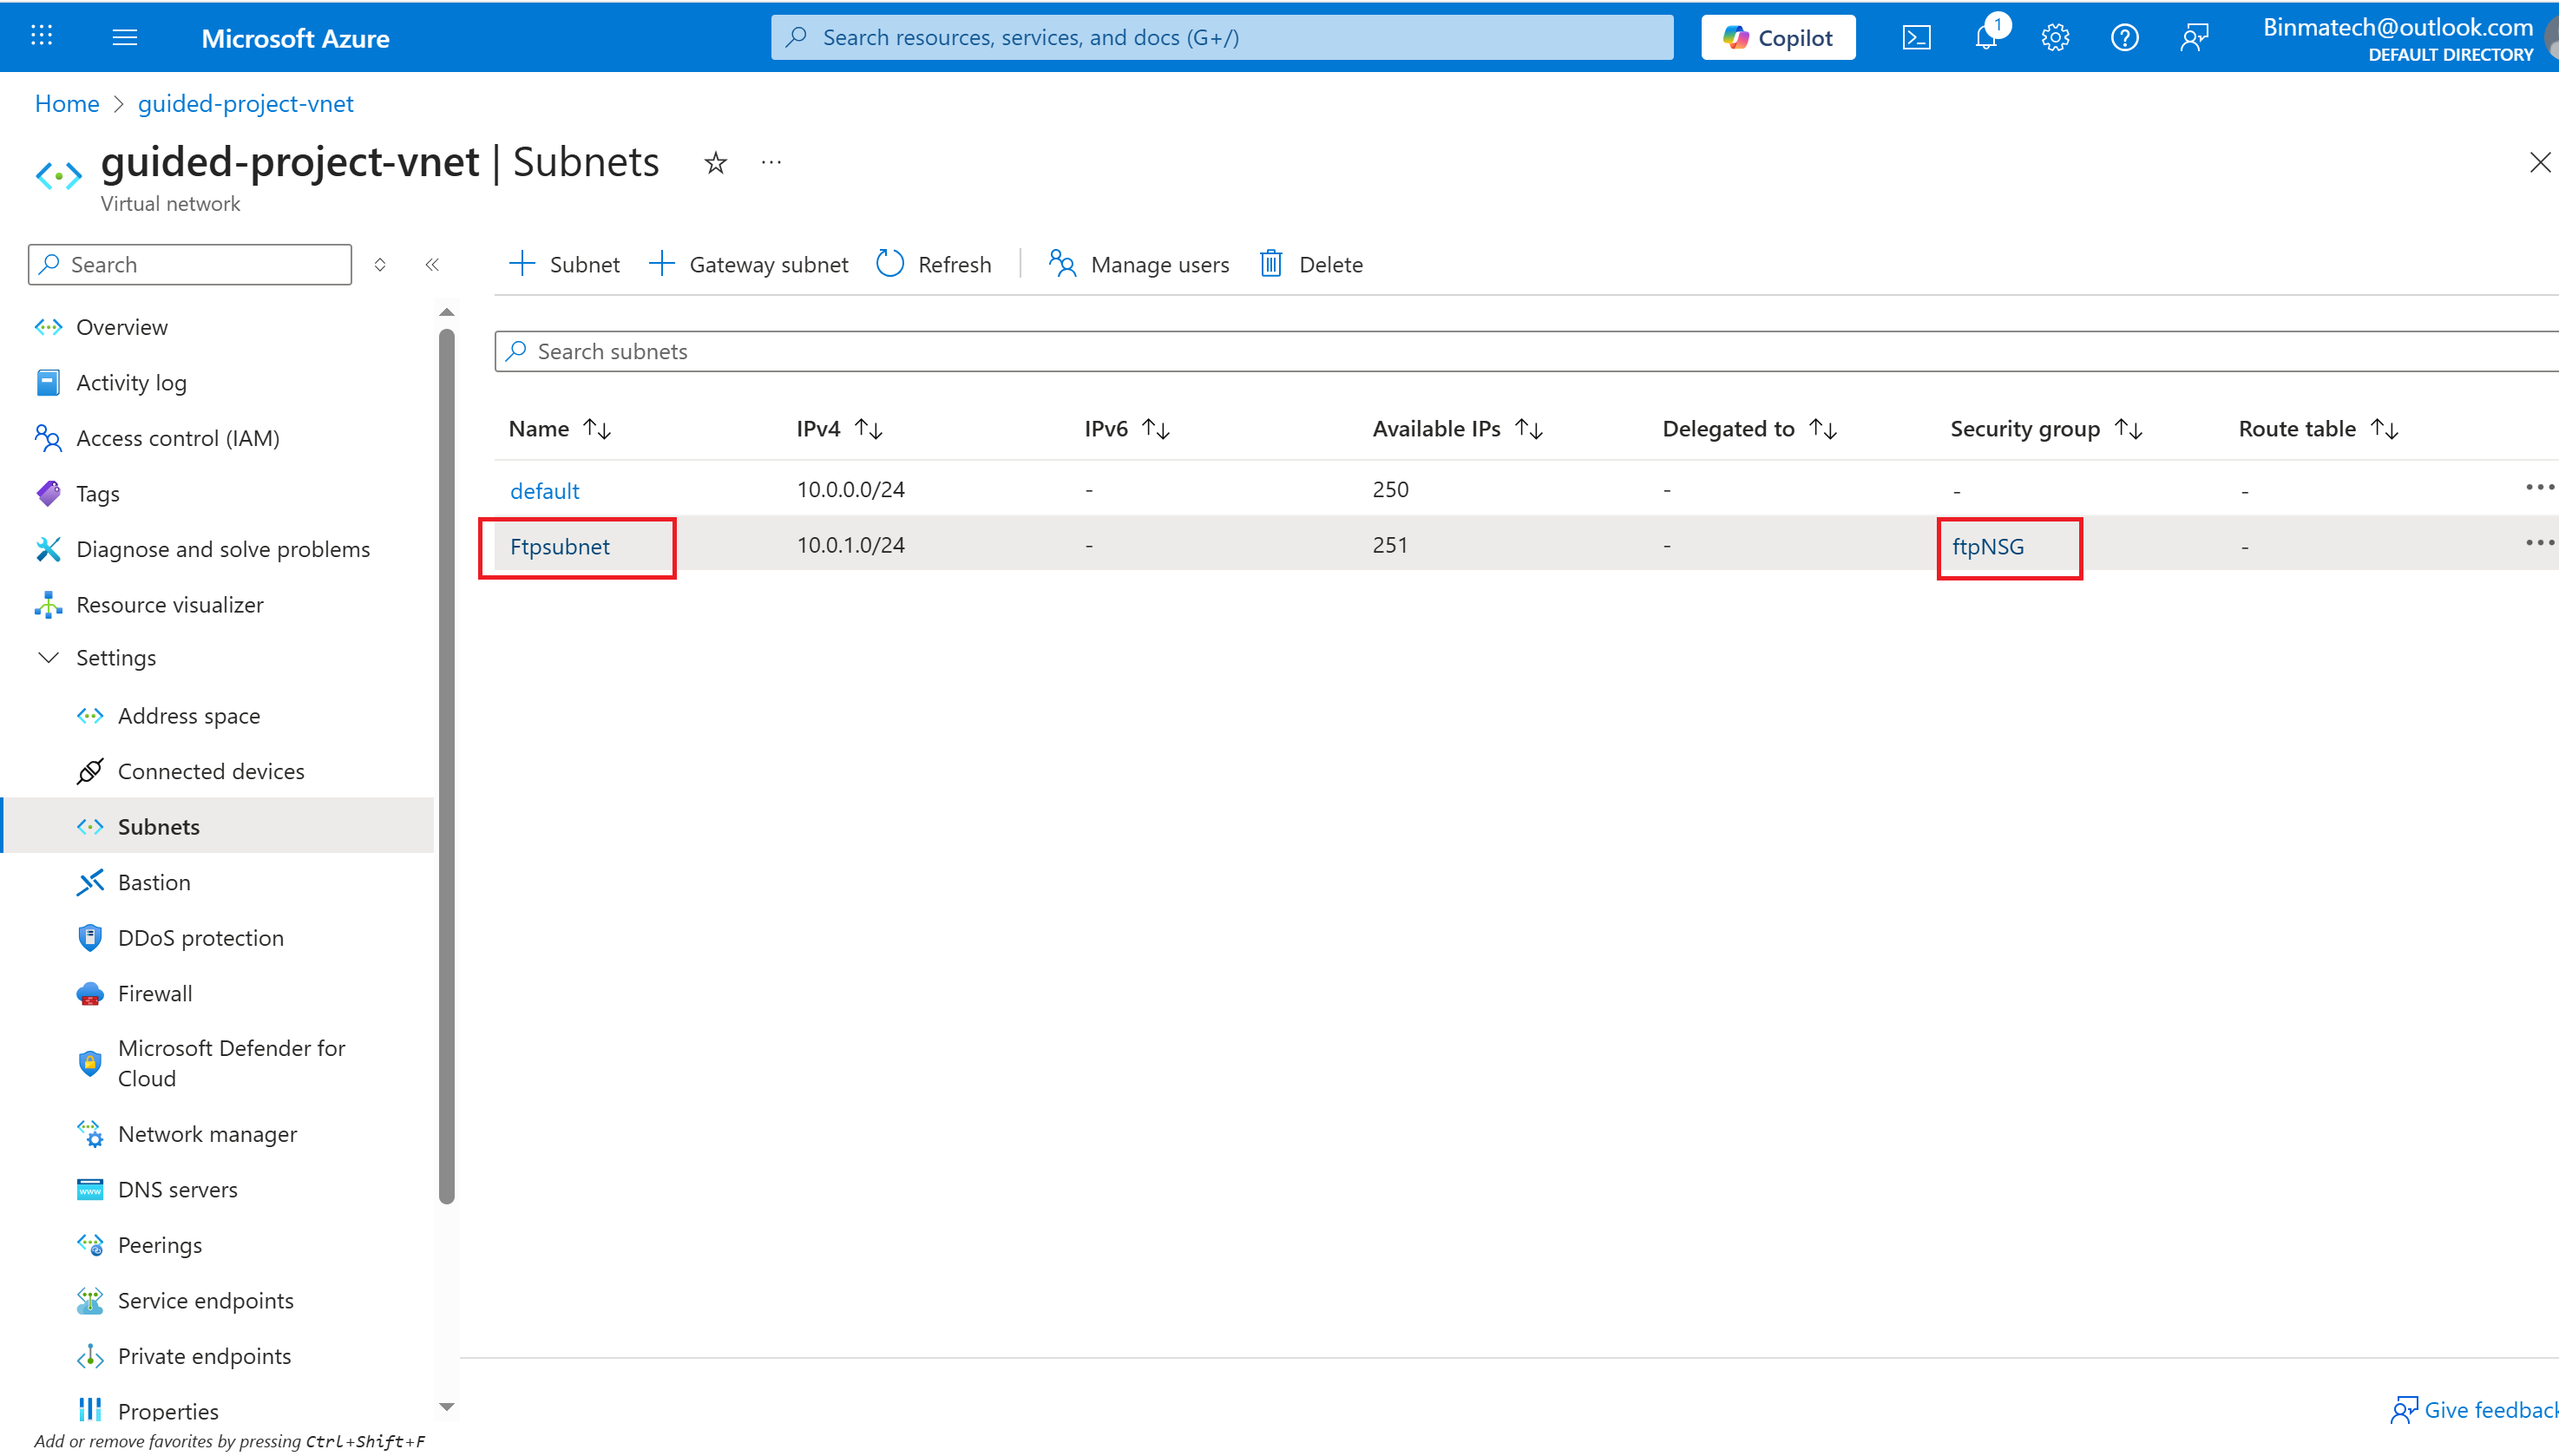
- Select Save.
- The security rules group as been attached to the subnet
Conclusion
Azure Virtual Network (VNet) is the backbone of cloud networking in Microsoft Azure, providing a secure, scalable, and highly configurable environment for your cloud resources. By logically isolating your workloads into subnets, VNets enable efficient organization, robust security, and seamless communication—whether within the same network, across different VNets, or even between on-premises and cloud environments.