Introduction
Securely managing virtual machines is one of the major challenges of cloud engineering. Generally, administrators use SSH (for Linux VM) and RDP (for Windows) for accessing Azure VMs via public IP addresses. This is a good approach but exposing SSH (port 22) and RDP (port 3389) to the Internet increases the attack surface of your environment hence making it susceptible to brute force and other forms of attacks.
To overcome this problem, Azure Bastion is a Platform as a Service (PaaS) solution which provides secure SSH and RDP connection from Azure portal using HTTPS (Port 443). The use of Azure Bastion eliminates the need of assigning public IP addresses to virtual machines thus making them safer and easy to manage.
In this tutorial, you will be able to know how to implement Azure Bastion, set up the required networking configuration, connect to an Ubuntu virtual machine using SSH and understand Azure Bastion security benefits.
What is Azure Bastion?
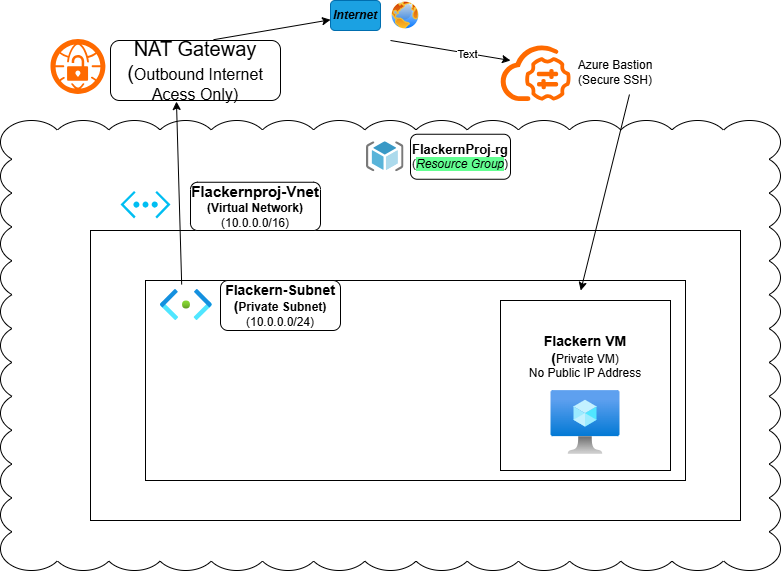
Azure Bastion is a managed Azure service that provides secure browser-based SSH and RDP connectivity to Azure Virtual Machines without exposing them to the public internet.
Instead of connecting directly to your VM's public IP, you connect through the Azure Portal, and Azure Bastion establishes a secure session over Microsoft's private network.
Benefits of Azure Bastion
No Public IP required for Virtual Machines
Secure browser-based SSH and RDP access
No need to expose ports 22 or 3389
Reduced attack surface
Fully managed Platform as a Service (PaaS)
Uses HTTPS (Port 443)
Integrates seamlessly with Azure Virtual Networks
Project Objectives
In this project, you will:
Create an Azure Virtual Network
Create the AzureBastionSubnet
Deploy Azure Bastion
Create an Ubuntu Virtual Machine
Connect to the VM using Azure Bastion
Verify secure SSH connectivity
Understand Azure Bastion architecture and best practices
Prerequisites
Before beginning, ensure you have:
An active Microsoft Azure subscription
Access to the Azure Portal
Basic knowledge of Azure Virtual Machines
A web browser
Permissions to create Azure resources
Azure Bastion Architecture
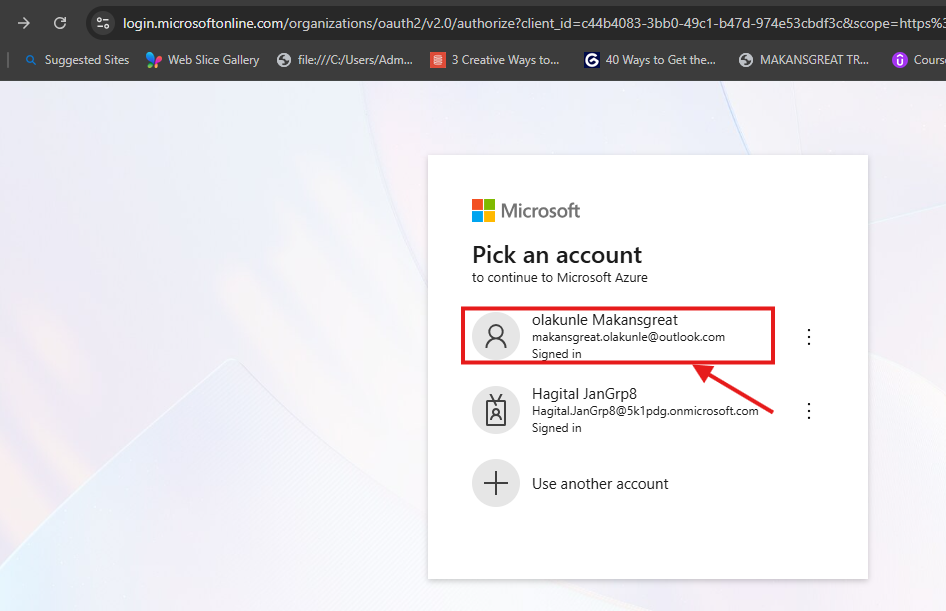
Step 1: Sign in to Azure Portal
On your web browser, head over to https://portal.azure.com and log in with your Microsoft account. If you don't have an account, create or sign up and provide the required information so your Microsoft account can be activated.
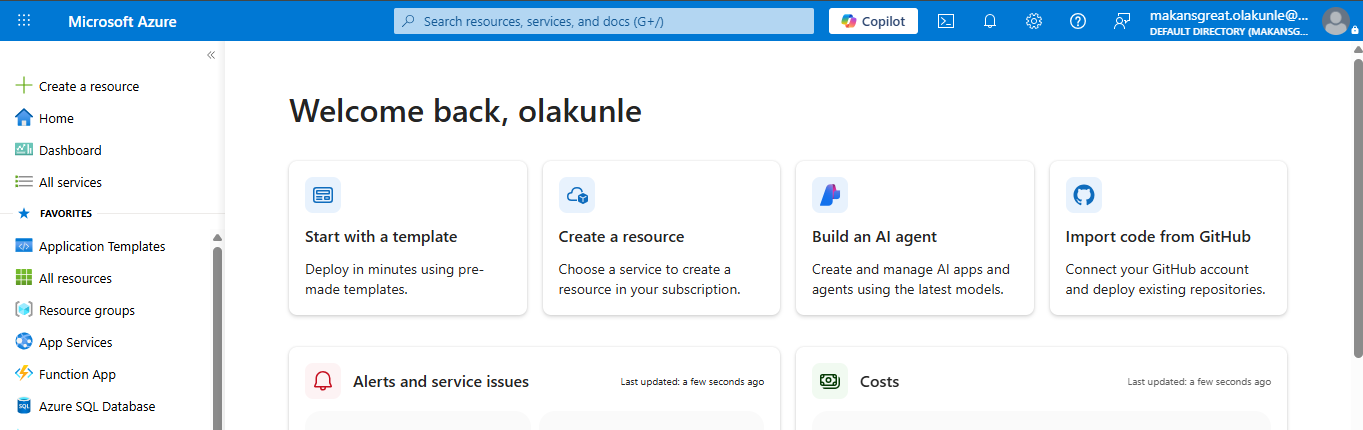
A successful login bring you to this page below,
Step 2: Create a Resource Group
Search for Resource Groups on search bar and click on Resource group from the dropdown
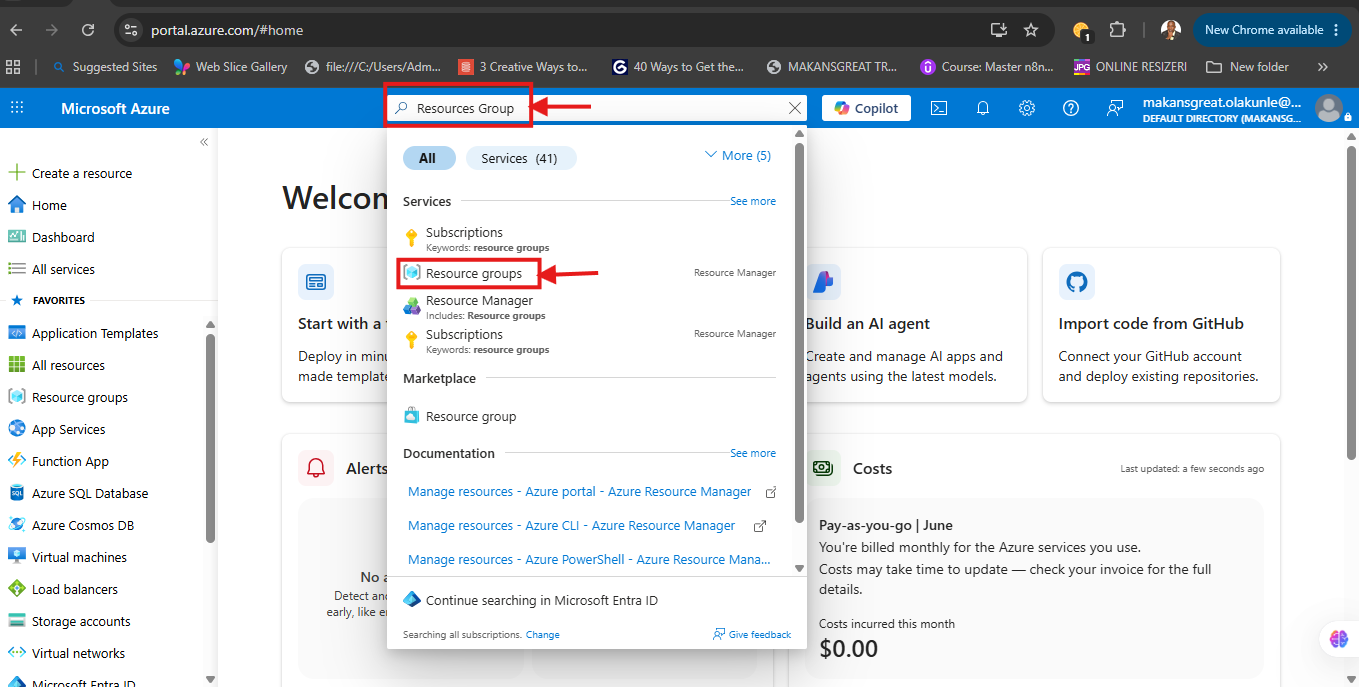
-Click on Create
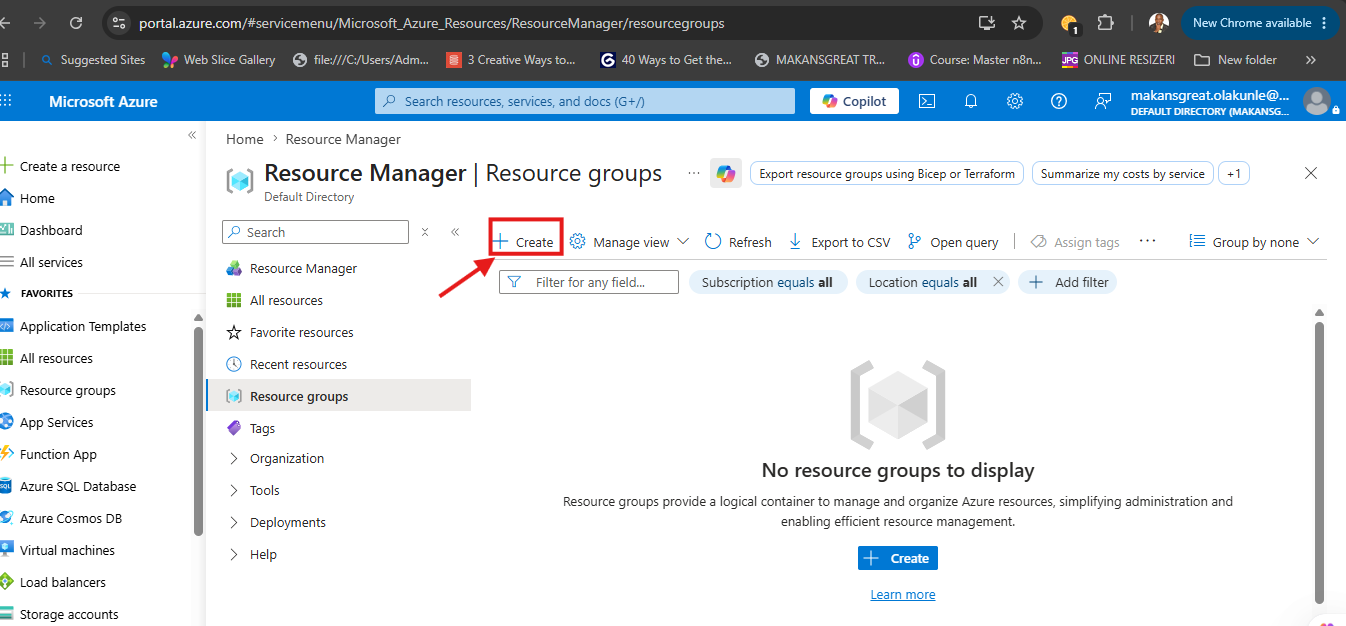
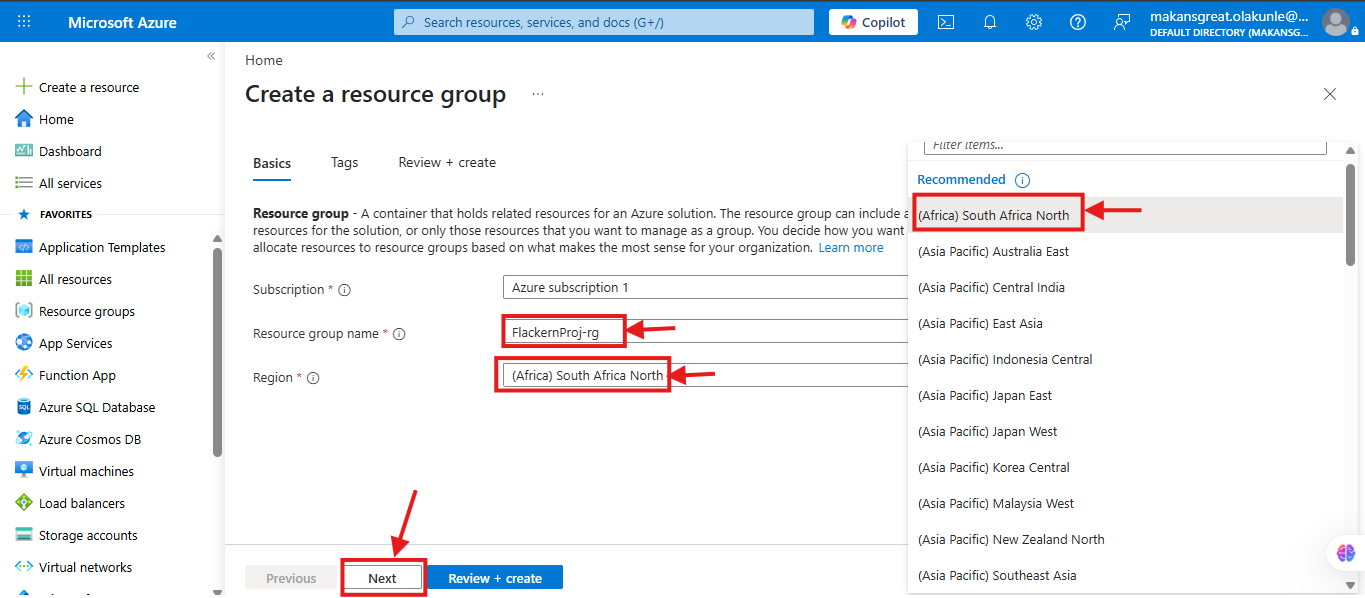
-Type the Resource group name, select the region and click Next
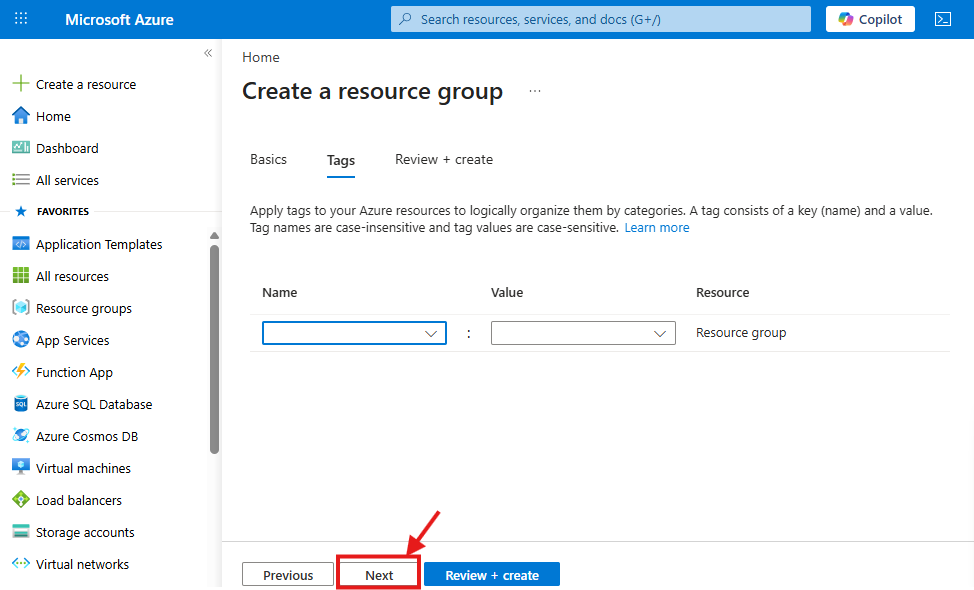
Apply tags to your resources to logically organize them by categories and click Next
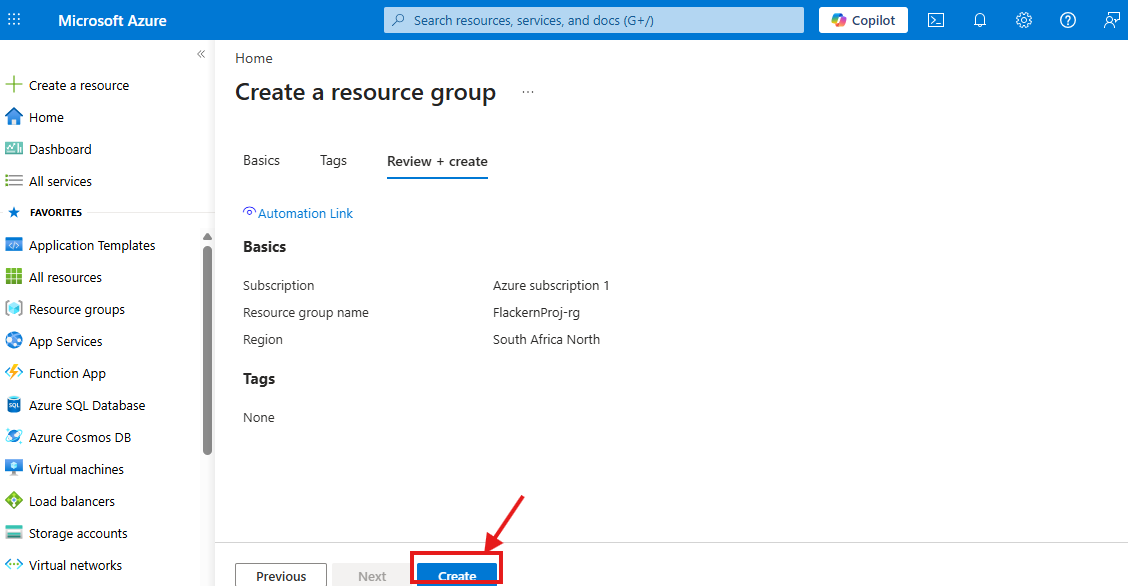
Review the resources group and click on Create
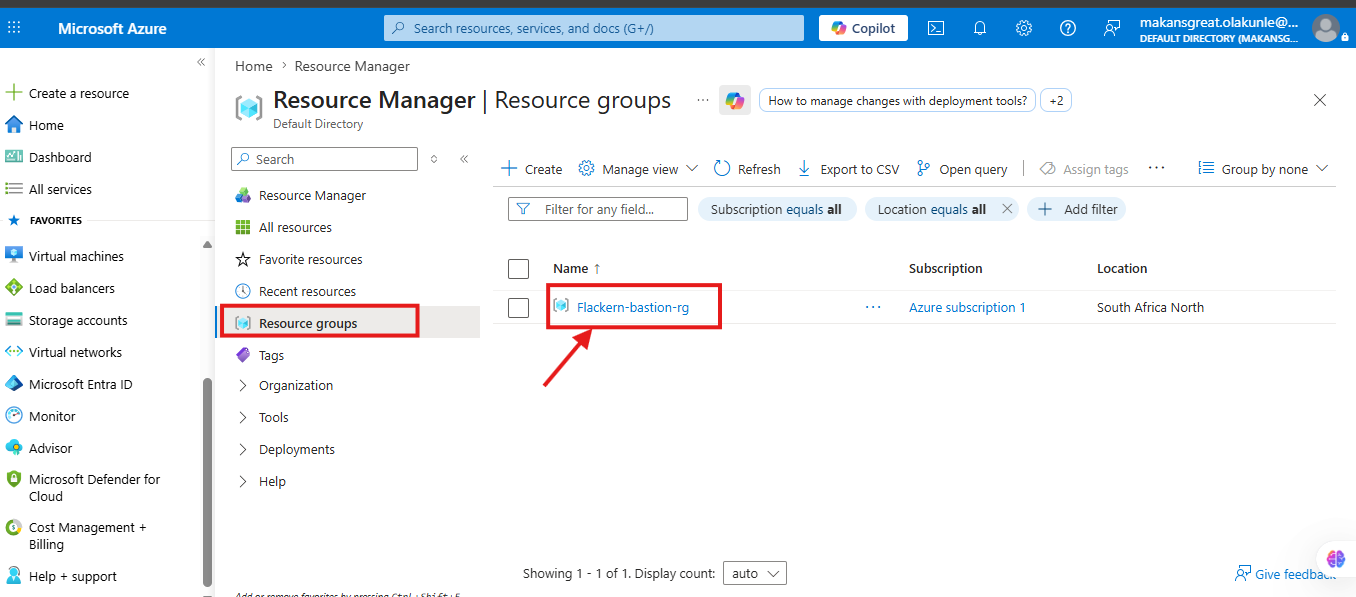
-Click on Resource Group on the left to bring out the resource group you created
Step 3: Create a Virtual Network
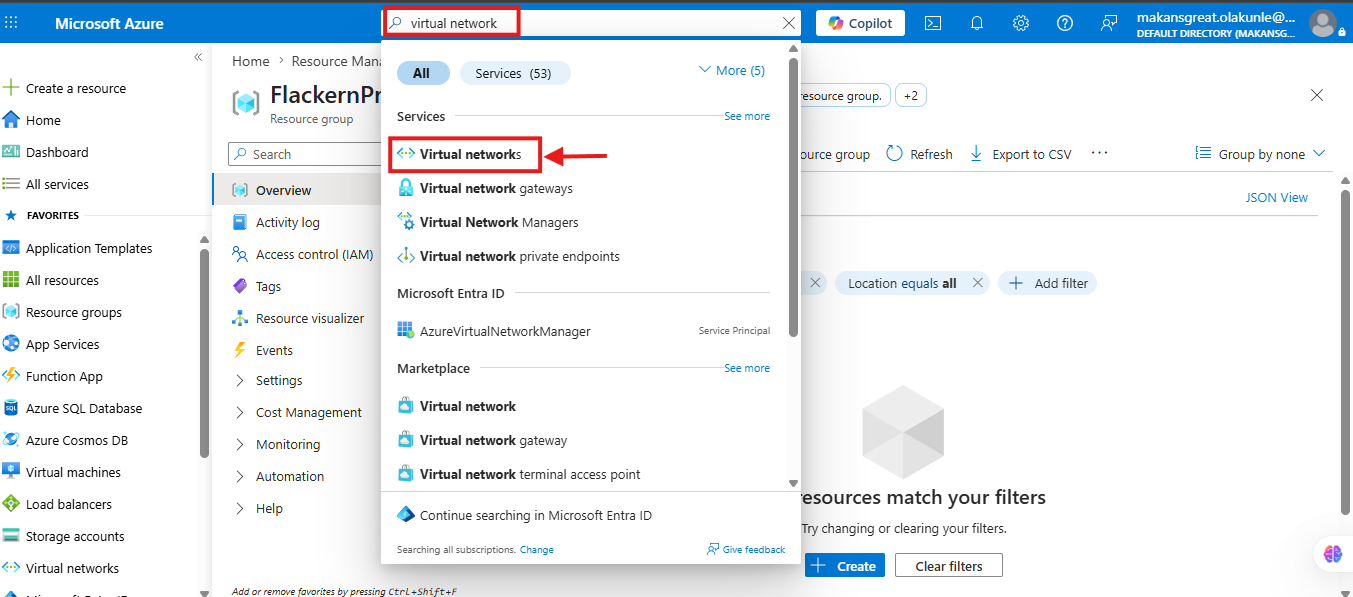
1. .Click on Resource group created and right on the Resource Group page Search for Virtual Network on search bar and click on Virtual Network from the dropdown__
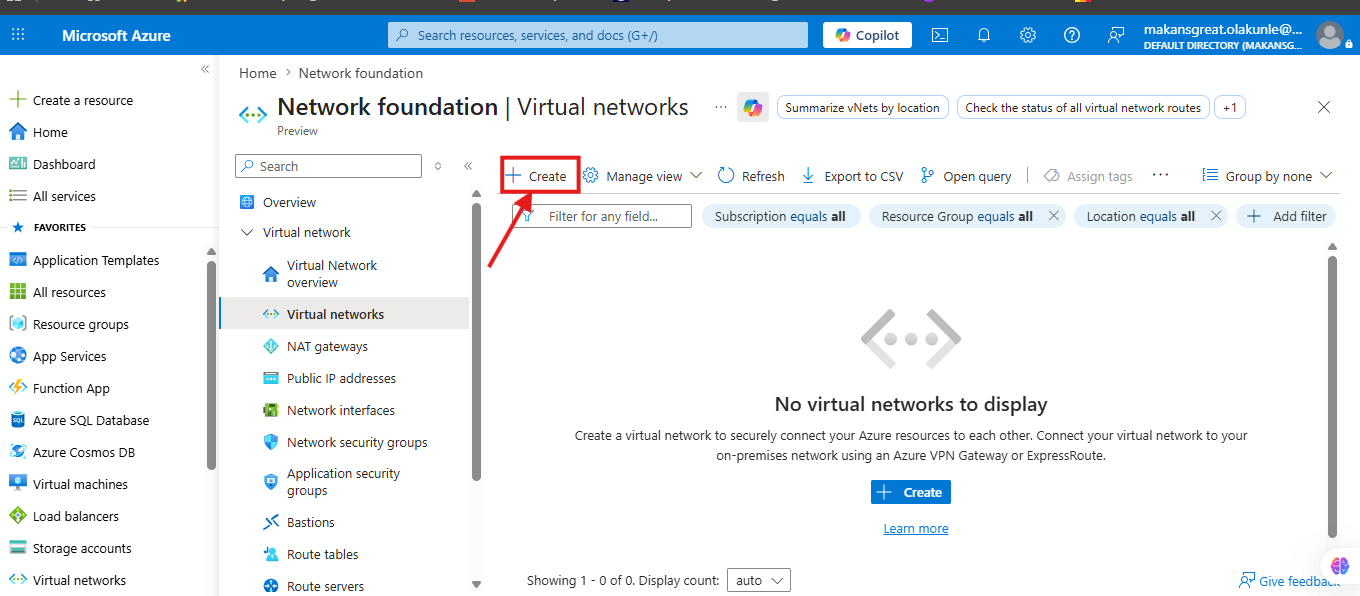
-Click on +Create(With a plus sign)
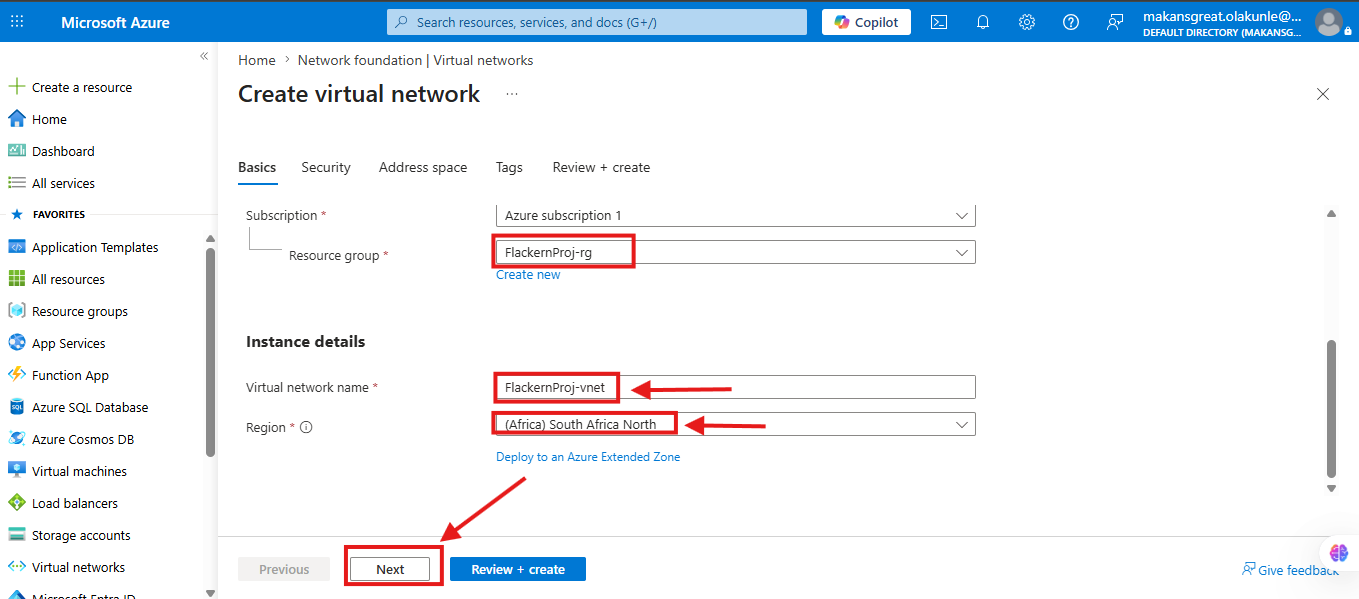
2. Define Basic Settings
Subscription: Select your subscription
Resource group: Choose an existing resource group or create a new one.
Region: Select the same region as your resource group
Virtual Network Name: Provide a name for the VNet.
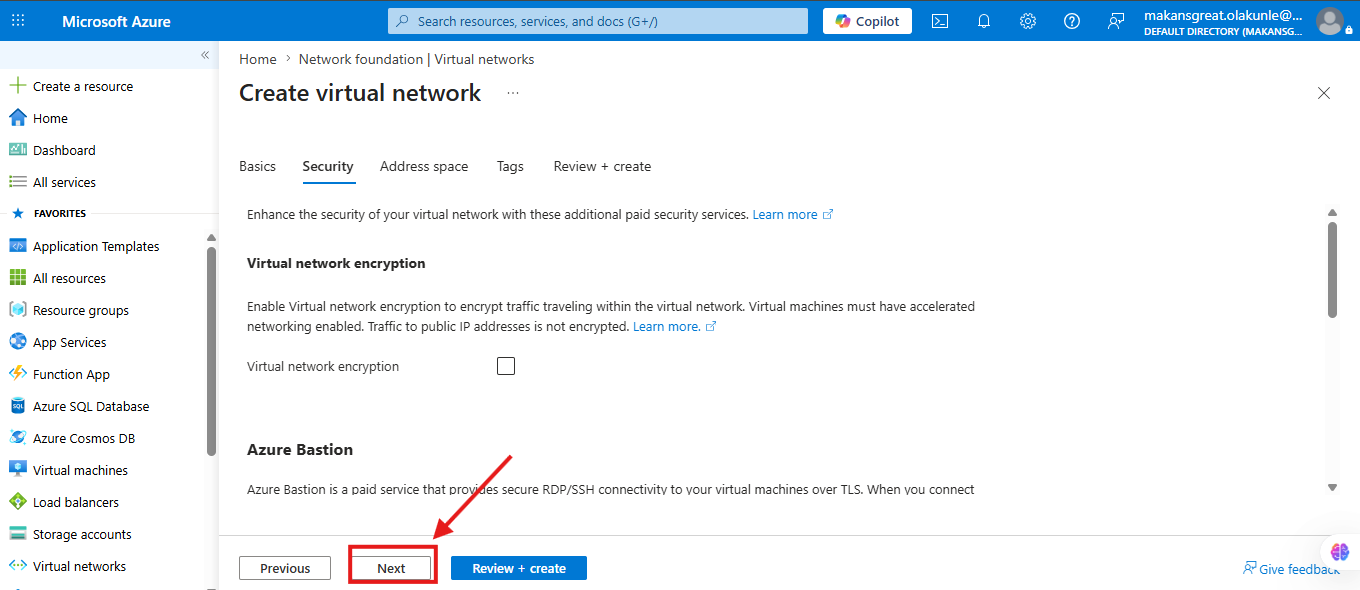
Click on Next and Next under the Security
3. Define IP Address Space
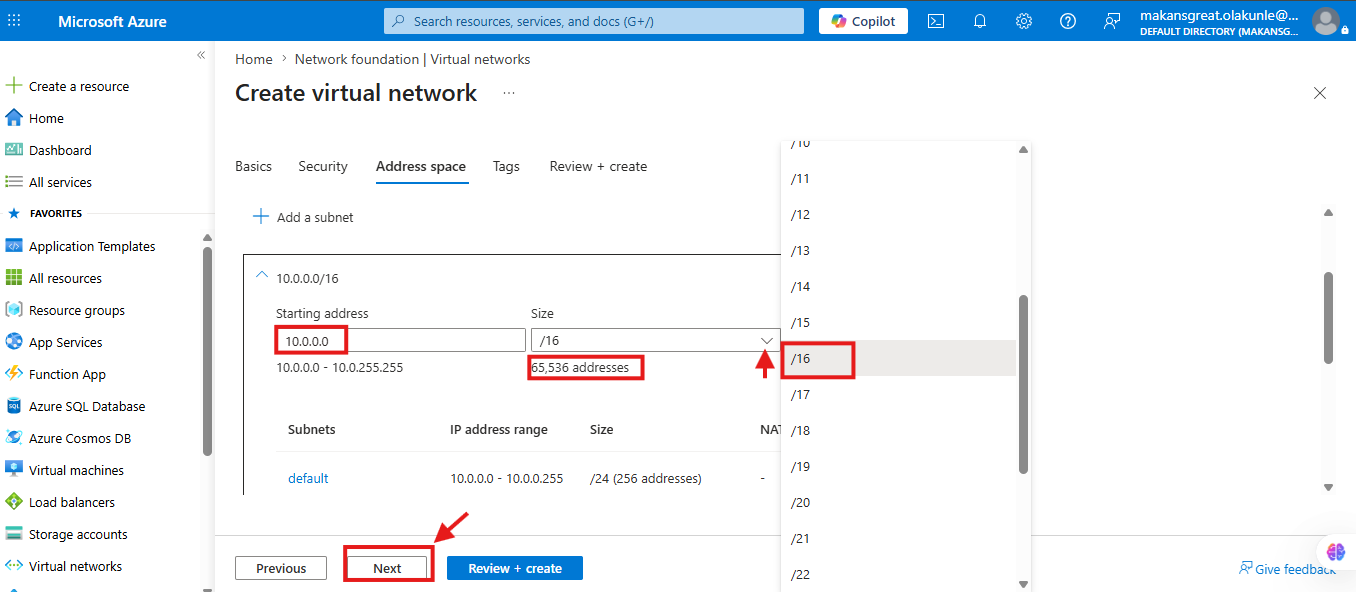
Enter the IPV4 address 10.0.0.0/16 space for your virtual network. The image below shows that we can have 65,536 IP addresses within this network.
NOTE:Whenever you create your VNet there is a subnet that comes with it defaultly. We delete the subnet and create our own Subnet
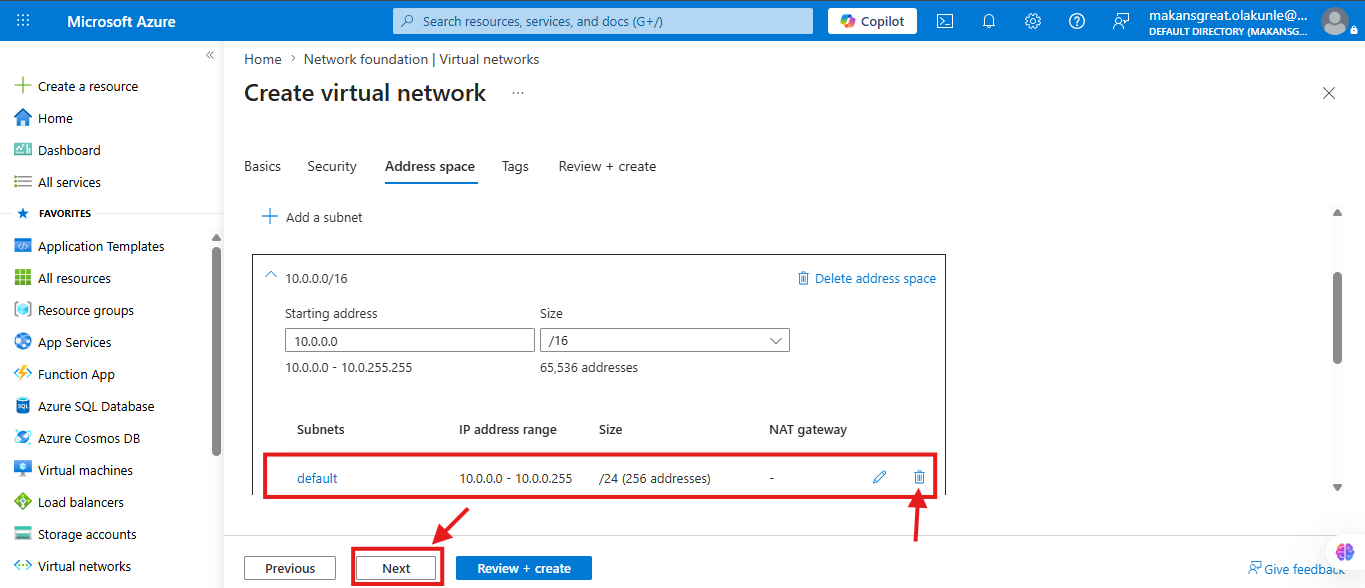
-Click Next -> Review + Create -> Create
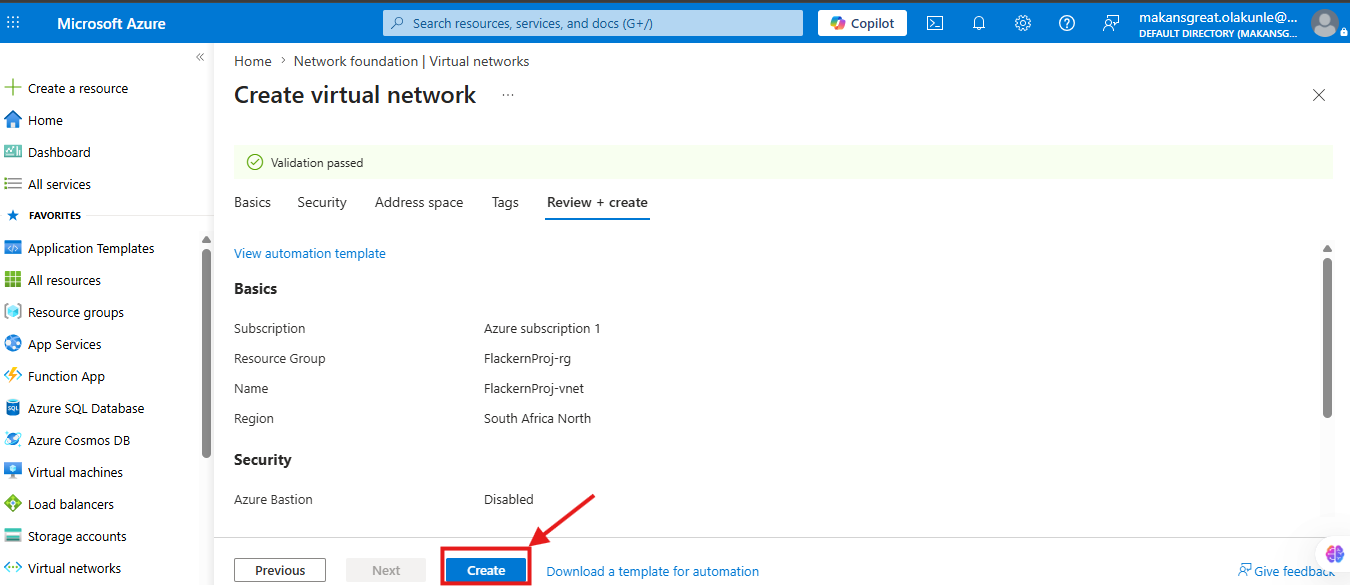
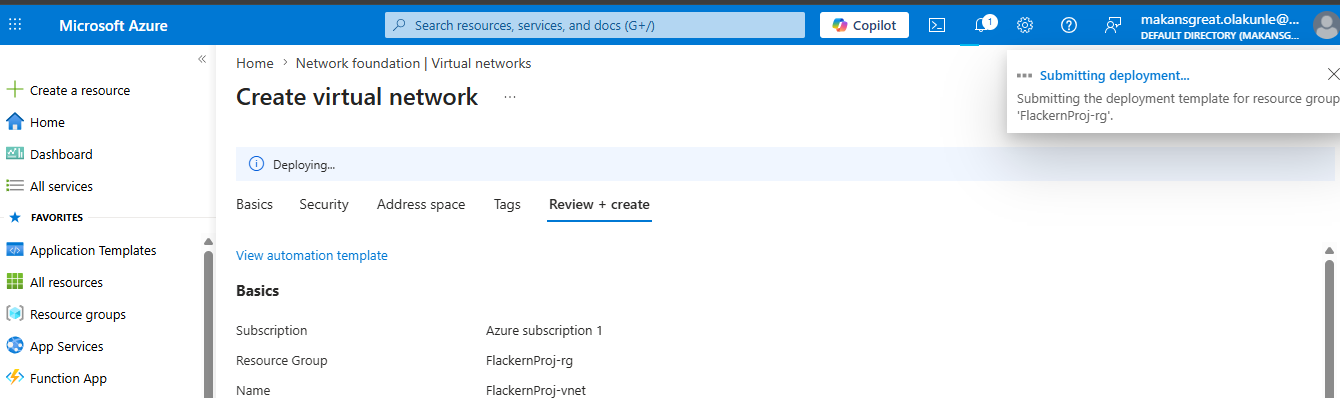
4.Click on Create, the deployment will be submitted, and the VNet will be created
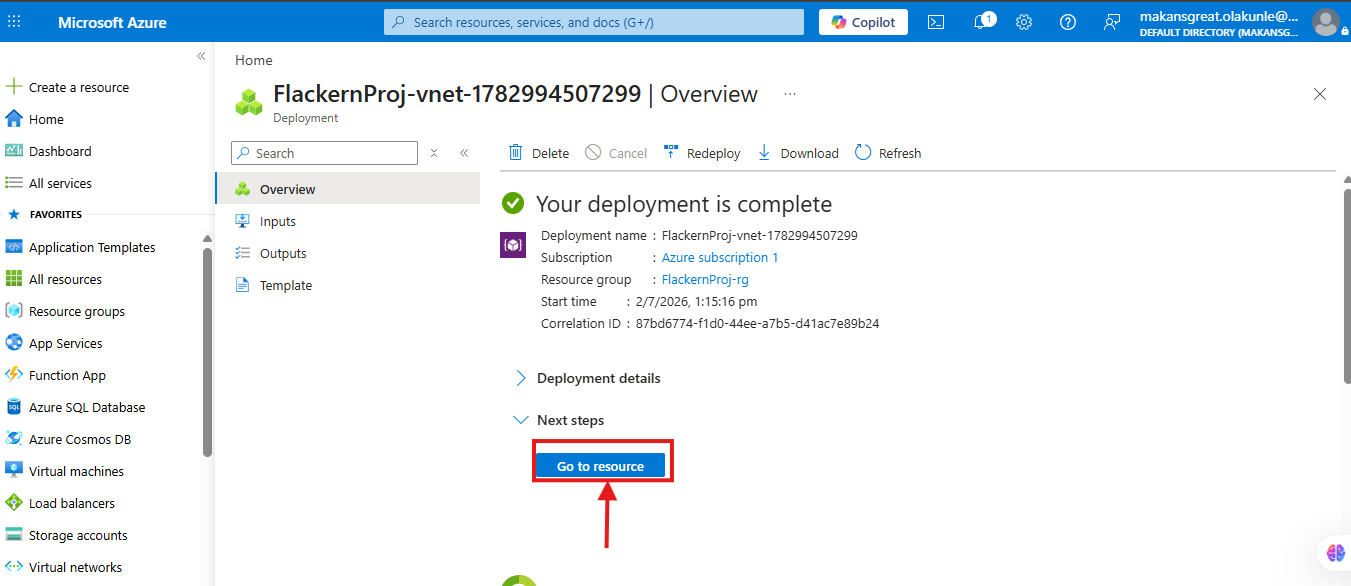
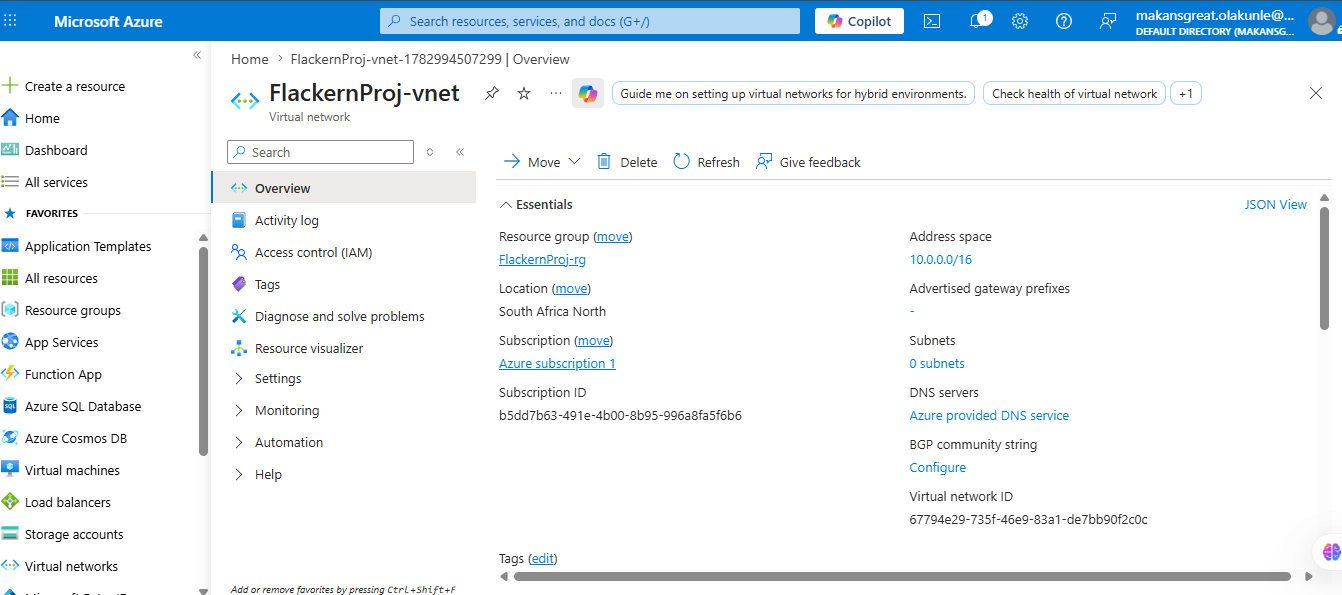
Click on Go To Resources and you will see the the Created VNet
Step 4: Configure Subnets
Now, let's Create two subnets within the virtual network:
1 AzureBastionSubnet
2 Default Subnet( Create another subnet)
Type Subnet on the search bar and click on Subnet
Click +Subnet to define each subnet
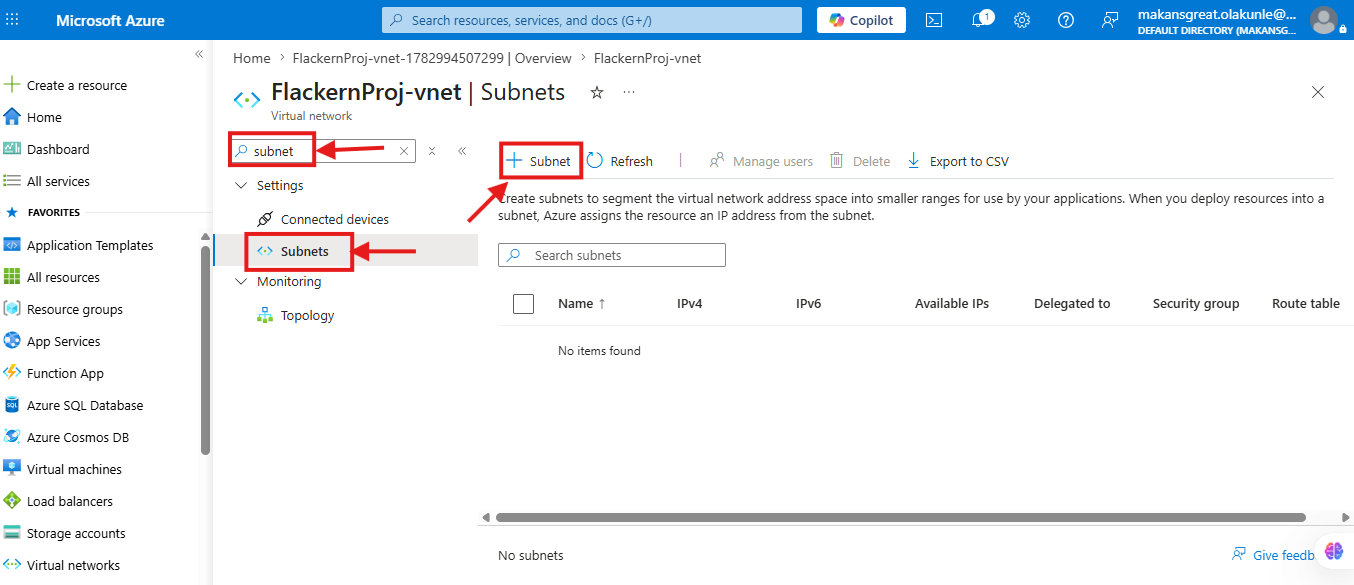
Subnet Creation- Add a Subnet
AzureBastionSubnet
Azure Bastion requires a dedicated subnet named exactly:
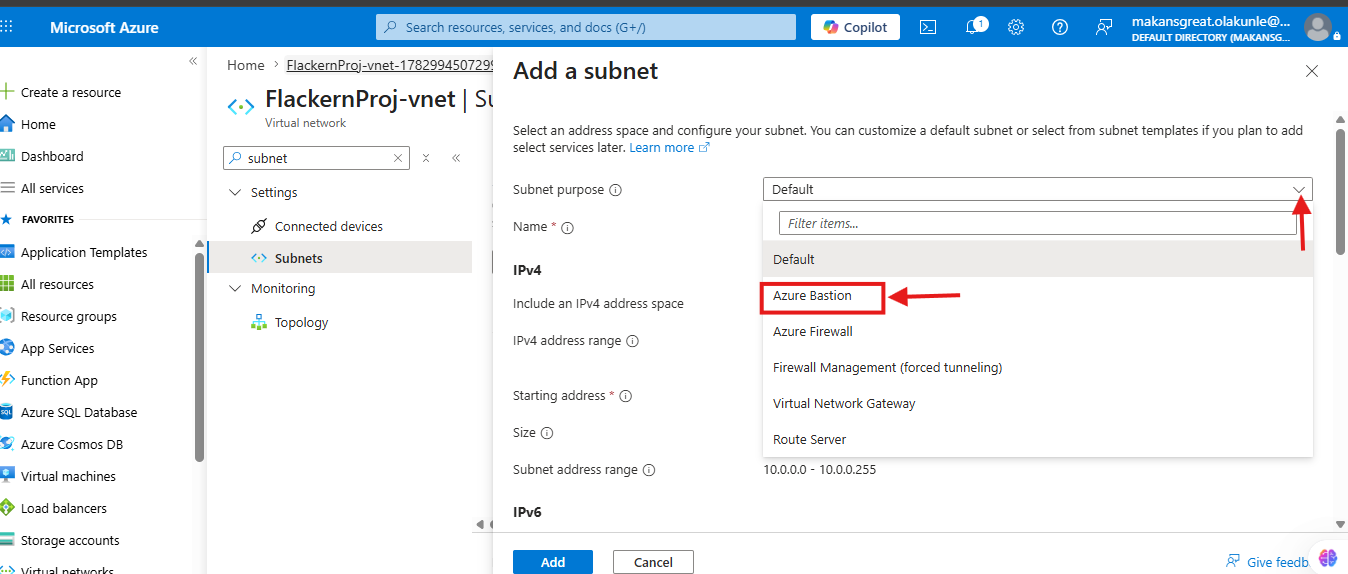
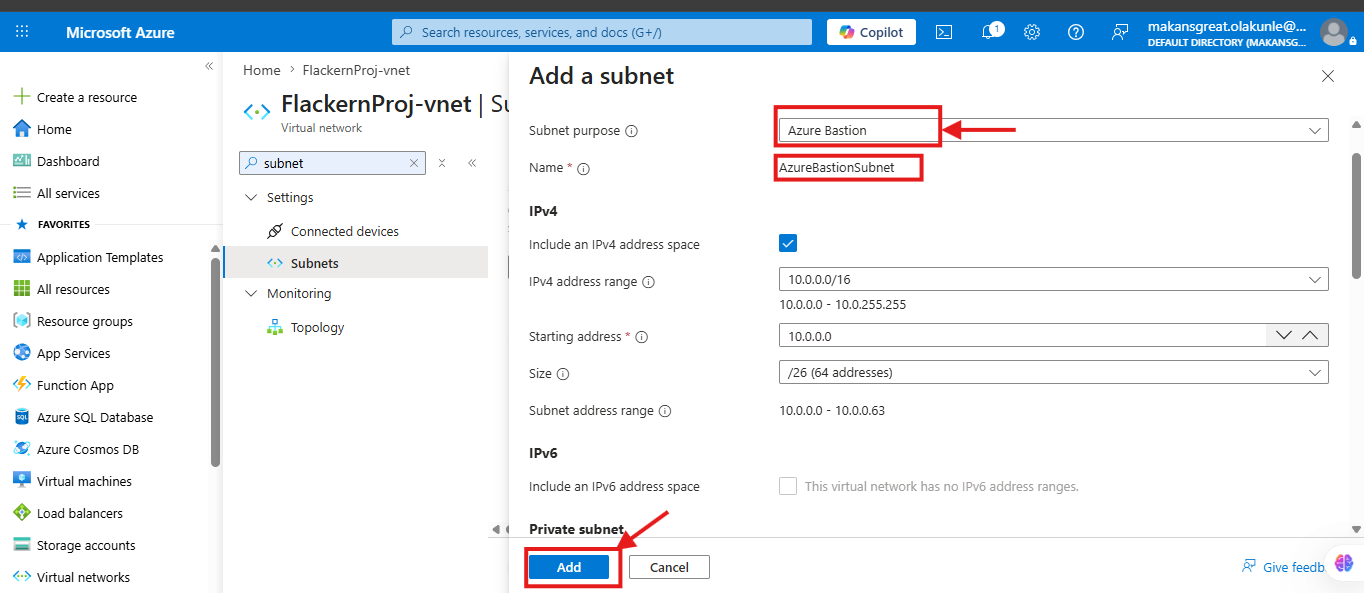
Configure each subnet as follows:
Subnet purpose: Azure Bastion
Subnet Name: AzureBastionSubnet
Subnet Address range: Specify the subnet range within the virtual network address space (10.0.0.0/26).
Create another subnet(Default VM Subnet)
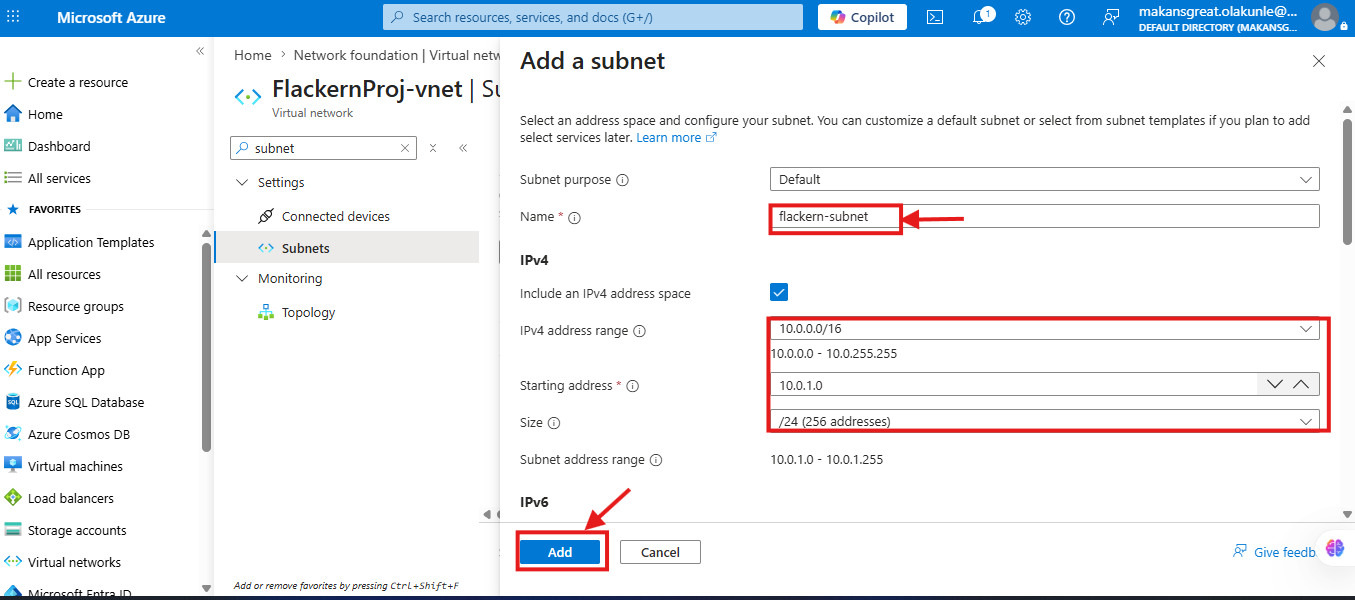
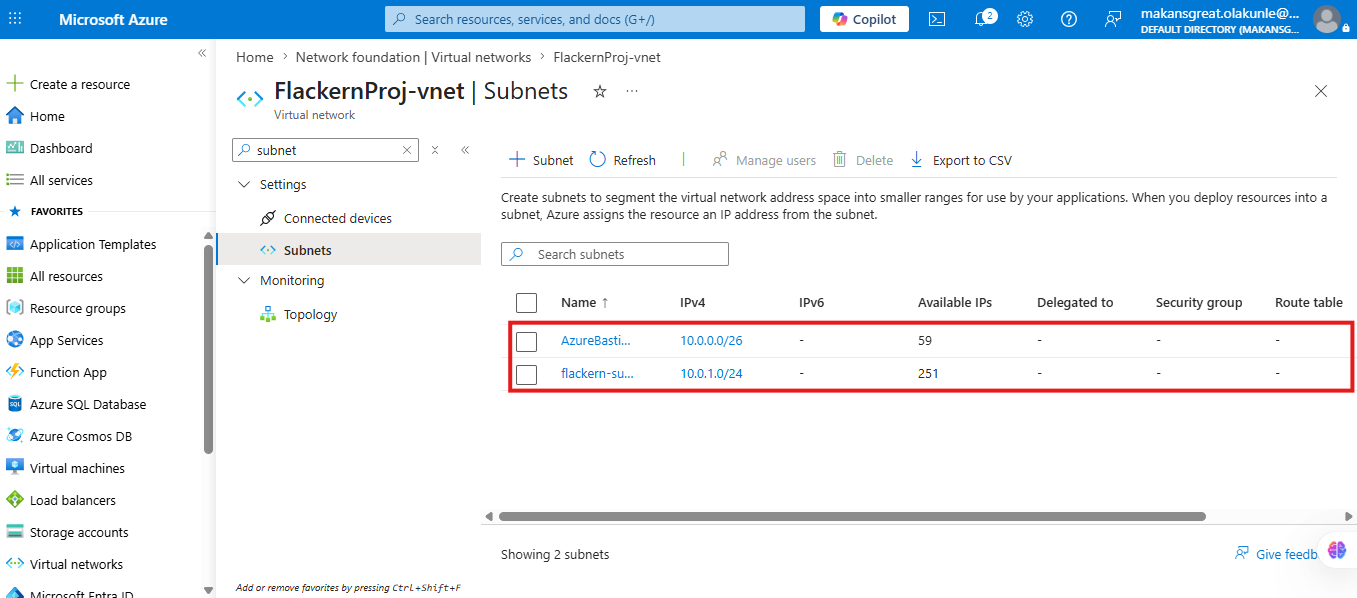
Step 5: Create an Ubuntu Virtual Machine
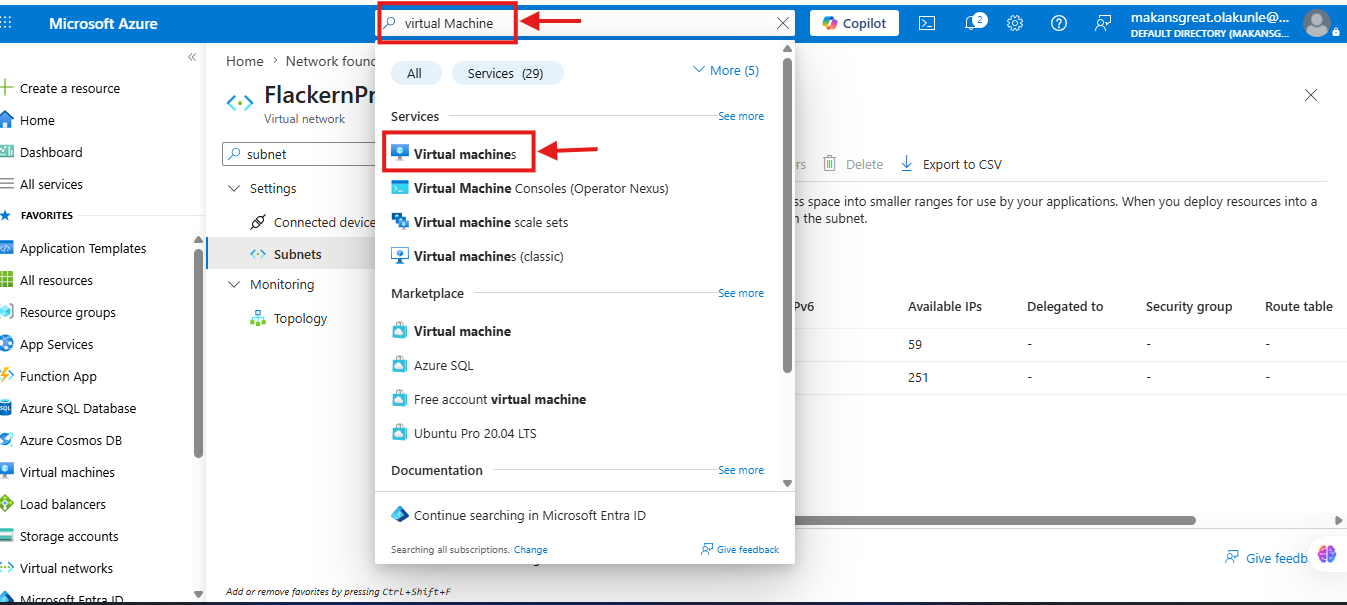
1.Type "Virtual Machines" in the search bar at the top. Once you see virtual machine display click on the virtual machine
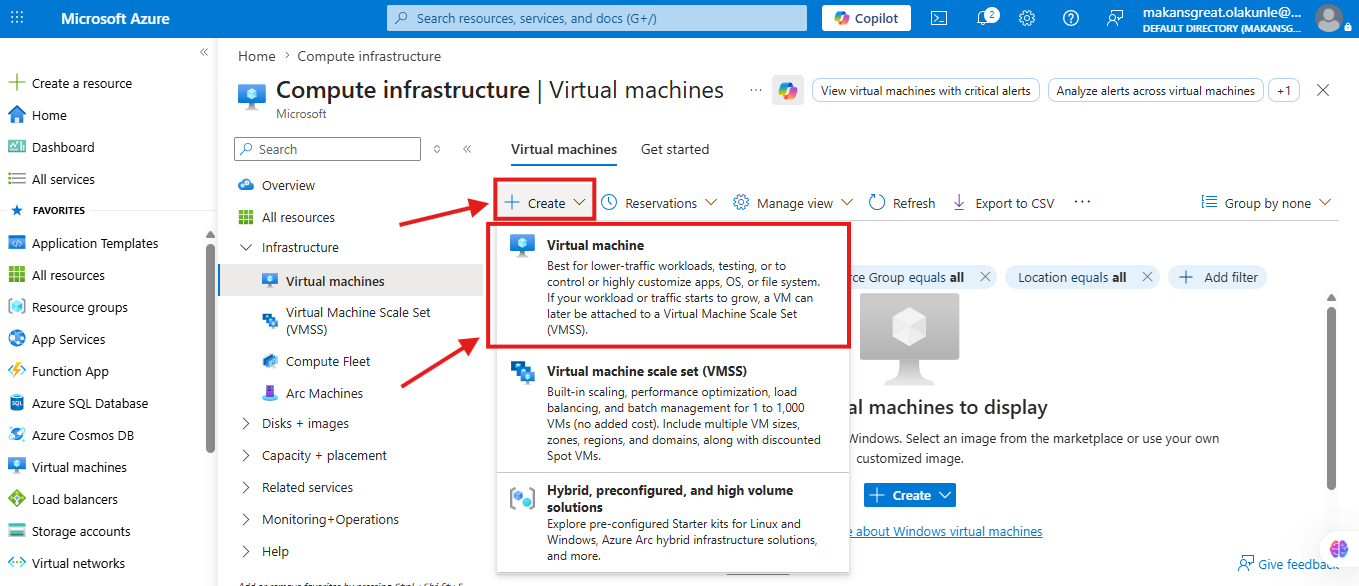
When you click on "Create" button, it will display a drop down as shown below. You will then click on the Azure virtual machine highlighted in red arrow. This will take you to the project details where you will begin to fill the basic configuration for you to start creating your virtual machine.
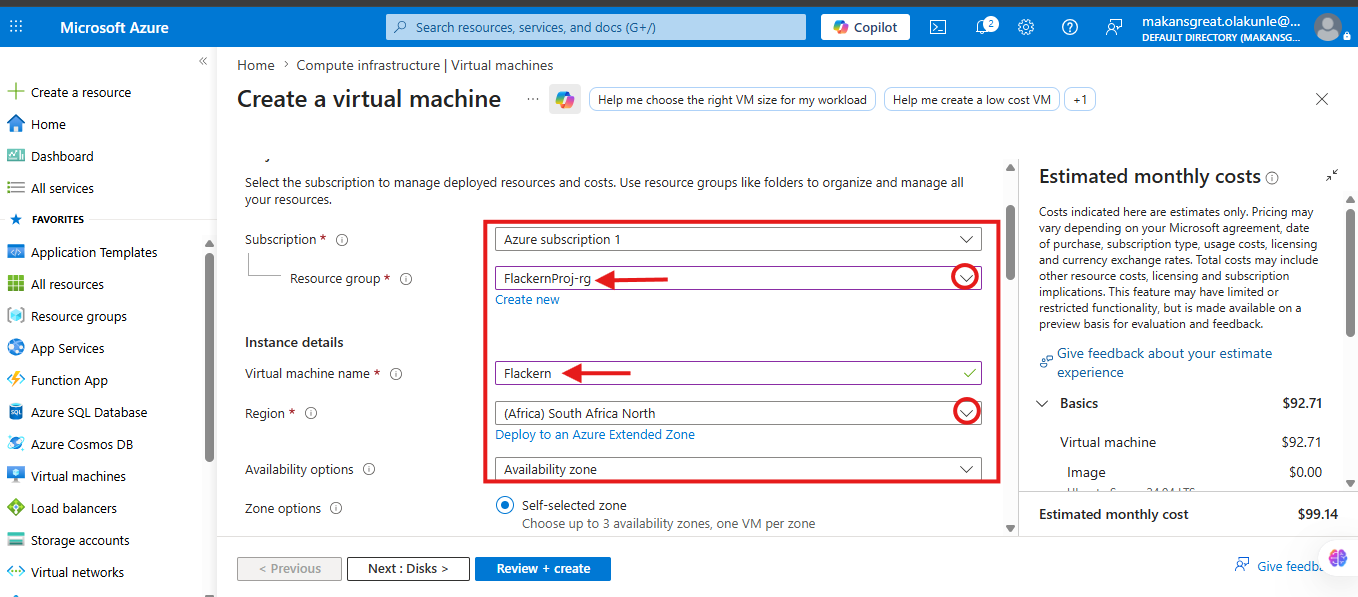
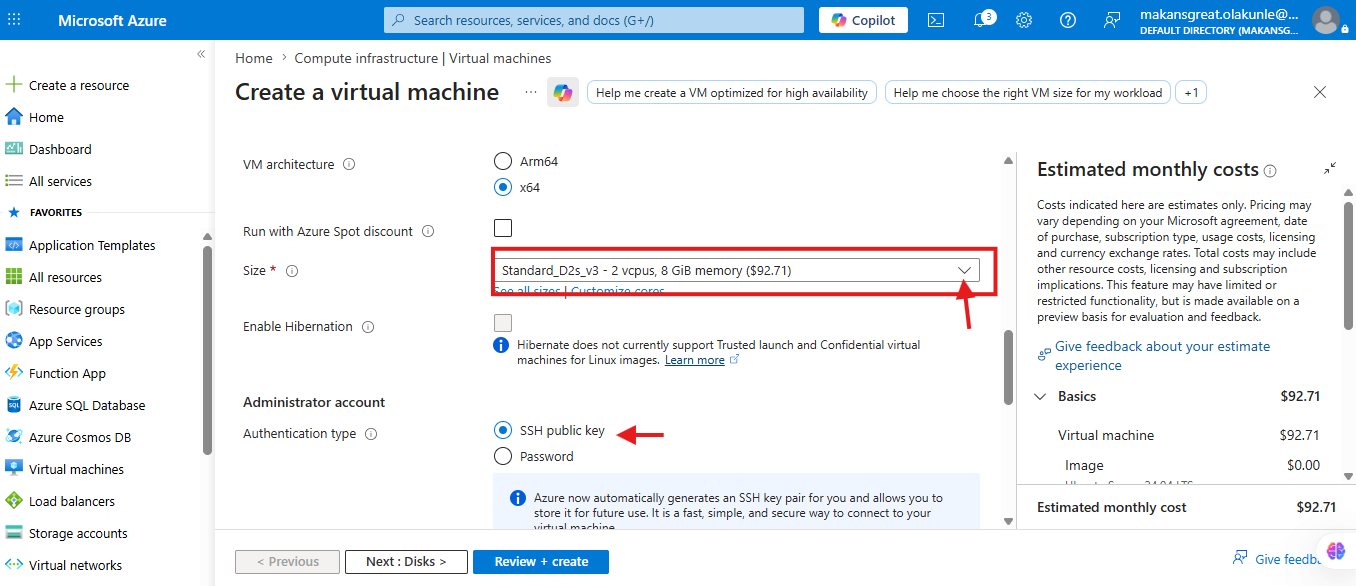
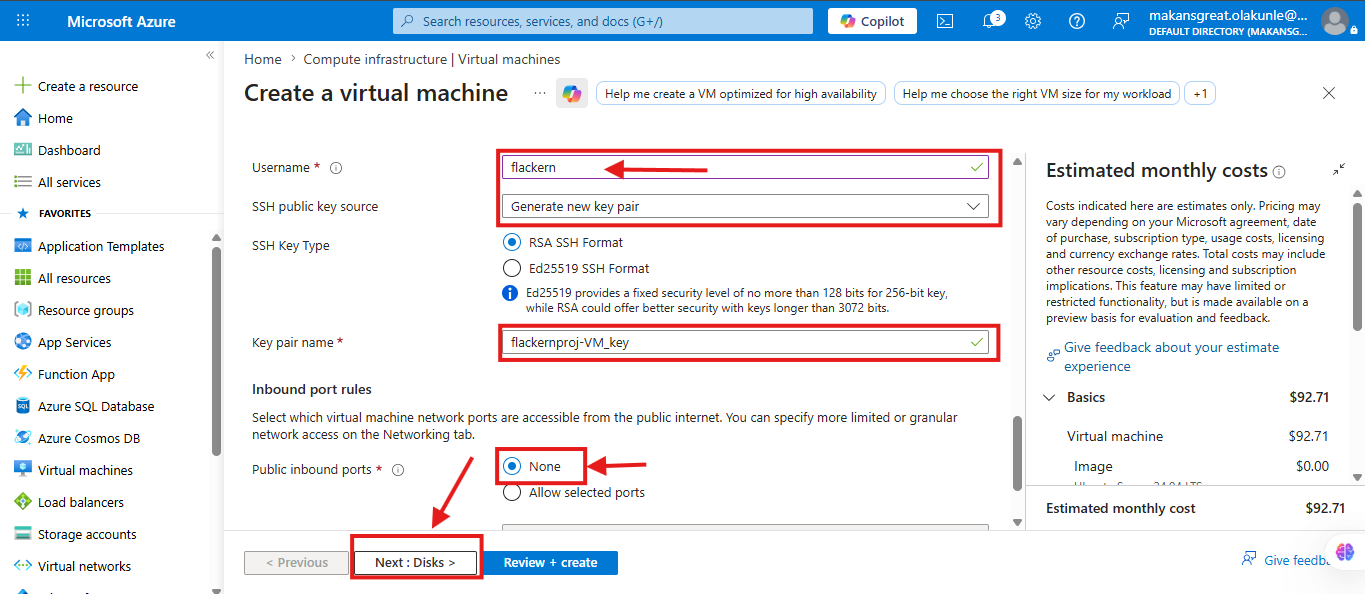
2.Create virtual Machine under the BASIC CONFIGURATIONS by filling the following tabs as follows:
Subscription: Select your subscription(Azure Subscription 1)
Resource Group: Use an existing or create a resource group (FlackernProj-rg)
Virtual machine name: flackern-VM or use your desired username
Region: Select a nearby or preferred location ((Africa) South Africa North)
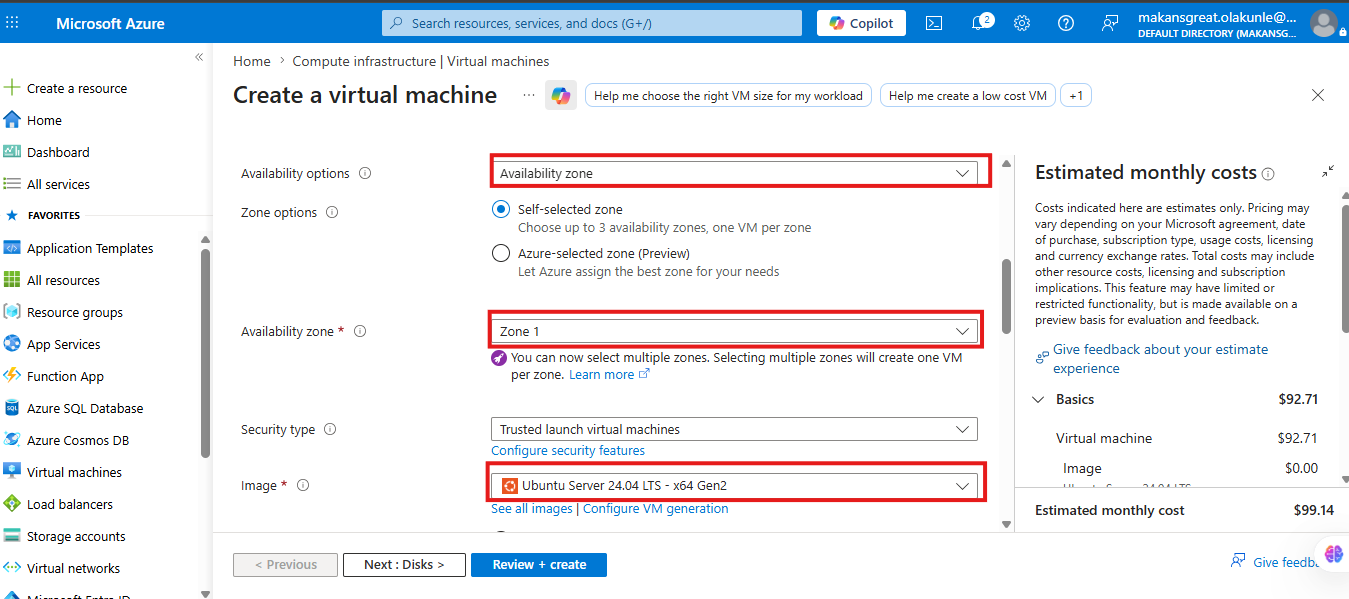
Availability options: Leave it as default (Availability Zone)
Availability Zone: Zone 1 (For this demo we select only one zone)
Security type: Standard
Image: Ubuntu Server 24.04 LTS - x64 Gen2
VM architecture: x64
Size: Standard_B2as_v2 - 2 vcpus, 8 GiB memory ($71.32)
Authentication type: SSH public key
Username: Use your desired username
SSH public key source: Generate new key pair
SSH Key Type: RSA SSH Format
Key pair name: flackern-vm_key or use your desired username
Public inbound ports: NONE
Select inbound ports: All traffic from the internet will be blocked by default.
3.Configure Disks
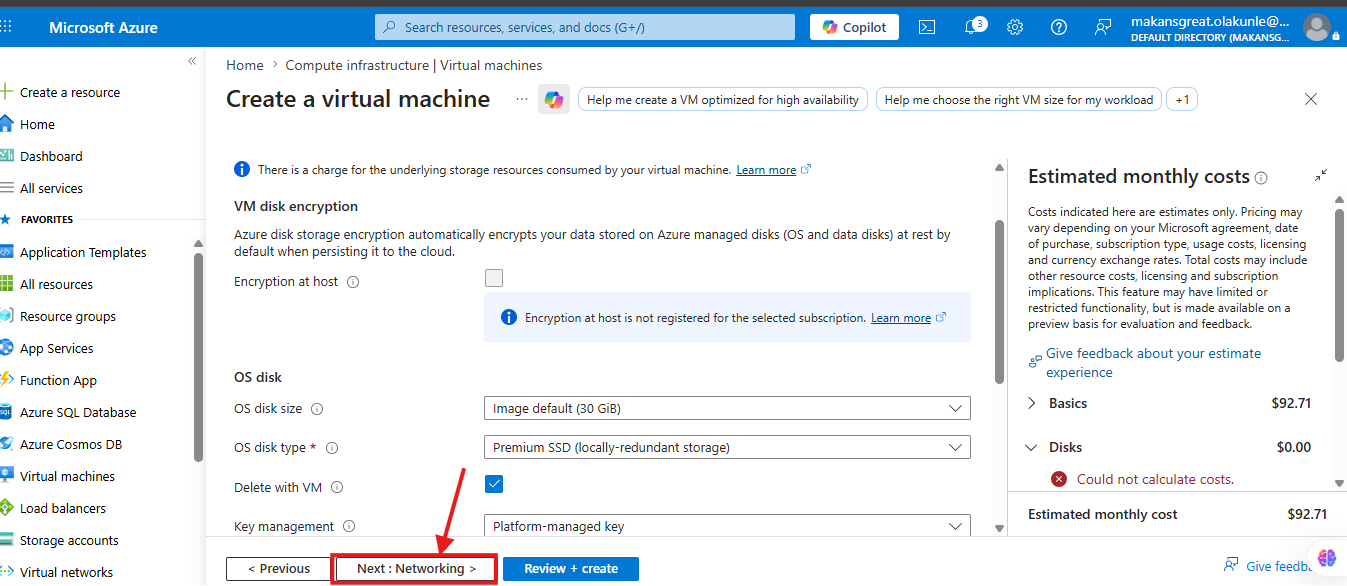
Click on Next : Disks >, this leads you to on the next page, you can use the default OS disk size, use the Image default (30 GiB) and for the OS disk type, use the default settings Premium SSD (locally-redundant storage) unless you have unique configuration requirements.
4.Networking Configuration
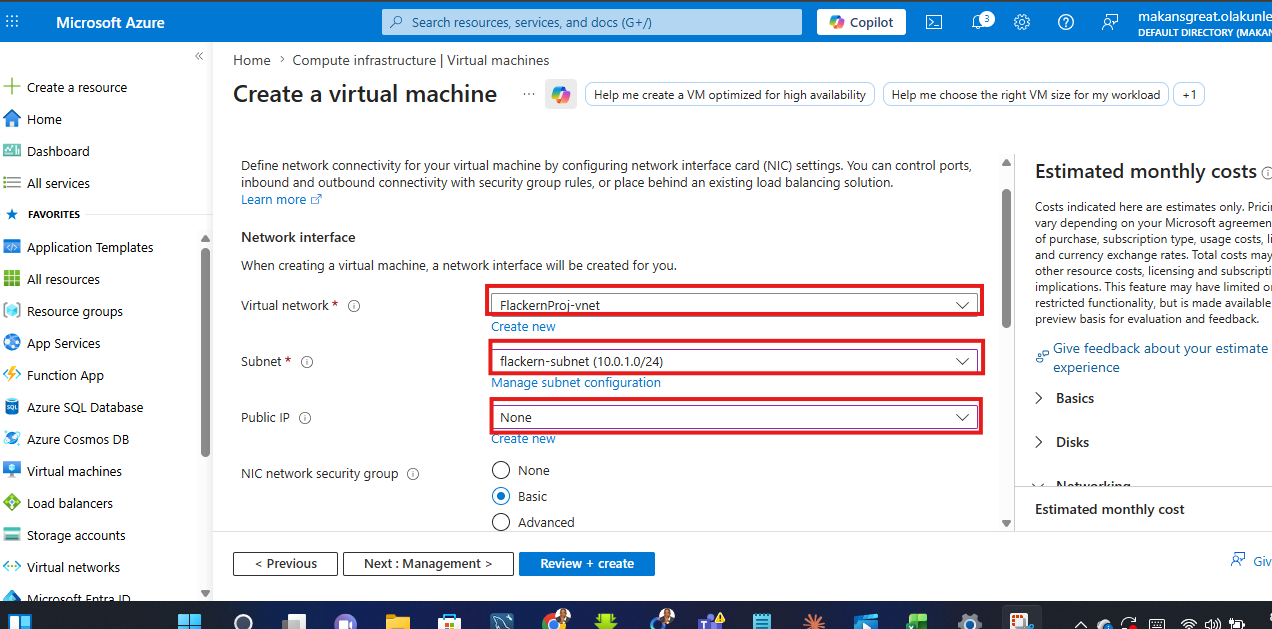
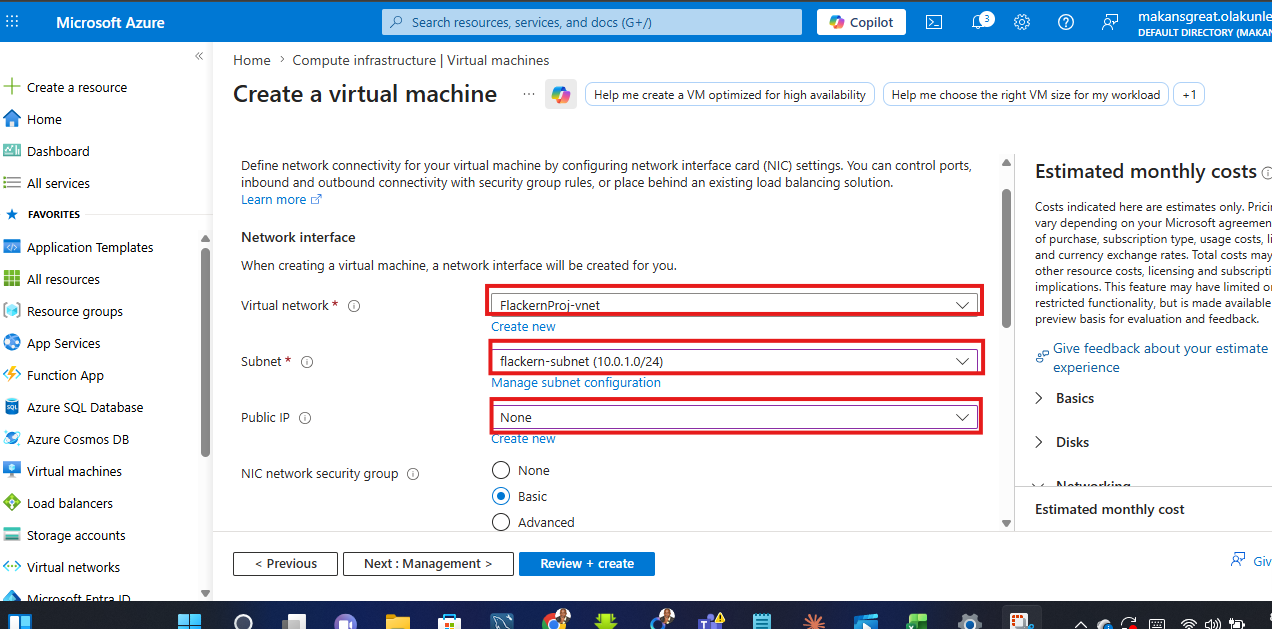
On the bottom of the last page in Step 3, Click on Next : Networking >, this leads you to the Network interface page below:
Create your virtual network and subnet or make use of the one you have created before
Virtual Network: flackernproj-Vnet (Vnet created before)
Subnet : Default Subnet (flackern-subnet)
Public IP: None
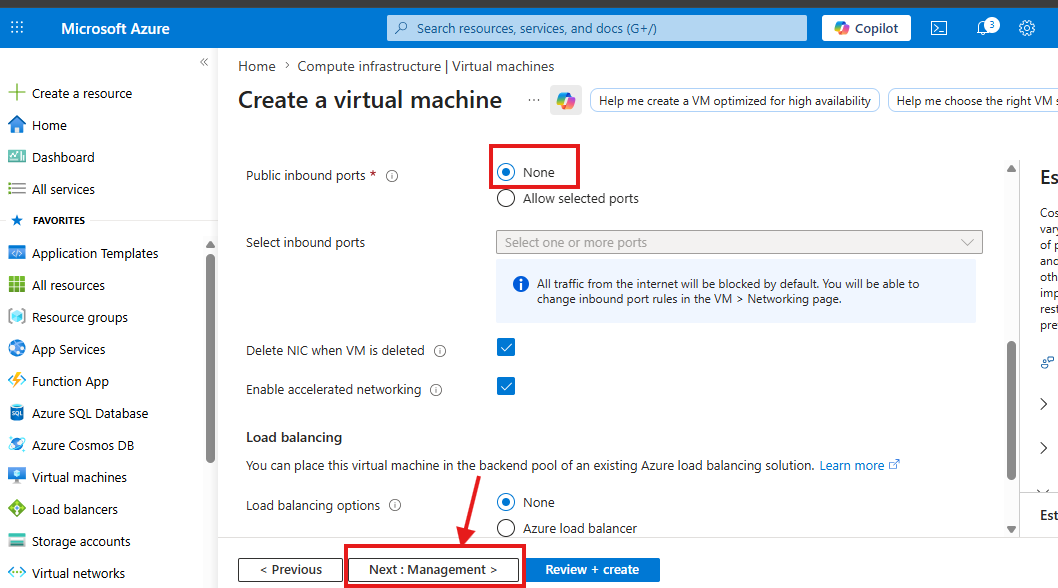
Public Inbound Port: None
Note: We are creating a private VM,so you select None for Public IP and Public Inbound Port.
**Remember: Public VM, Public IP
**Private VM, No Public IP**
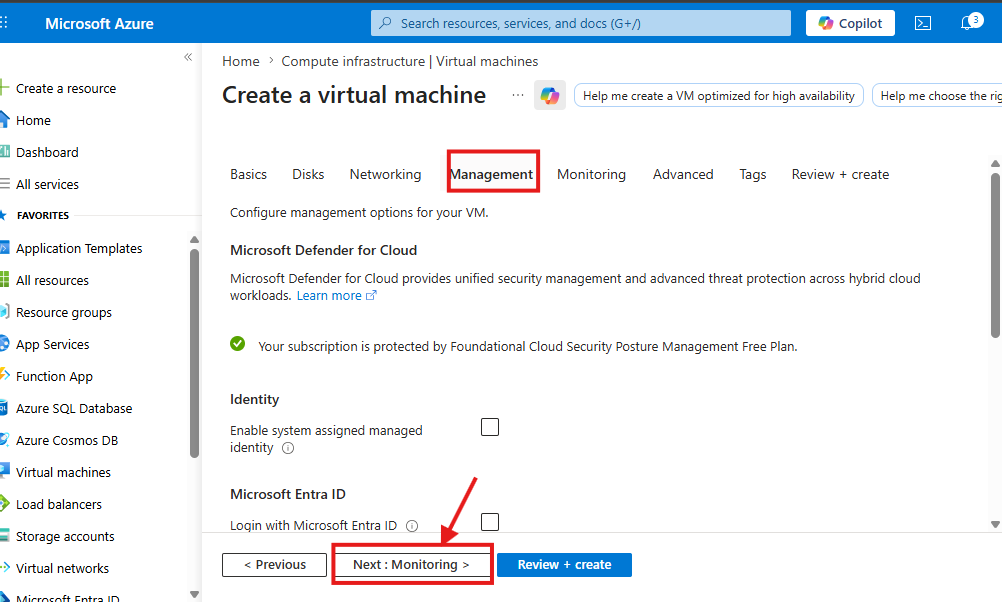
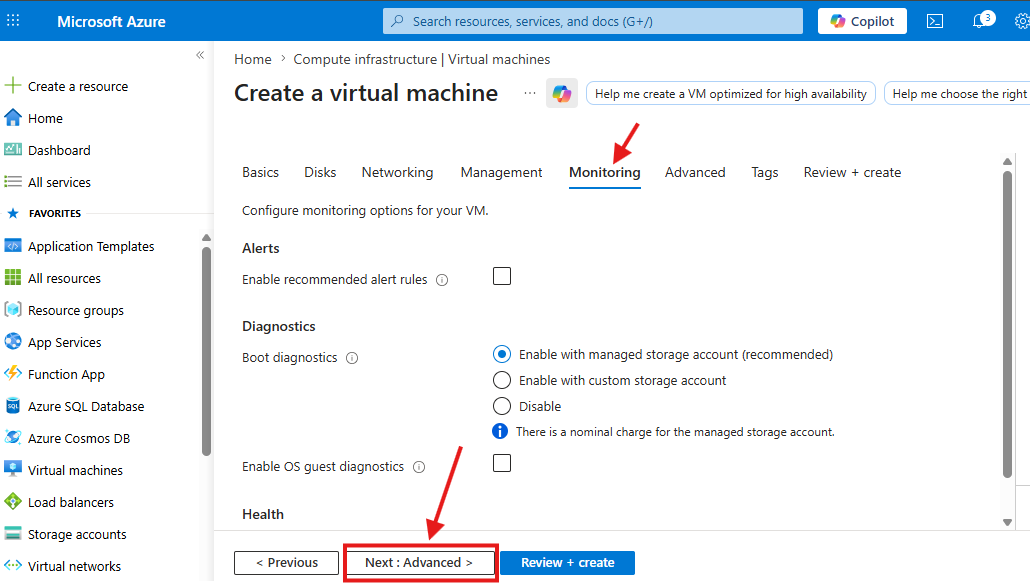
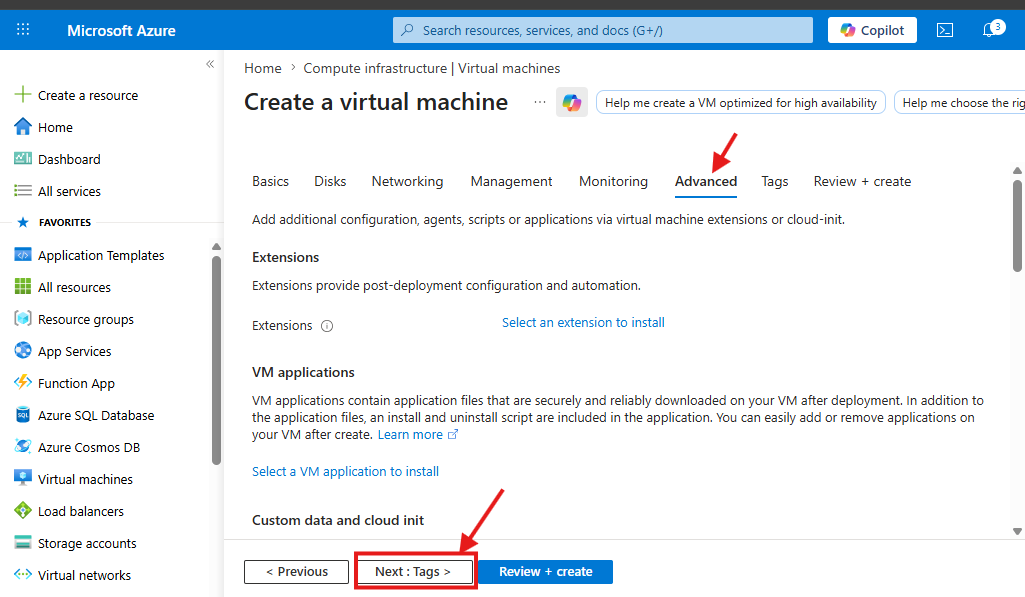
5.Management, monitoring, Advanced, Tags: These pages usually displayed as default. Find their default screenshots below. However, you may wish to skip them and proceed to “Review+Create”
Step 5. Generate SSH private Key
After a successful Linux VM deployment process, Azure will validate the configuration
Then Click "Review + create". This will show validation passed as highlighted below.
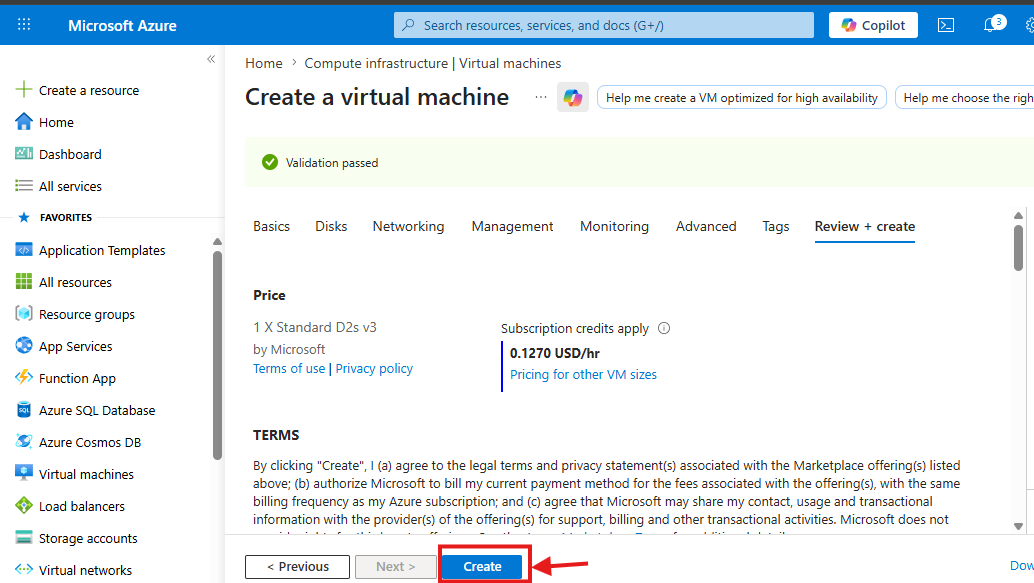
Then click “Create” . This will take you to the next page to generate new key pair. Then, you will click on “Download private key and create resource” as shown below. The new key pair will then be downloaded on your PC, while Azure will also provision your VM.
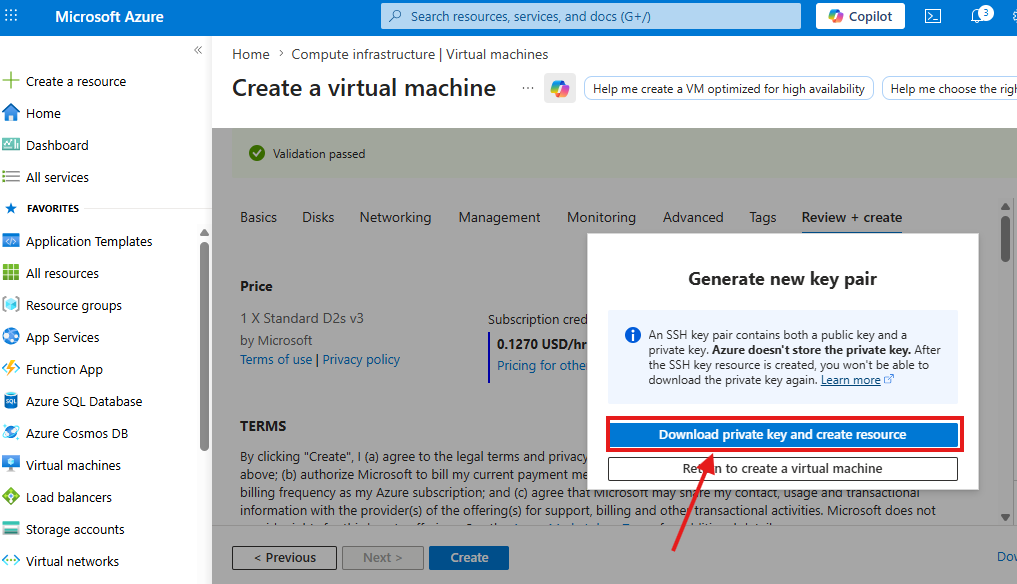
Download private key and create resource, afterwards, the deployment will start.
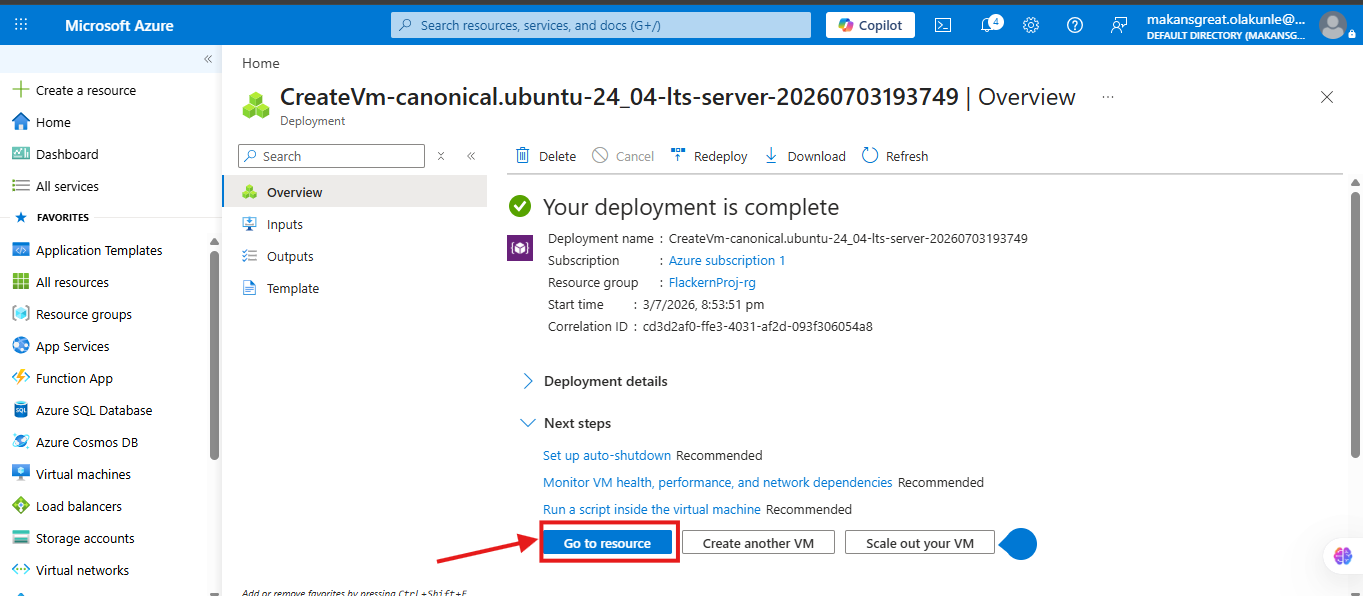
Wait for Deployment: Azure will now provision your virtual machine. This process may take a few minutes. Then the next page will show that your deployment is complete as shown below, then you will click on “Go to Resource”
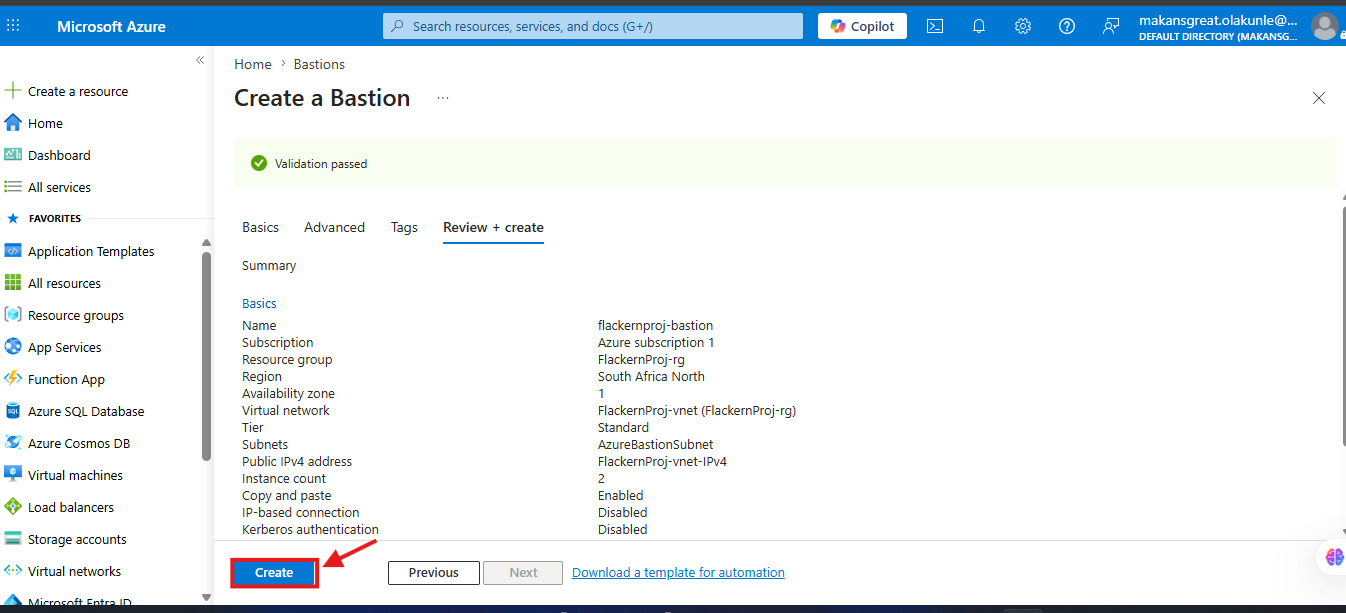
Step 6: Deploy Azure Bastion
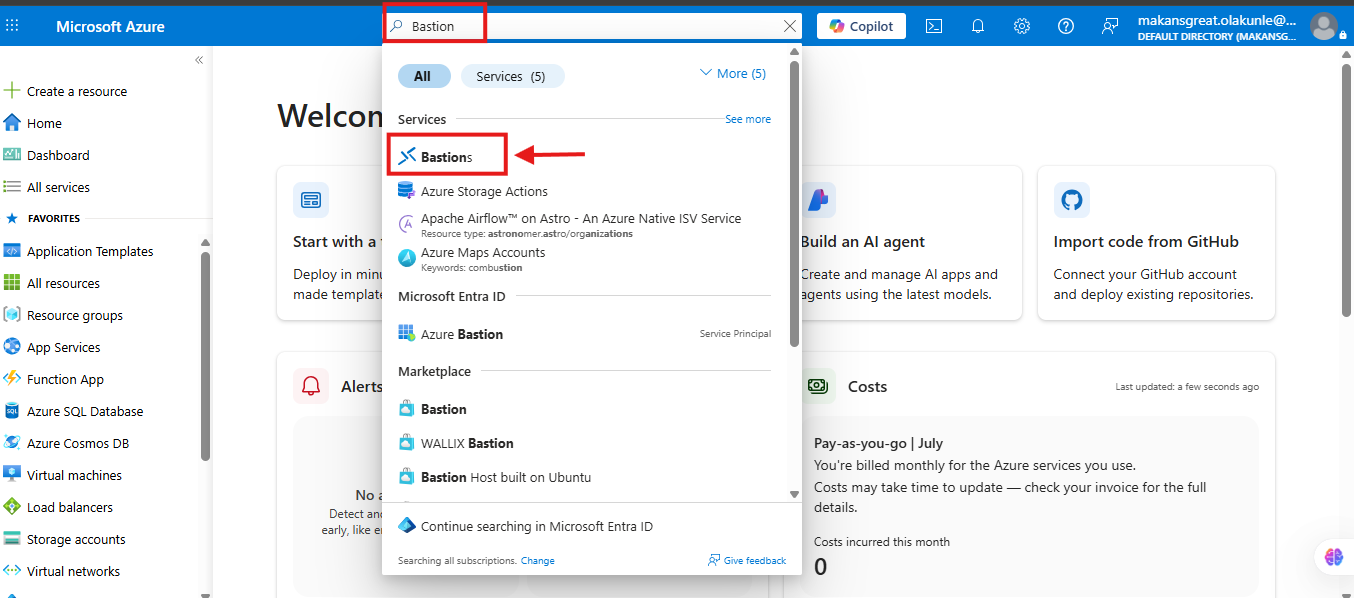
Type "Bastion" in the search bar at the top. Once you see Bastion display click on the Bastion
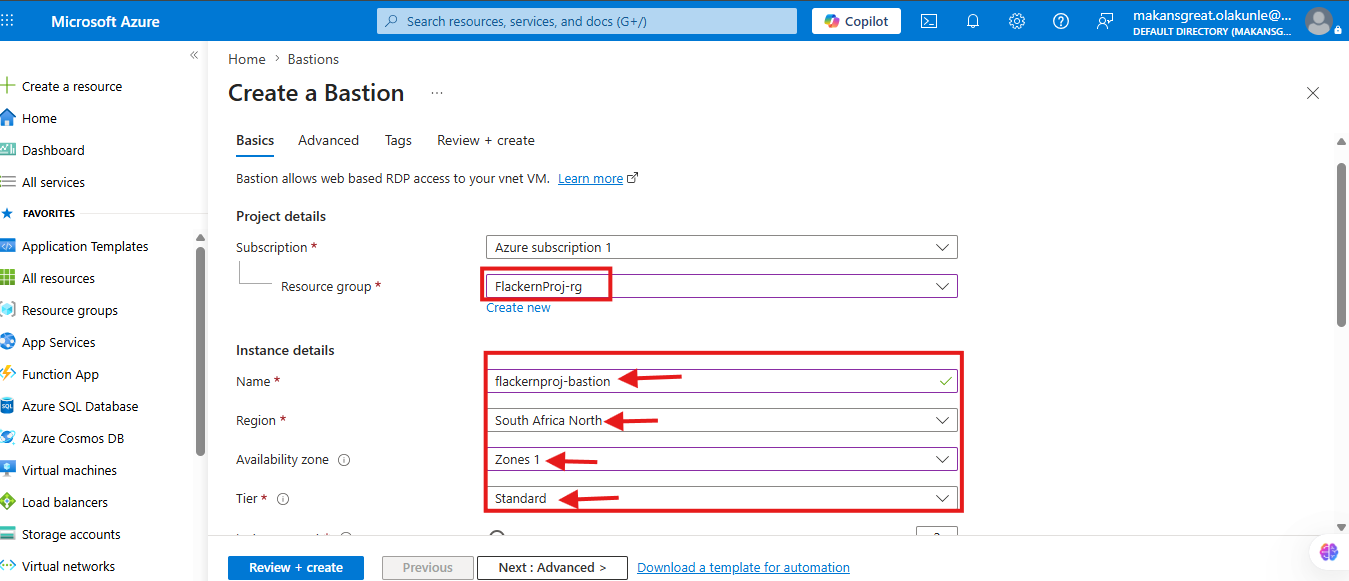
When you click on "Create" button,this will take you to the project details where you will begin to fill the basic configuration for you to start creating your Bastion
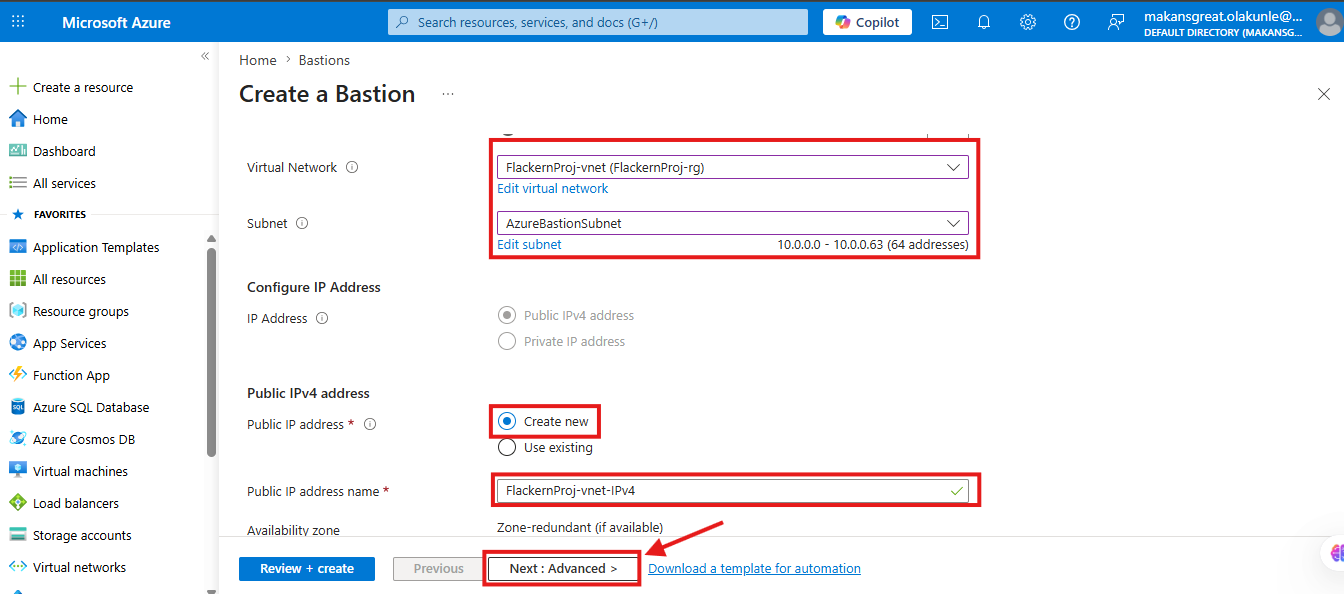
Advanced, Tags: These pages usually displayed as default. Find their default screenshots below. However, you may wish to skip them and proceed to “Review+Create”
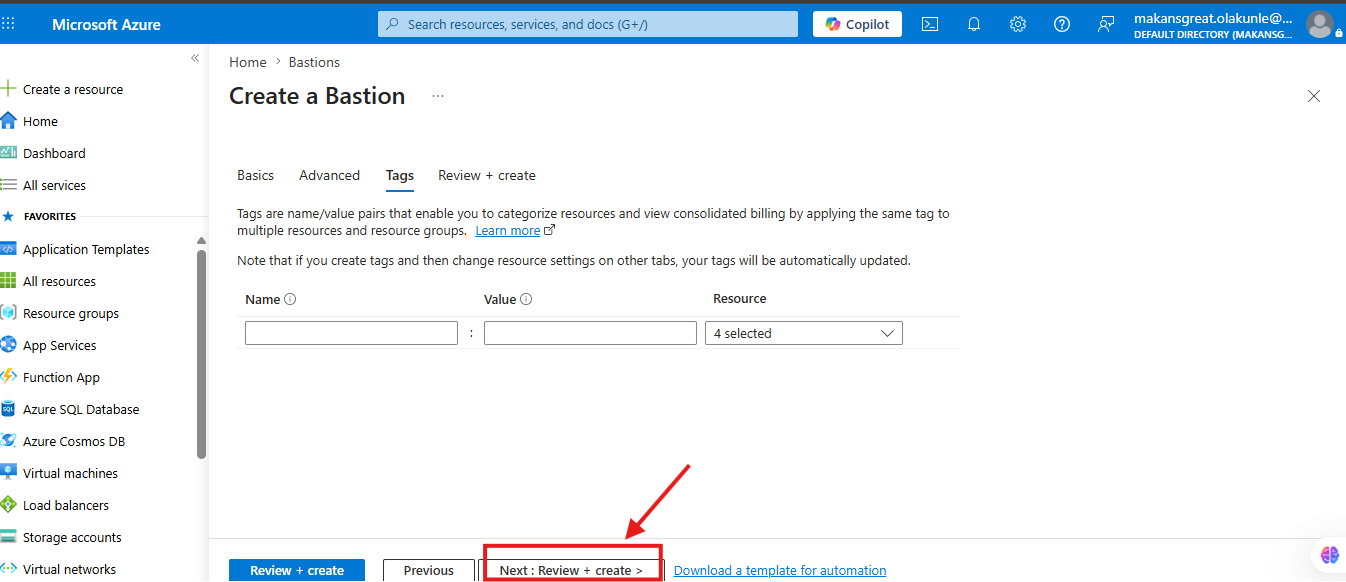
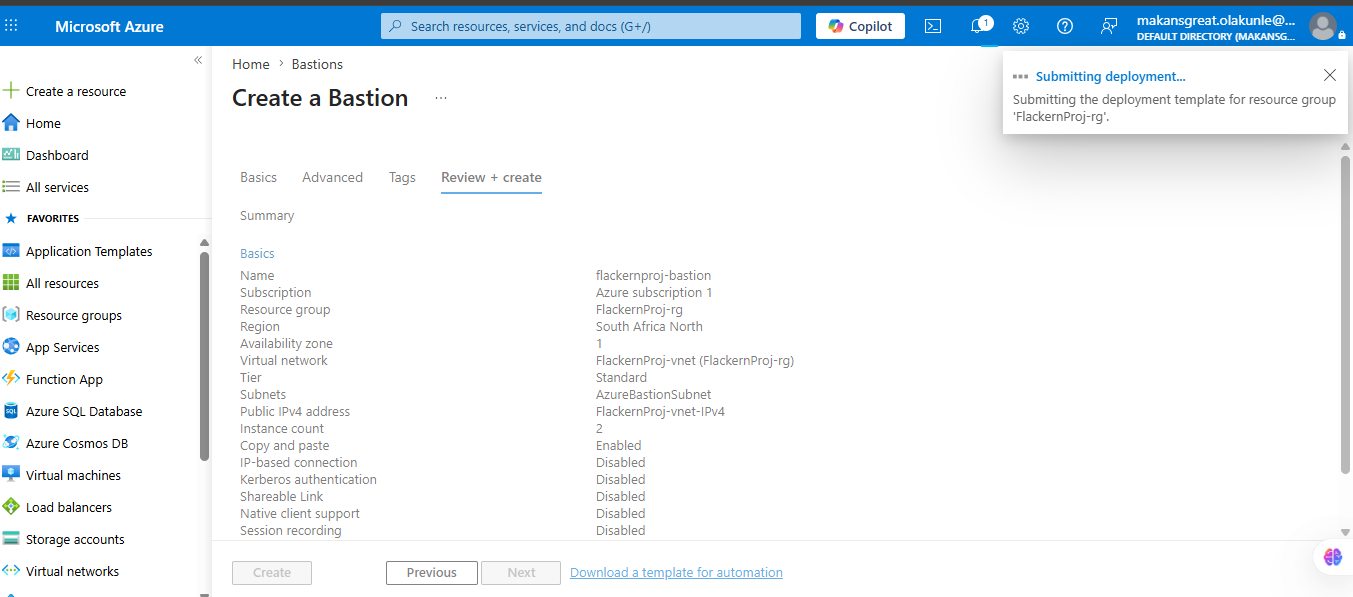
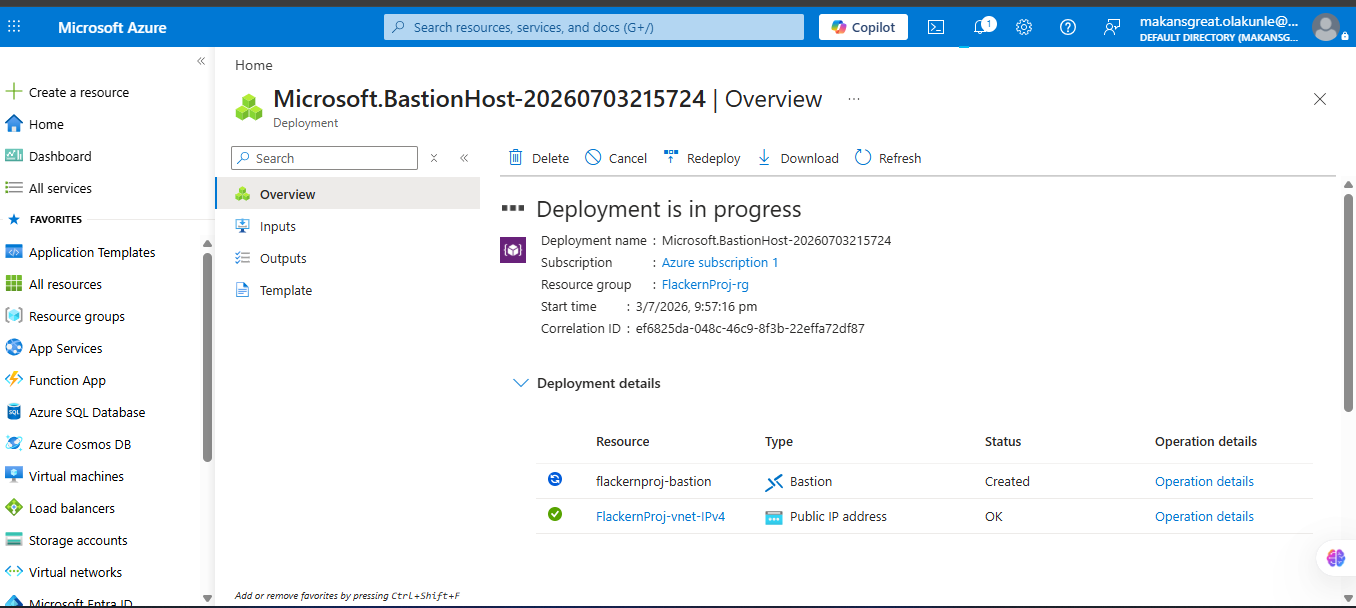
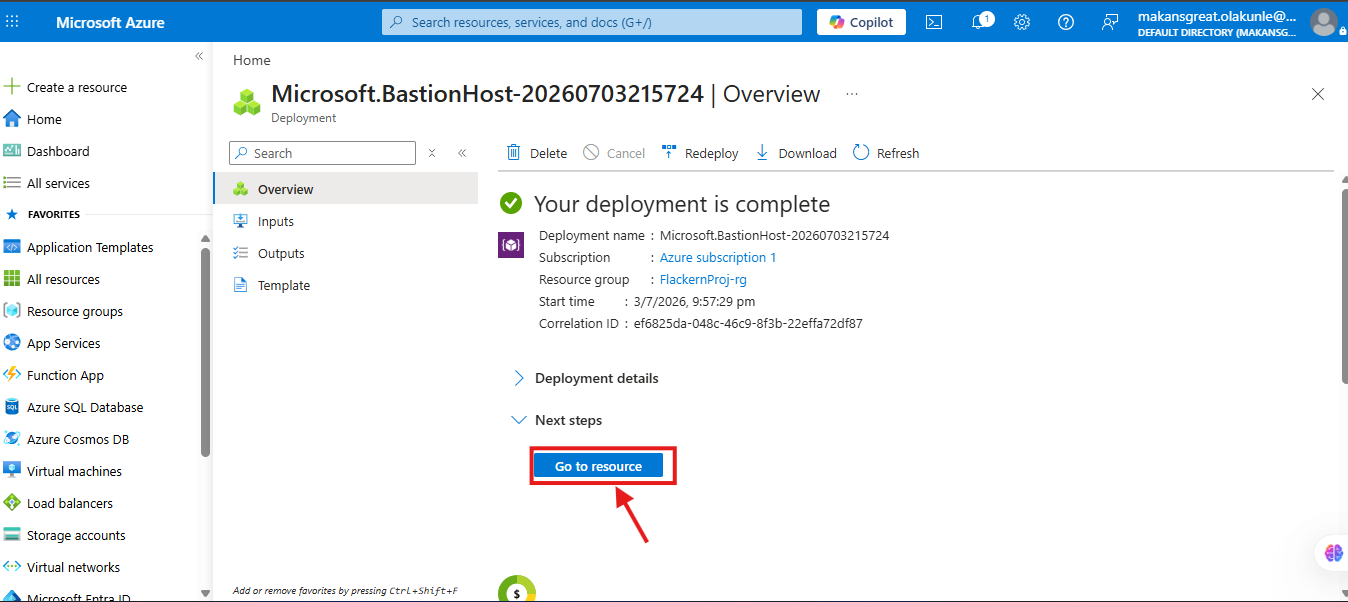
Click on Create after validation is passed
Connect to VM using Bastion:
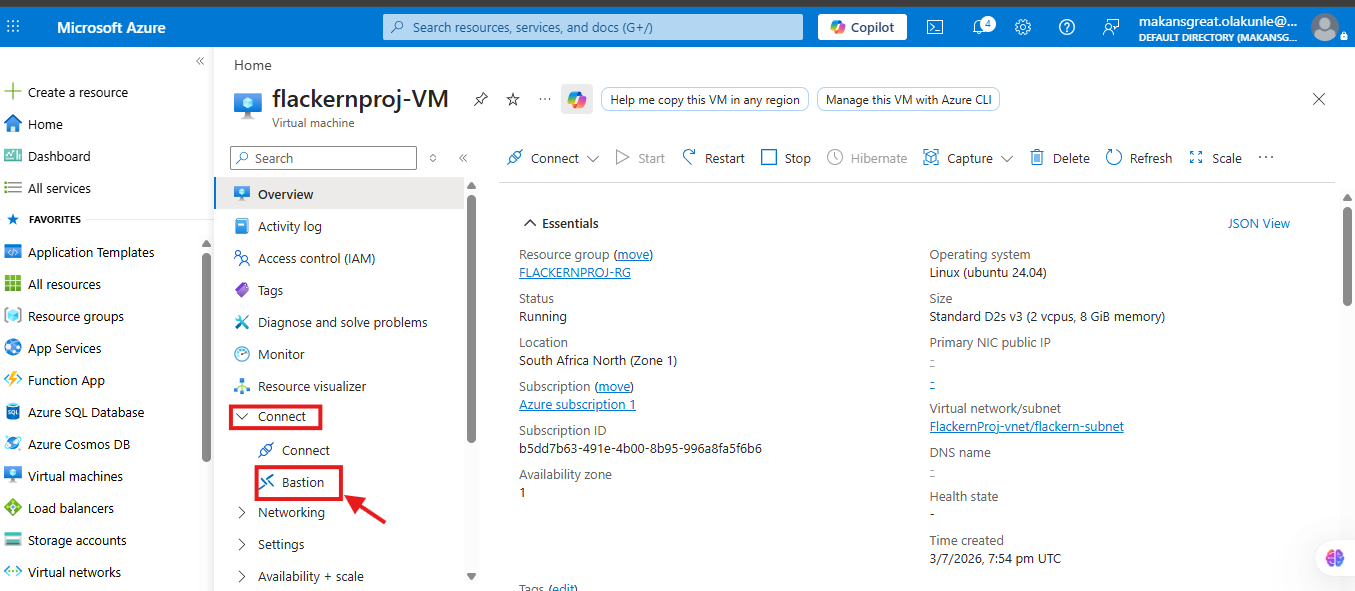
Once the VM is deployed, go to the VM in the Azure portal.
Click on the Connect button.
Select Bastion as the type of connection.
Enter the credentials (username and password or SSH key) and click Connect.
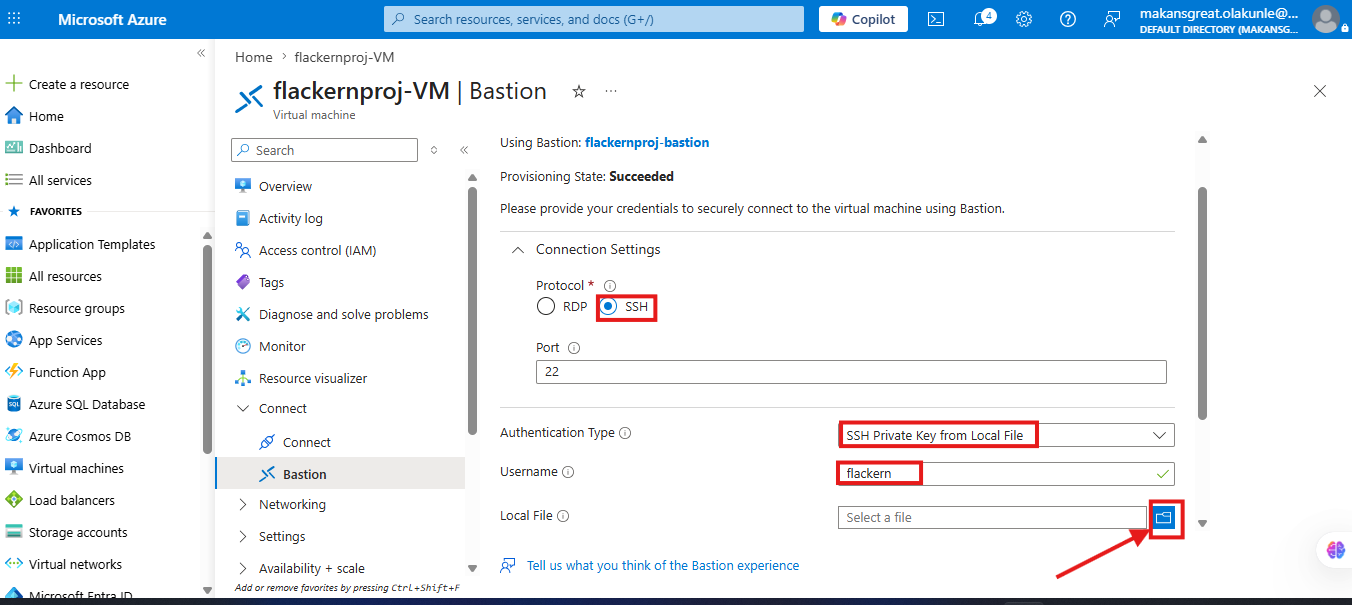
Provide your credentials to securely connect to the virtual machine using Bastion
Connection Settings:
Protocol: SSH
Port : 22
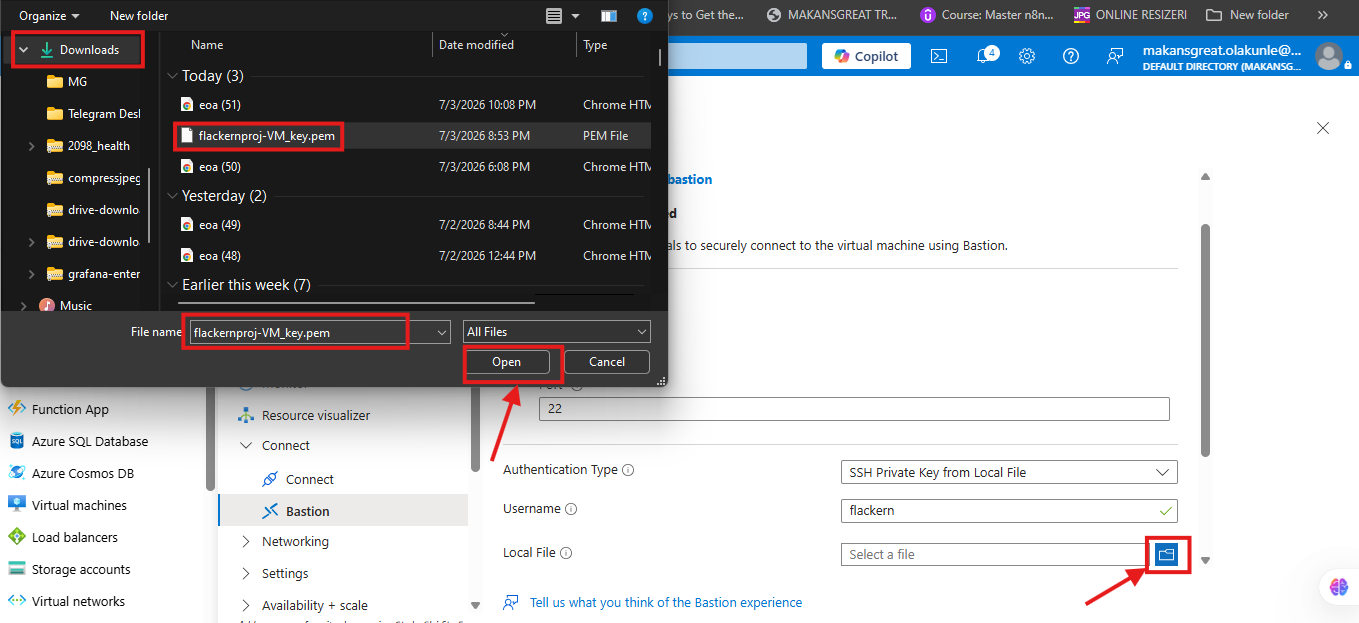
Authentication Type: SSH Private Key from Local File
Username: Use the username you created
Local File: Pick up the Key-pem you downloaded on your download,open the file on your azure portal and click on connect
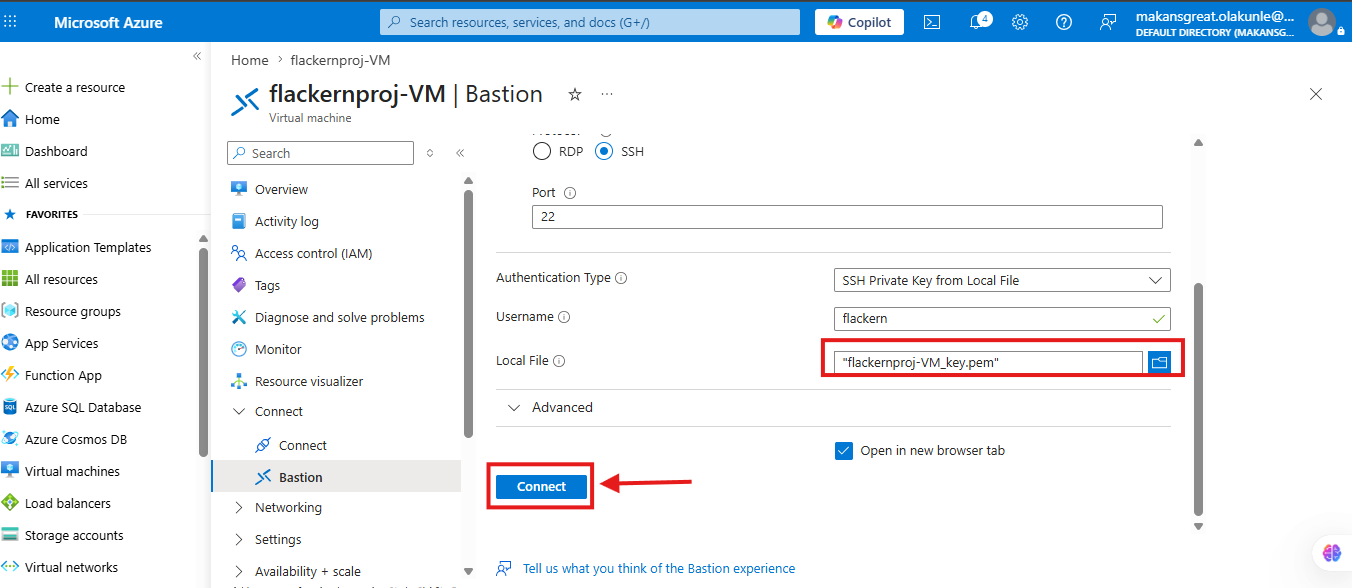
Immediately you Click Connect, within a few seconds, Azure opens an SSH session directly in your browser.(We are connecting to our VM Securely)
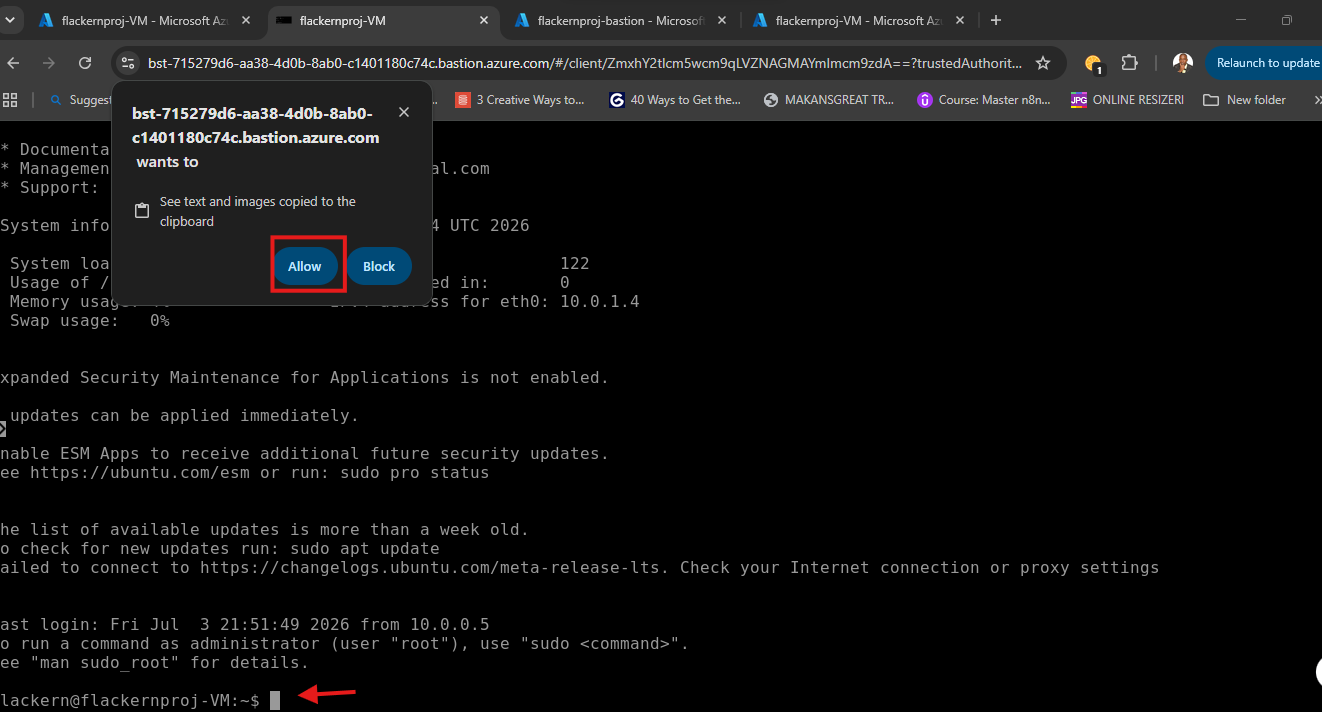
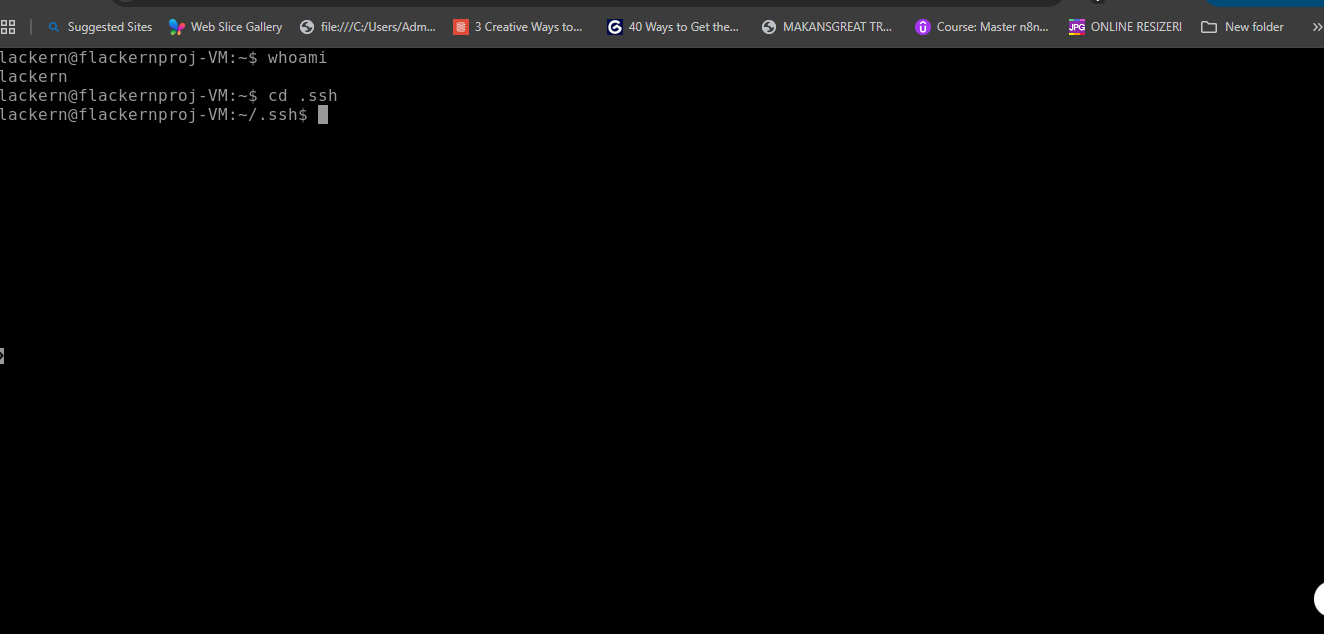
Congratulations we have successfully SSH into our Virtual Machine securely using Bastion
Conclusion
Azure Bastion is one of the most effective ways to securely manage Azure Virtual Machines without exposing them to the public internet. By providing browser-based SSH and RDP access over HTTPS, it eliminates the need for public IP addresses and open management ports, significantly improving the security posture of your cloud environment.
In this step by step guide you created a Virtual Network, configured the required AzureBastionSubnet, deployed an Azure Bastion host, created an Ubuntu virtual machine, and successfully connected to it using a secure browser-based SSH session.
