Introduction
Microsoft Azure Virtual Machines (VMs) provide scalable cloud computing resources that allow users to deploy and manage operating systems in the cloud. In this project, I created an Ubuntu 22.04 Virtual Machine in Azure, connected to it using SSH from both Git Bash through the Visual Studio Code, updated the server, installed Apache2, configured network security settings, and deployed a custom web page accessible through a public IP address.
This hands-on lab helped me gain practical experience with Azure Infrastructure as a Service (IaaS), Linux administration, SSH connectivity, and web server deployment.
Project Objectives
Create an Ubuntu 22.04 Azure VM
Download and secure a .pem private key
Connect to the VM using Git Bash
Update and upgrade Ubuntu packages
Install and verify Apache2
Create a custom web page
Access the website through a browser
Prerequisites
Active Azure Subscription
Azure Portal access
Git Bash installed
Internet connection
Step 1. Log In to Azure Portal
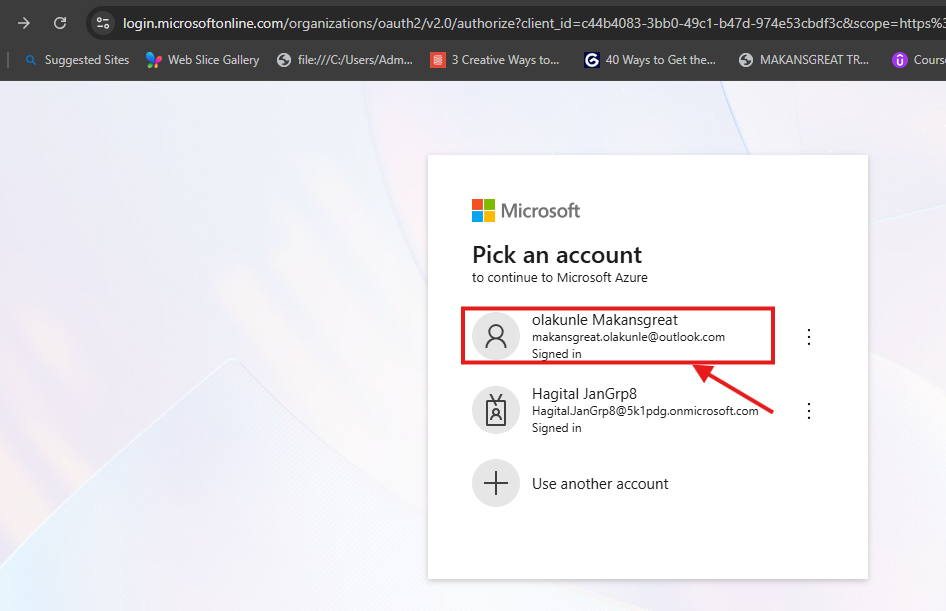
On your web browser, head over to https://portal.azure.com and log in with your Microsoft account. If you don't have an account, create or sign up and provide the required information so your Microsoft account can be activated.
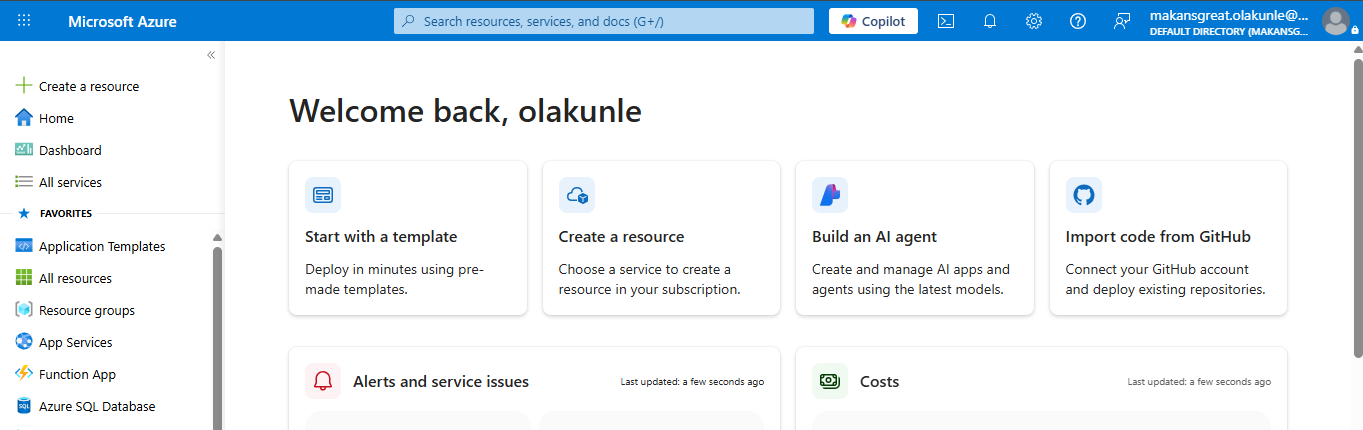
A successful login bring you to this page below,
__Step 2: Create a Resources Group
__
We need to create our Resources Group first before we go ahead to create our virtual machine
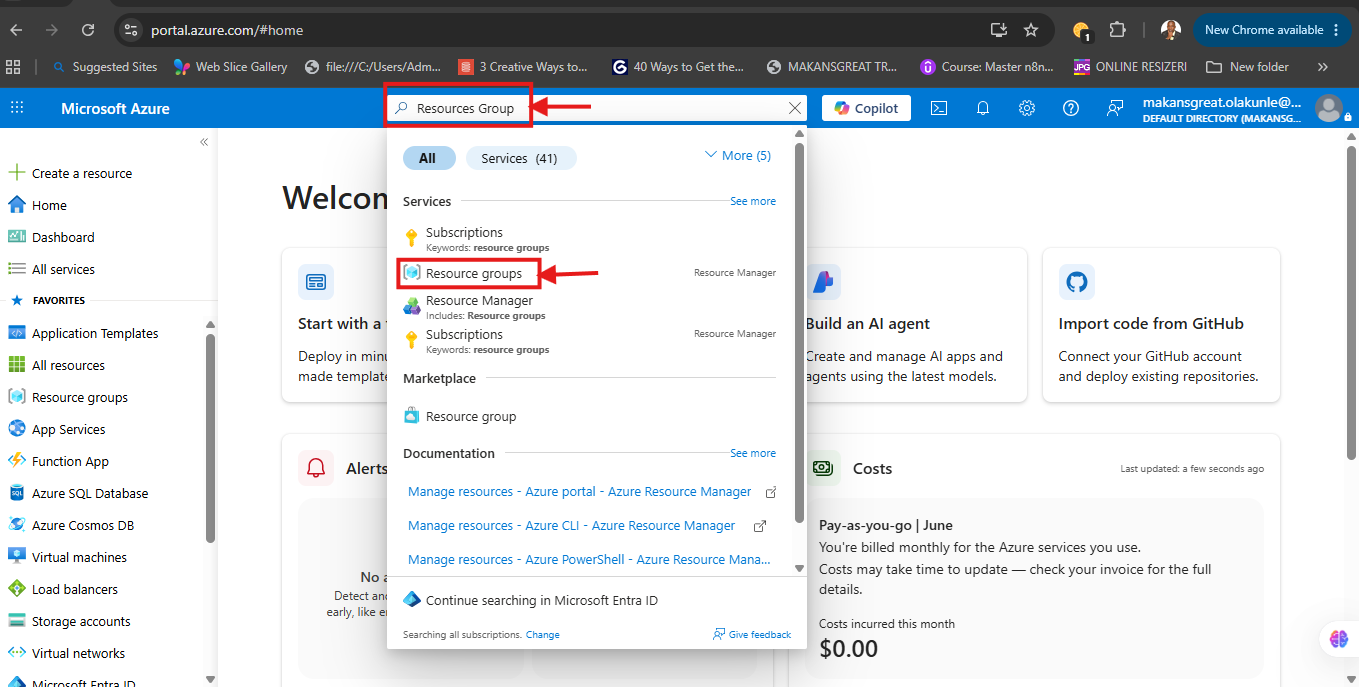
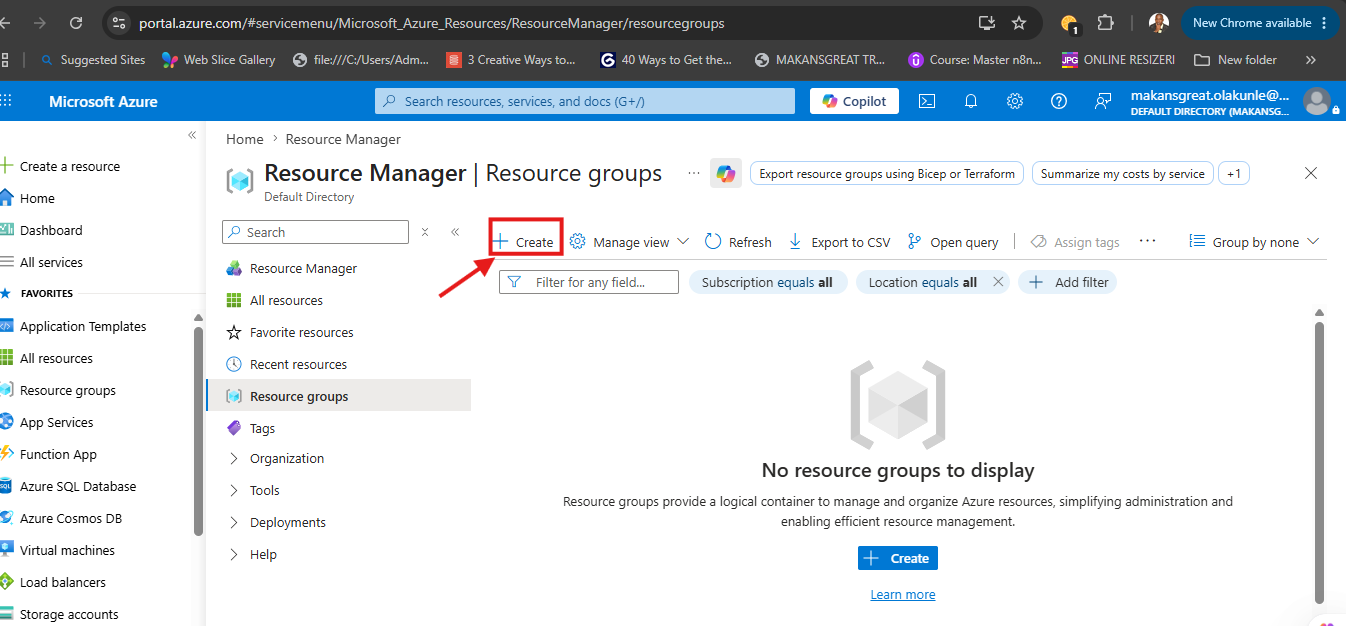
. Search for Resource Group in the search bar at the top of your portal
page and Select/Click on Resource Group.
Click on Create to create Resource Group
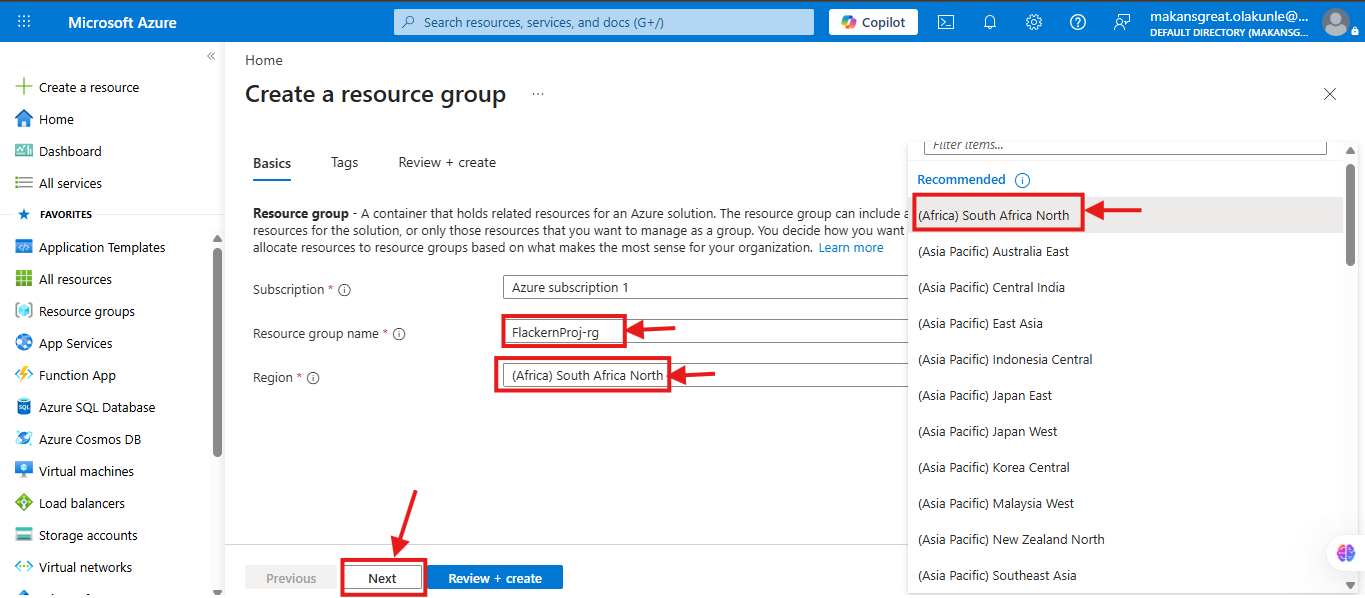
Type the Resource group name, select the region and click Next
Apply tags to your resources to logically organize them by categories and click Next
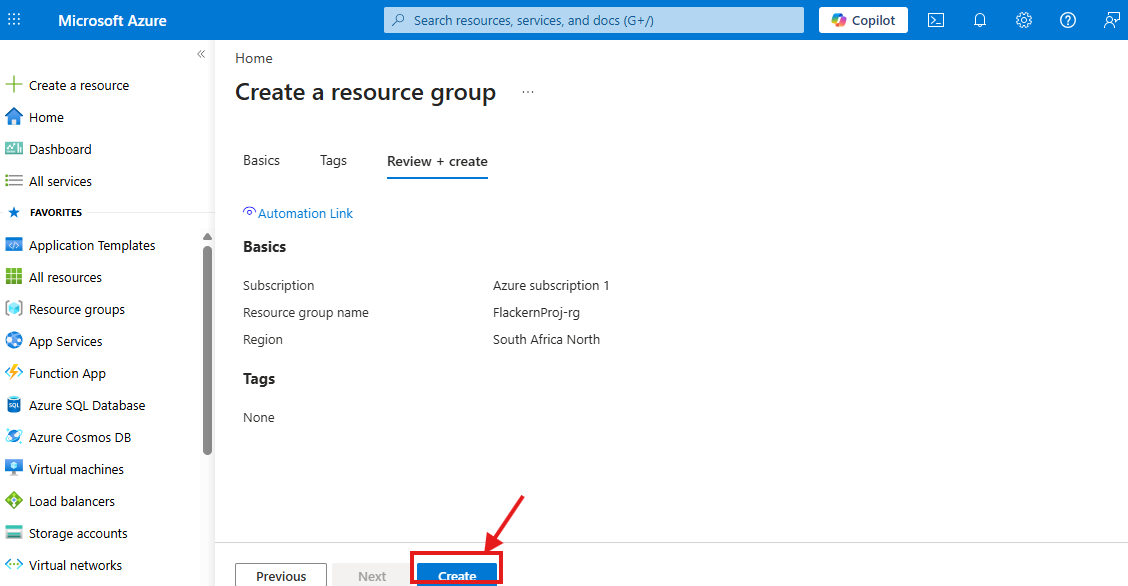
Review the resources group and click on Create
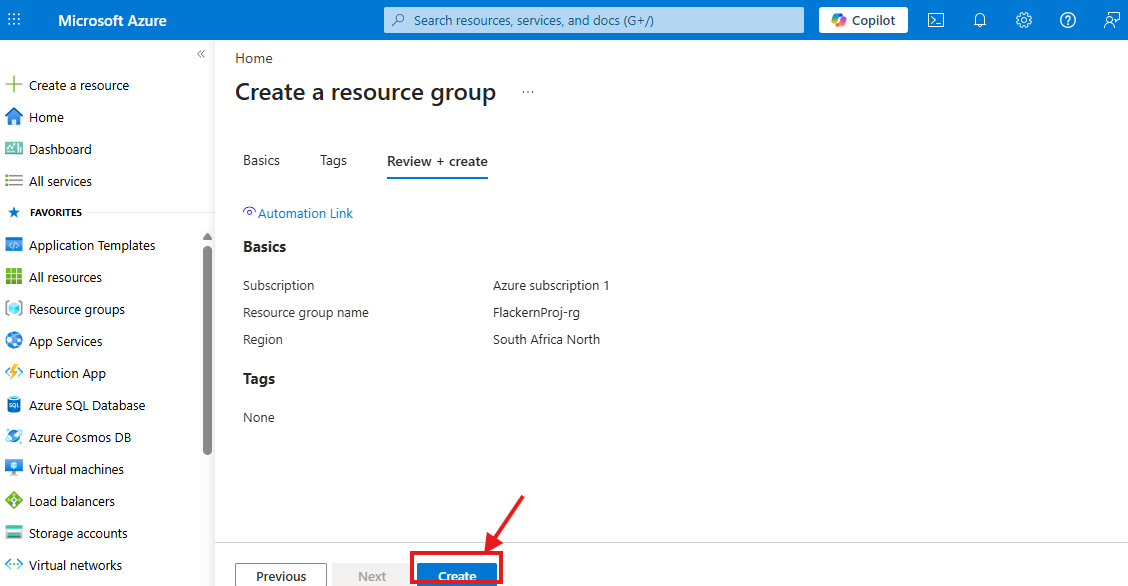
Click on Resource Group on the left to bring out the resource group you created
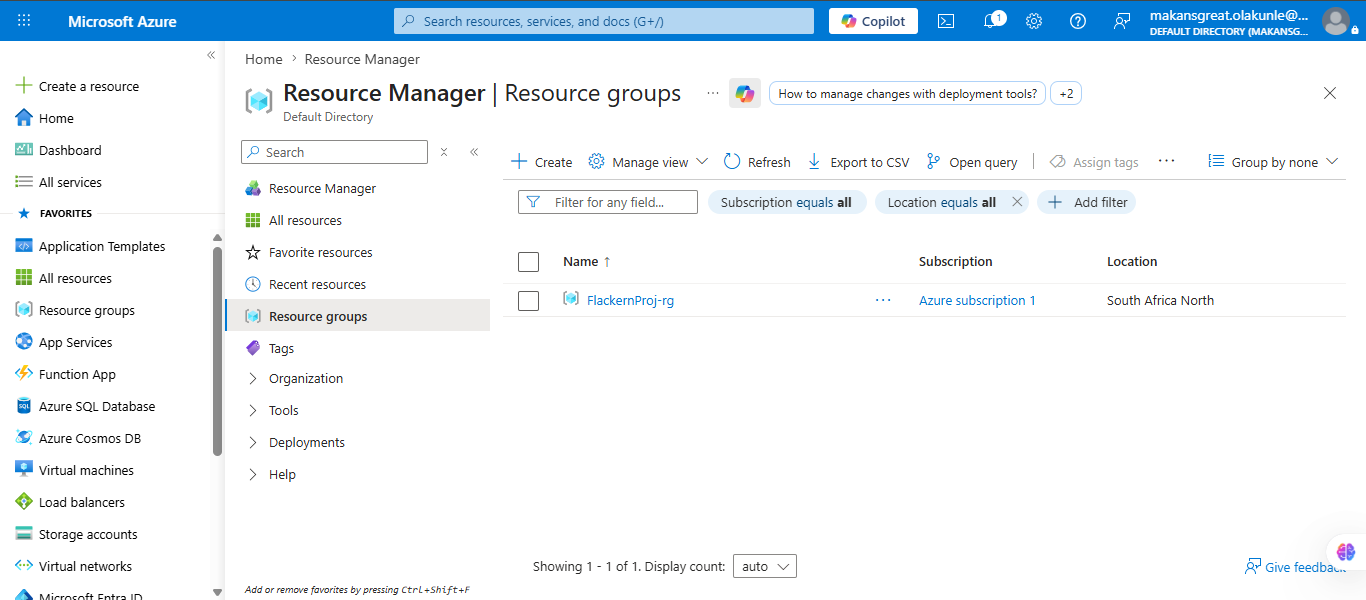
Step 2. Create a New Virtual Machine
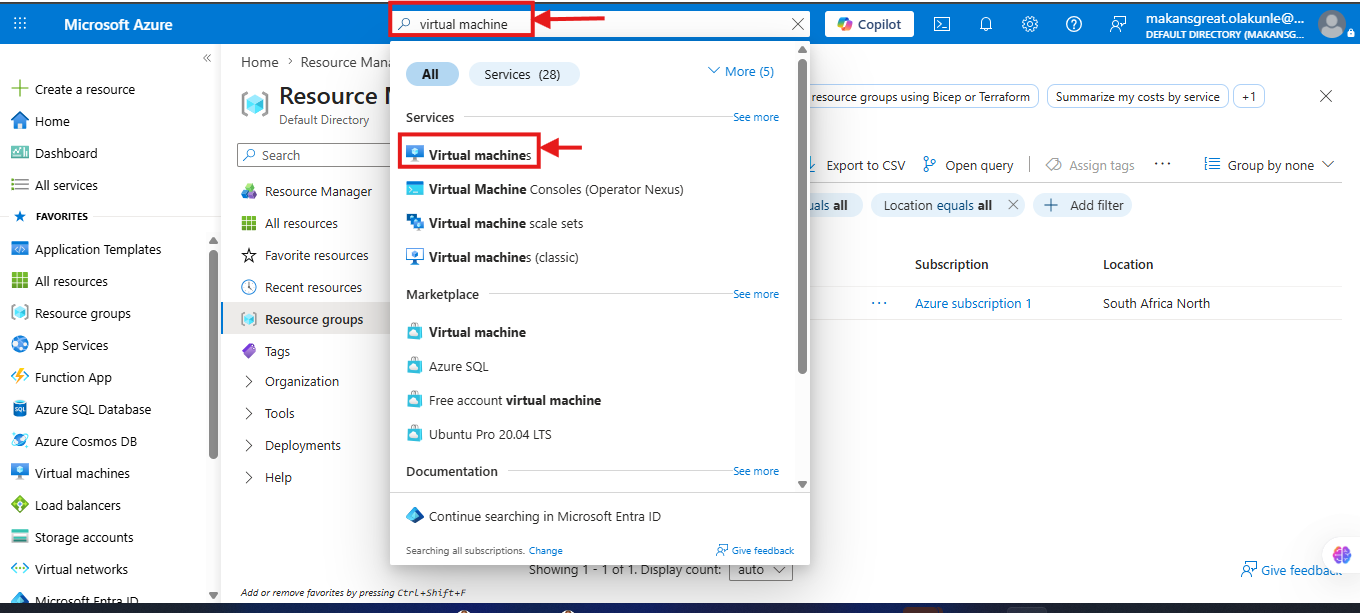
Type "Virtual Machines" in the search bar at the top. Once you see virtual machine display click on the virtual machine
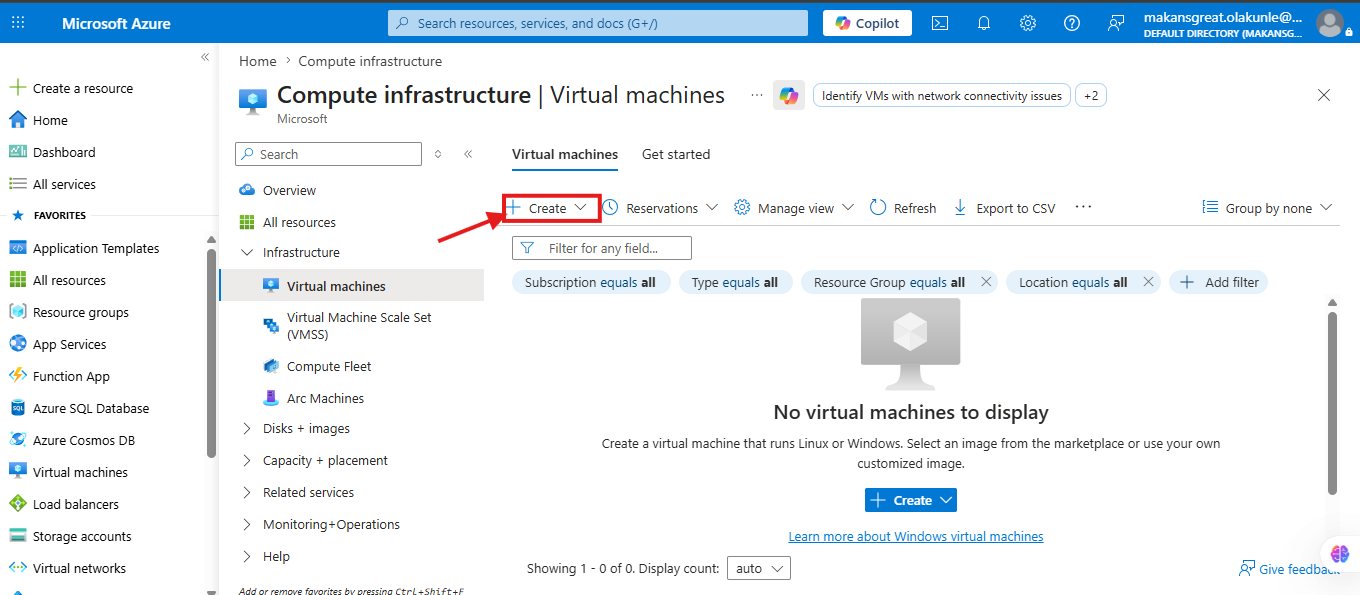
Once you click on the virtual machine, your screen will be displayed as shown below. Click on CREATE
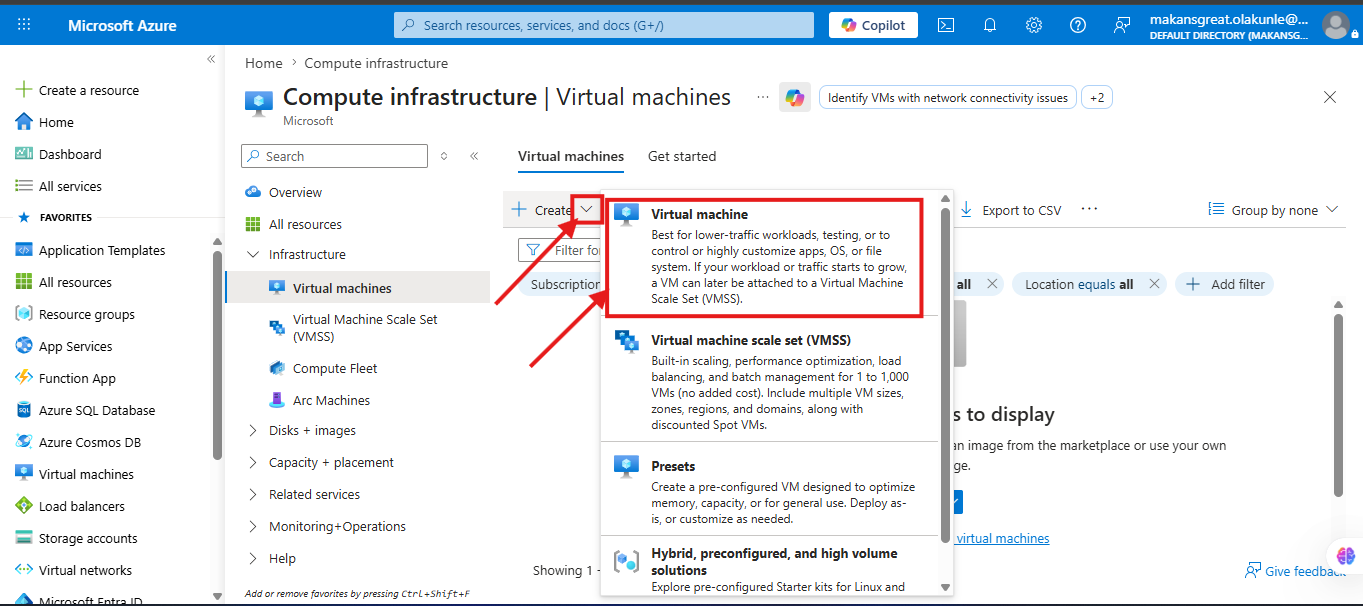
When you click on "Create" button, it will display a drop down as shown below. You will then click on the Azure virtual machine highlighted in red arrow. This will take you to the project details where you will begin to fill the basic configuration for you to start creating your virtual machine.
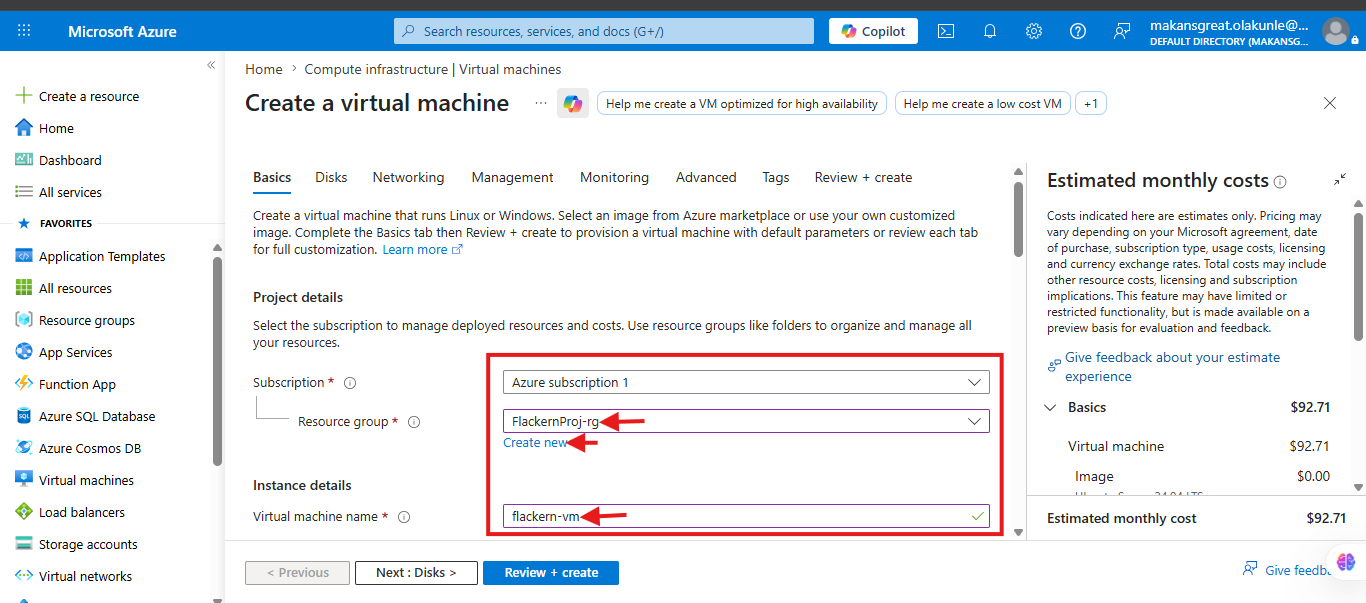
Create virtual Machine under the BASIC CONFIGURATIONS by filling the following tabs as follows:
_Subscription: Select your subscription(Azure Subscription 1)
Resource Group: Use an existing or create a resource group (FlackernProj-rg)
Virtual machine name: flackern-vm or use your desired username
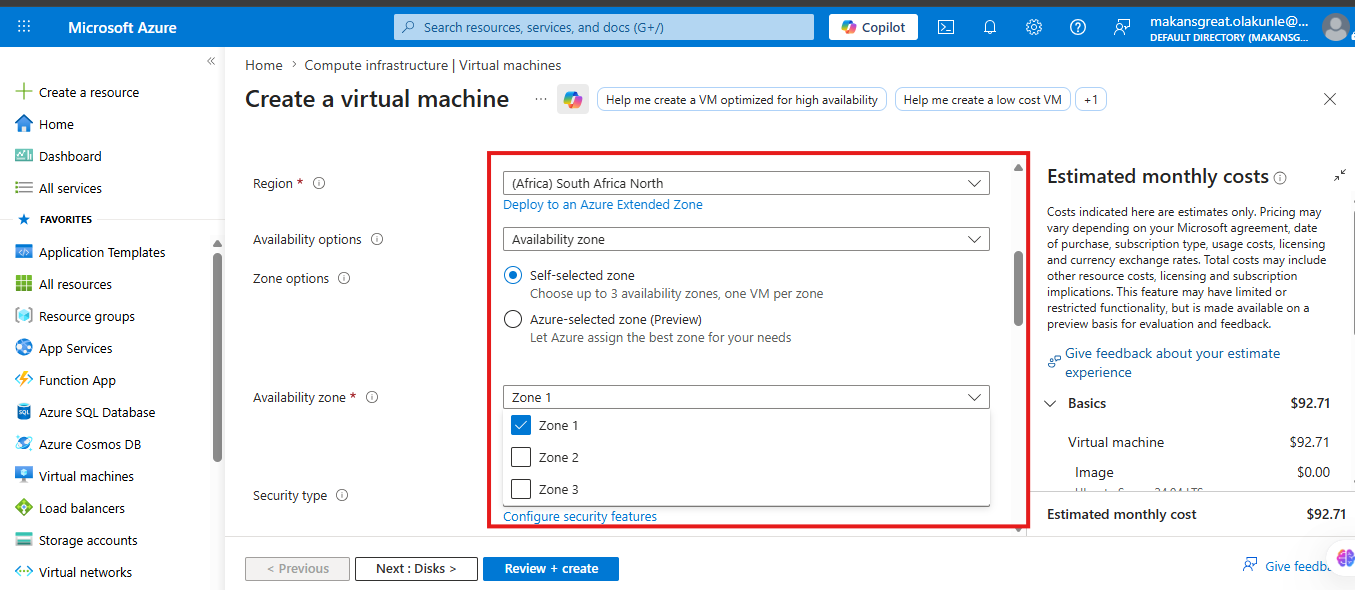
Region: Select a nearby or preferred location ((Africa) South Africa North)
Availability options: Leave it as default (Availability Zone)
Availability Zone: Zone 1 (For this demo we select only one zone)
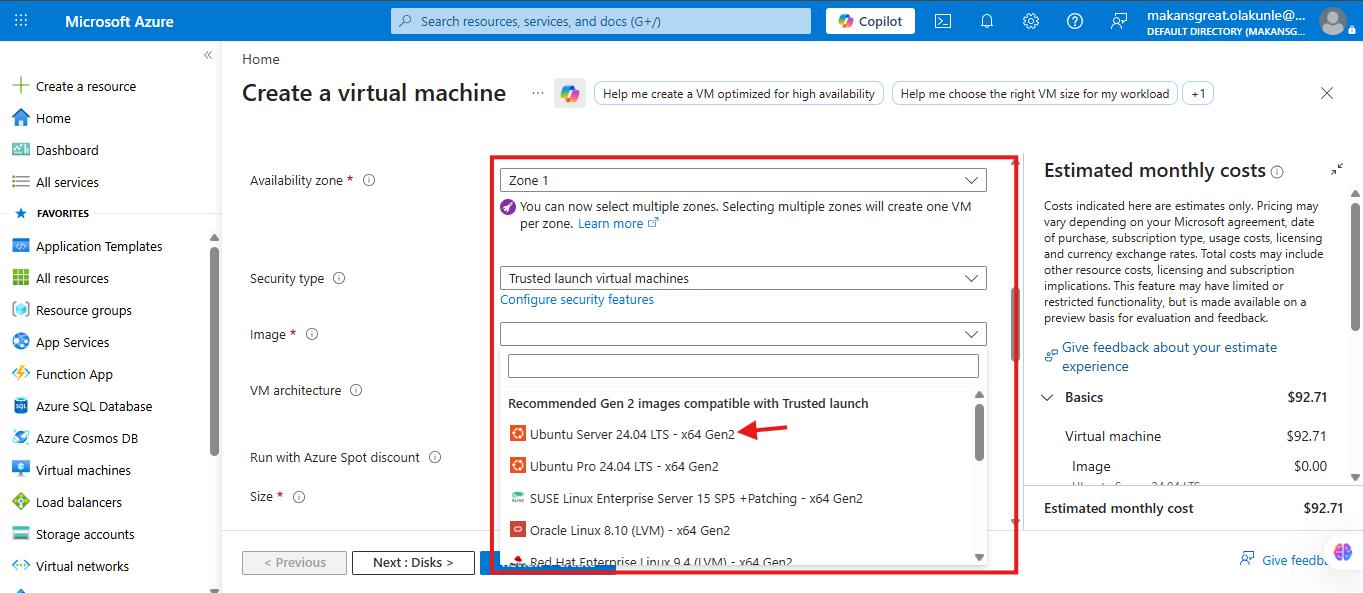
Security type: Standard
Image: Ubuntu Server 24.04 LTS - x64 Gen2
VM architecture: x64
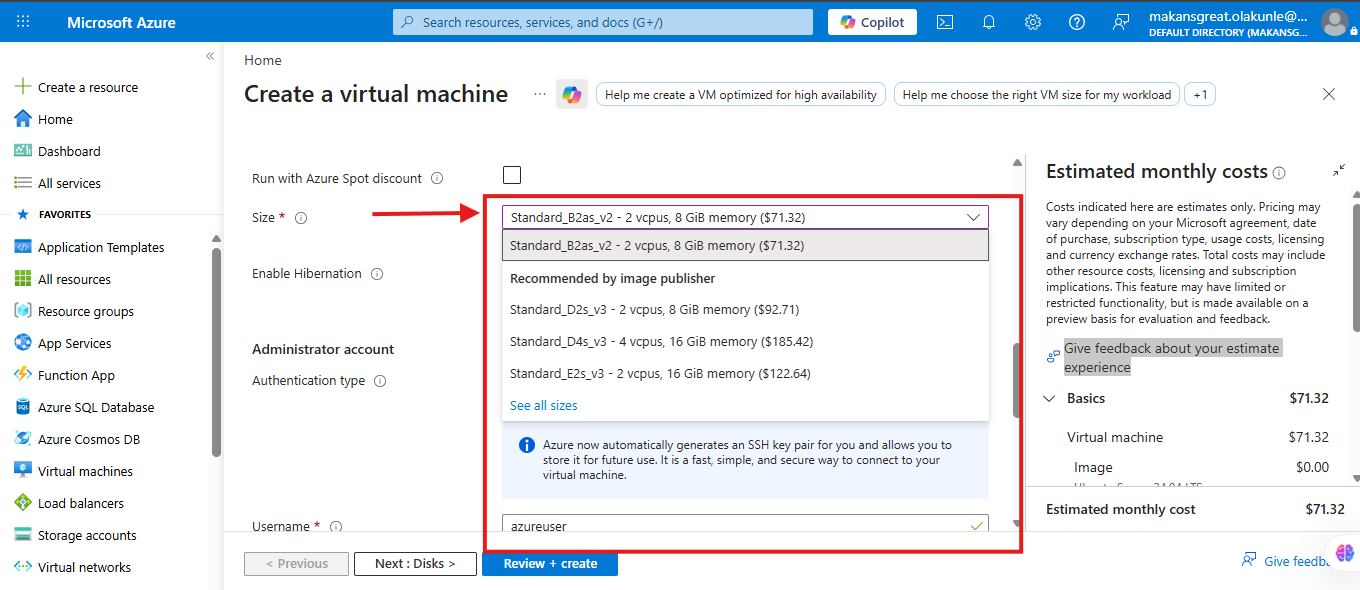
Size: Standard_B2as_v2 - 2 vcpus, 8 GiB memory ($71.32)
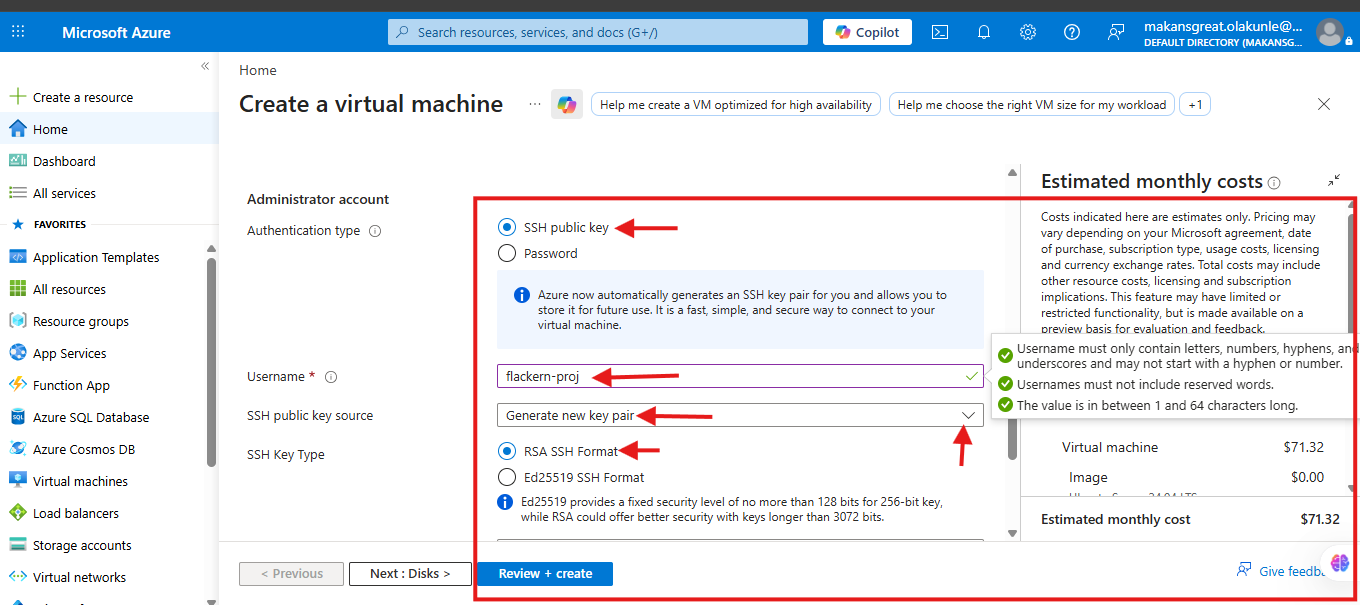
Authentication type: SSH public key
Username: Use your desired username
SSH public key source: Generate new key pair
SSH Key Type: RSA SSH Format
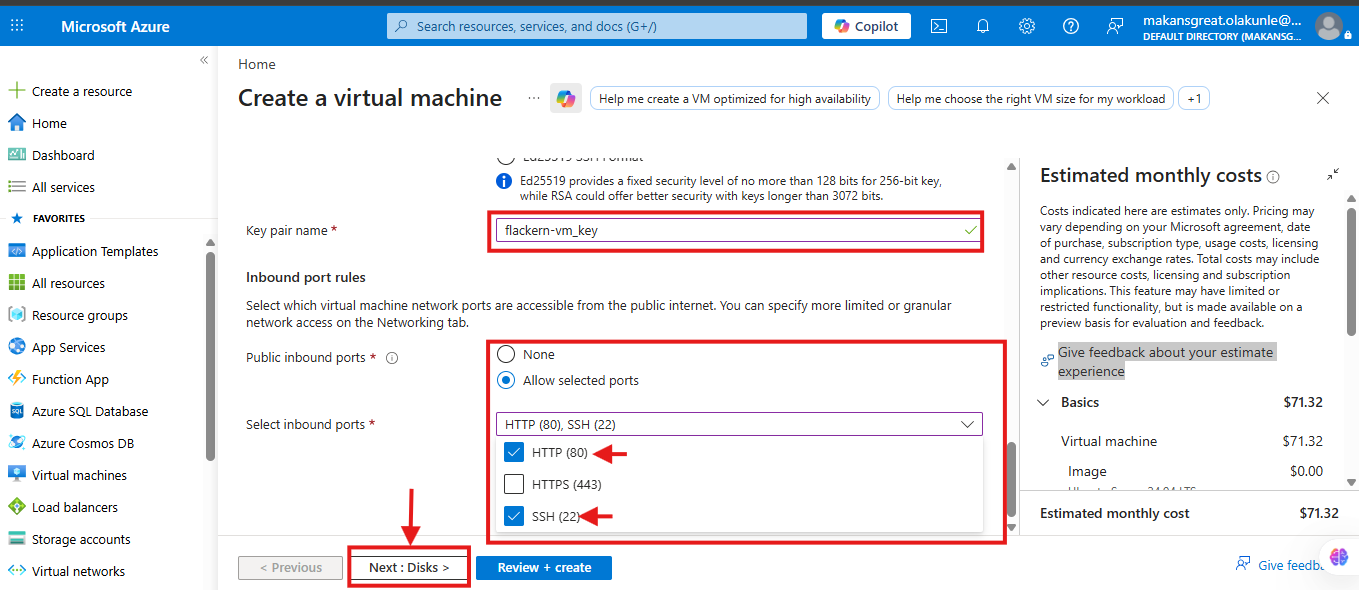
Key pair name: flackern-vmkey or use your desired username
Public inbound ports: Allow selected ports
Select inbound ports: HTTP (80) and SSH (22)
Step 3. Configure Disks
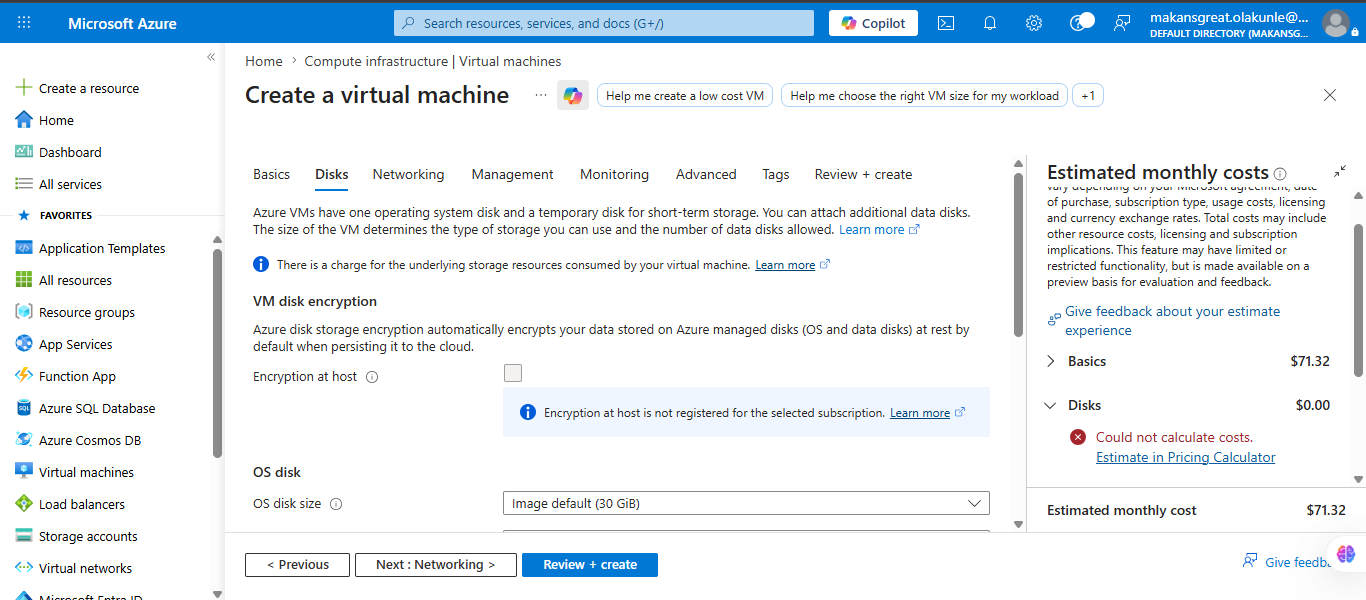
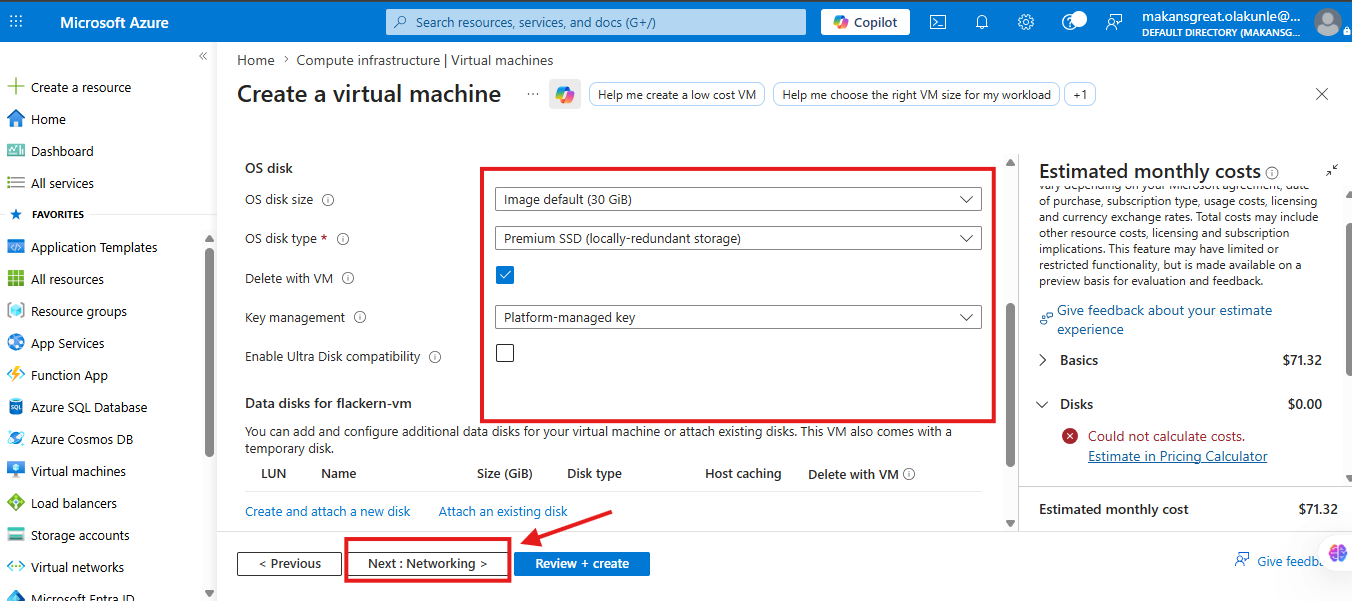
Click on Next : Disks >, this leads you to on the next page, you can use the default OS disk size, use the Image default (30 GiB) and for the OS disk type, use the default settings Premium SSD (locally-redundant storage) unless you have unique configuration requirements.
Step 4. Networking Configuration
On the bottom of the last page in Step 3, Click on Next : Networking >, this leads you to the Network interface page below:
- Create your virtual network and subnet or make use of the one you have created before
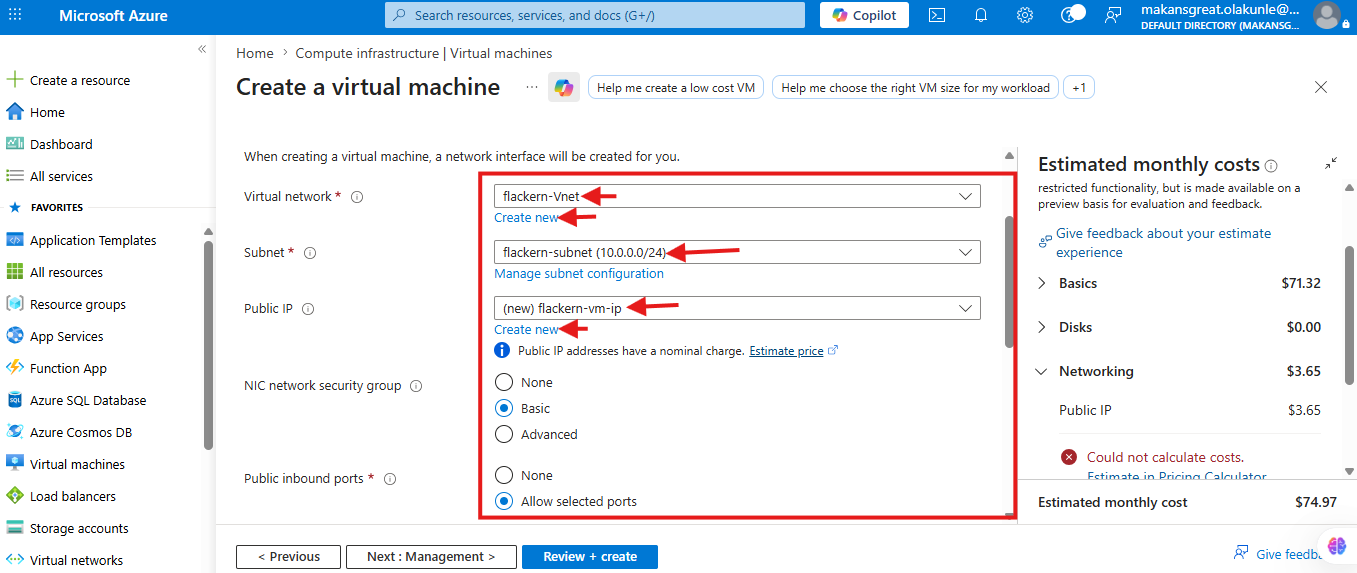
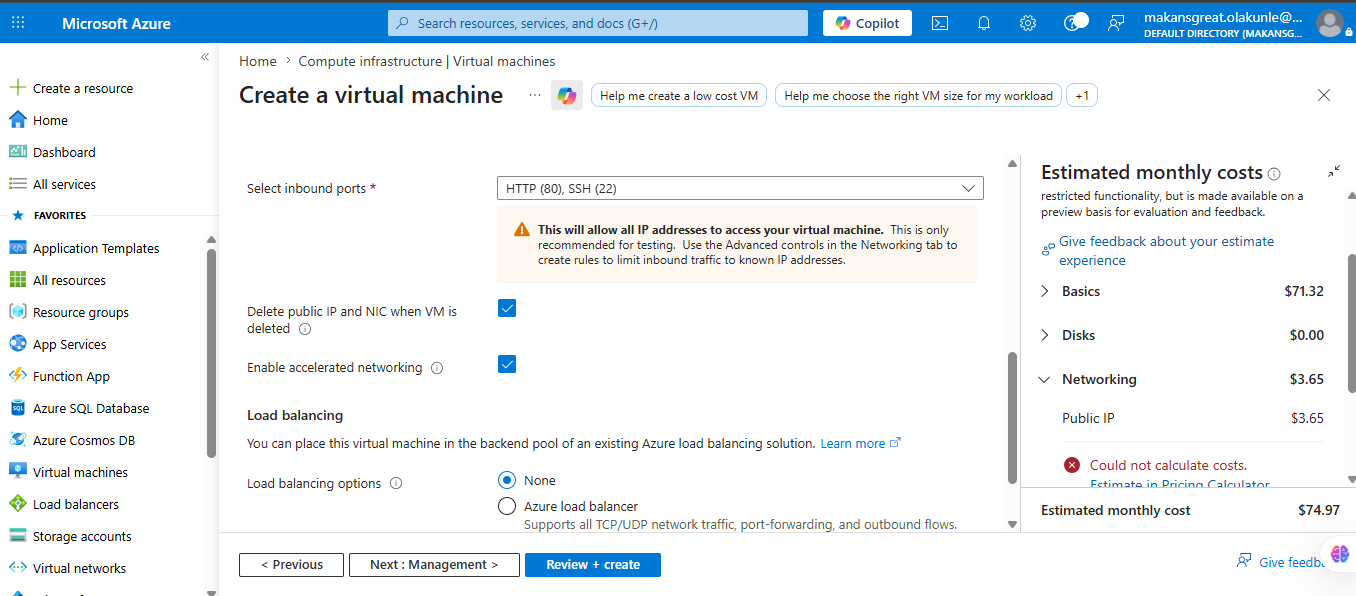
Management, monitoring, Advanced, Tags: These pages usually displayed as default. Find their default screenshots below. However, you may wish to skip them and proceed to “Review+Create”.
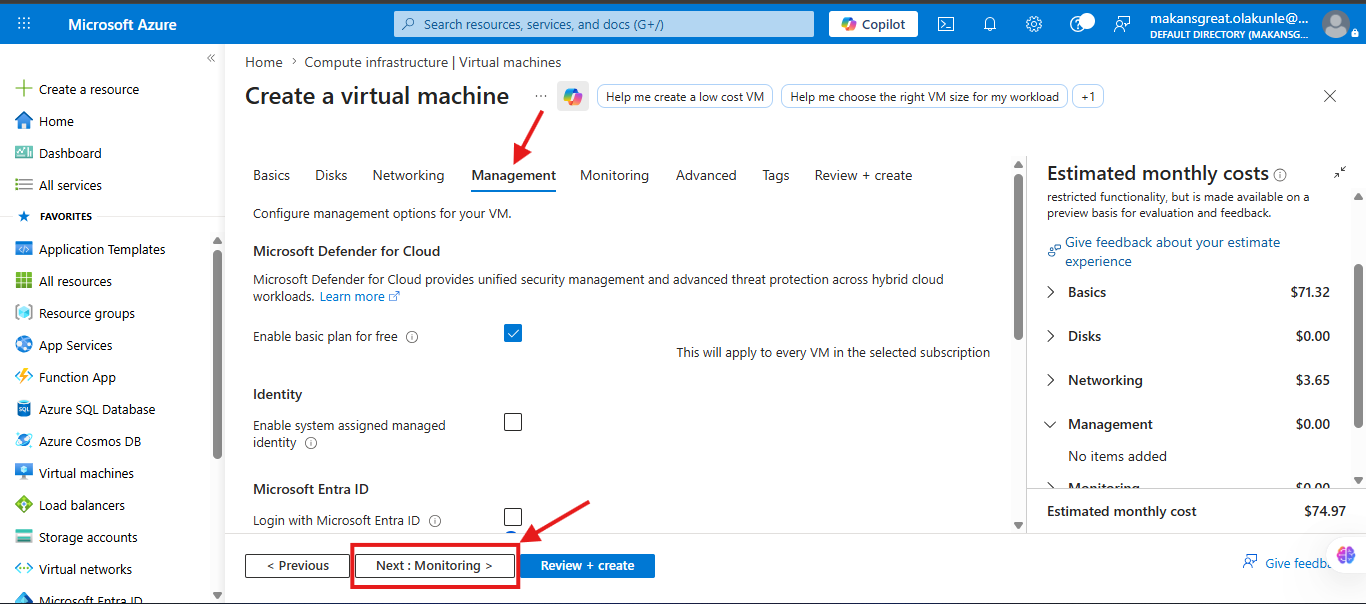
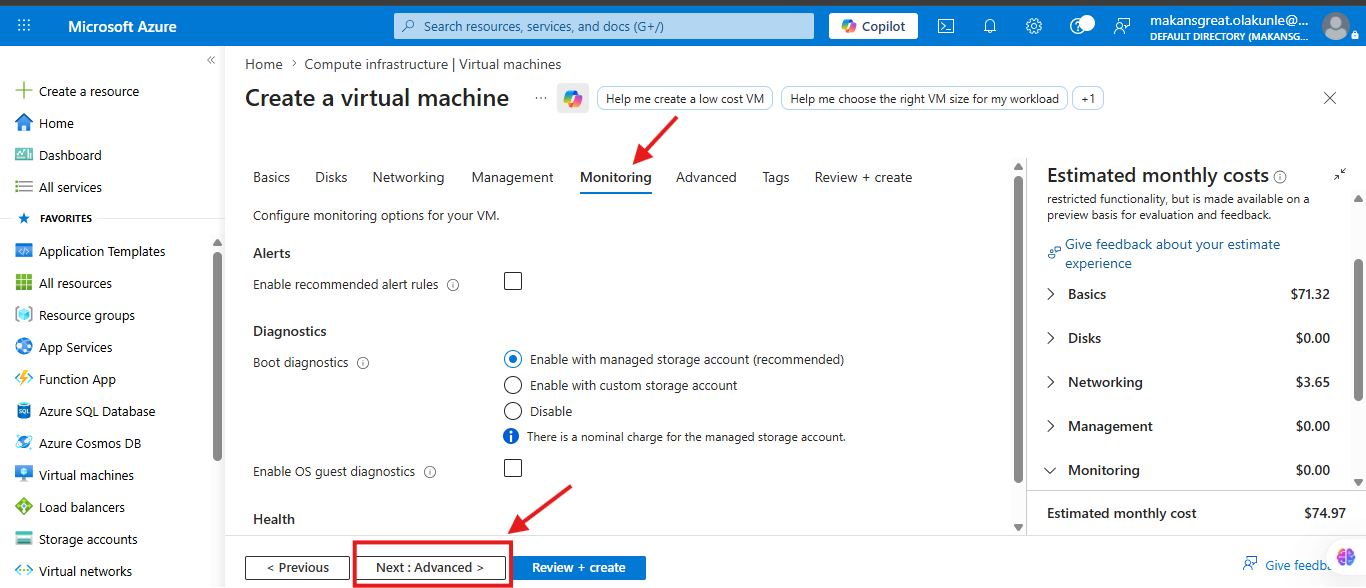
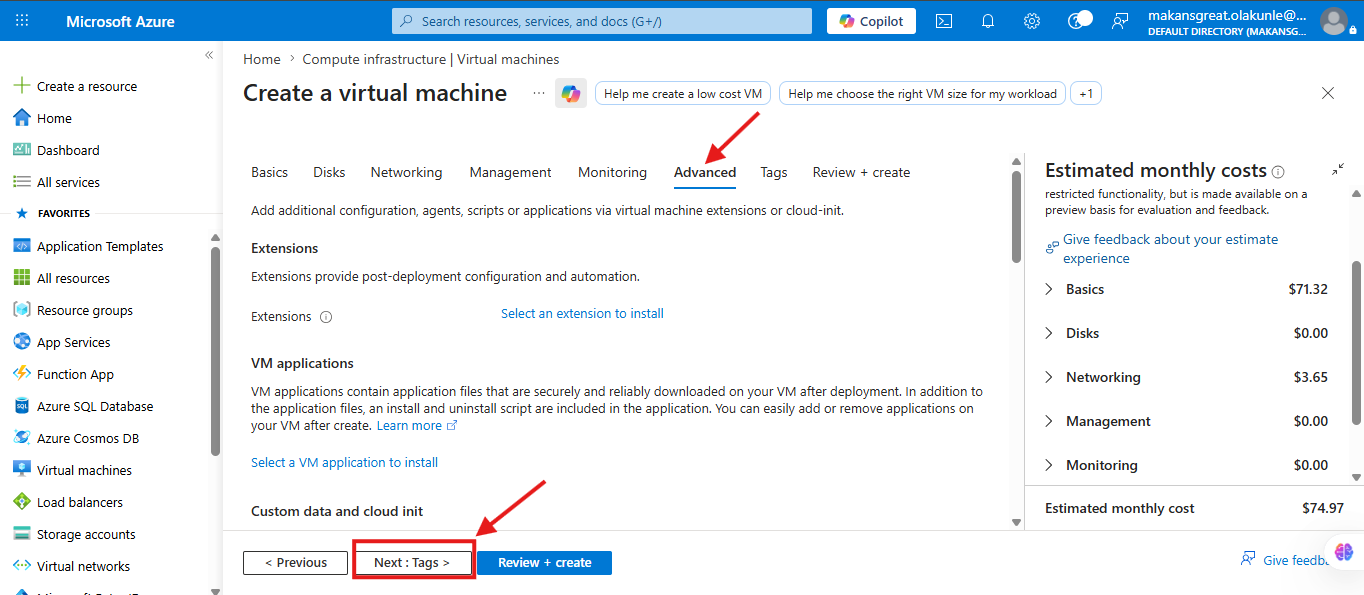
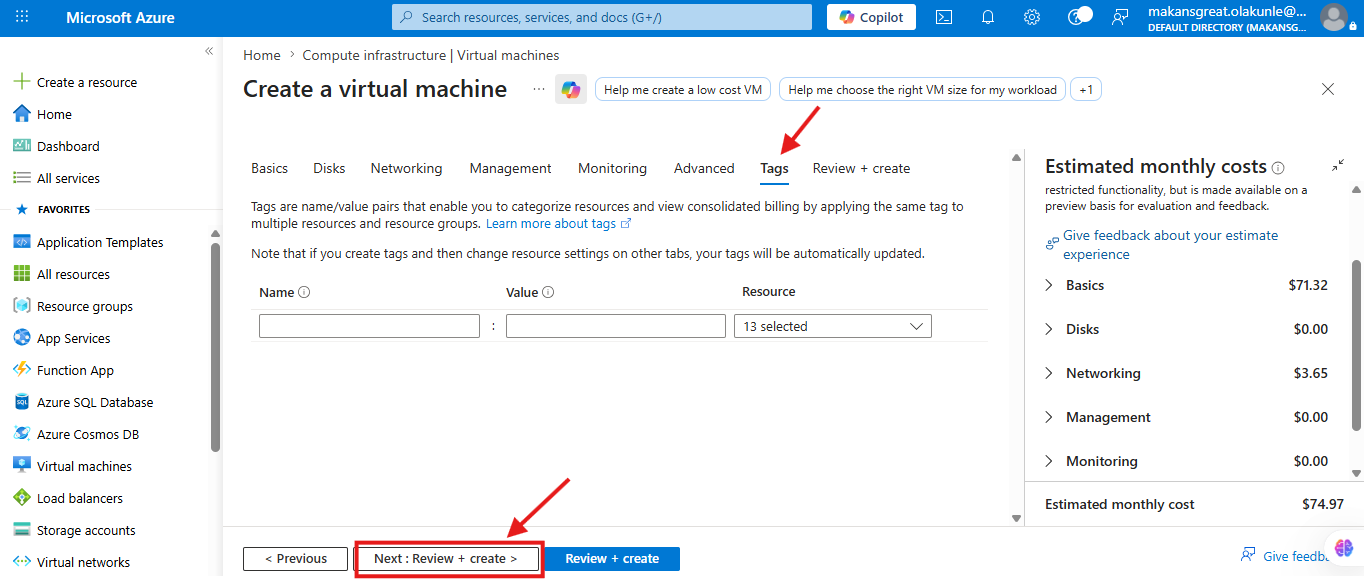
Step 5. Generate SSH private Key
After a successful Linux VM deployment process, Azure will validate the configuration
_Then Click "Review + create". This will show validation passed as highlighted below.
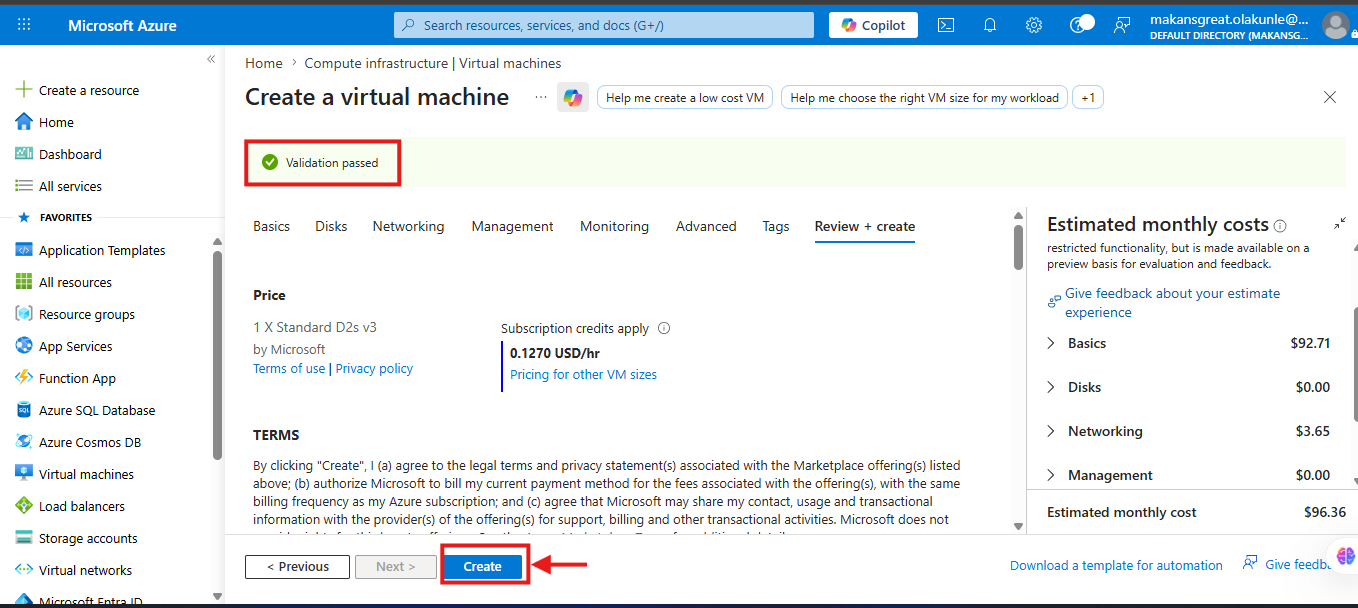
_Then click “Create” . This will take you to the next page to generate new key pair. Then, you will click on “Download private key and create resource” as shown below. The new key pair will then be downloaded on your PC, while Azure will also provision your VM.
__
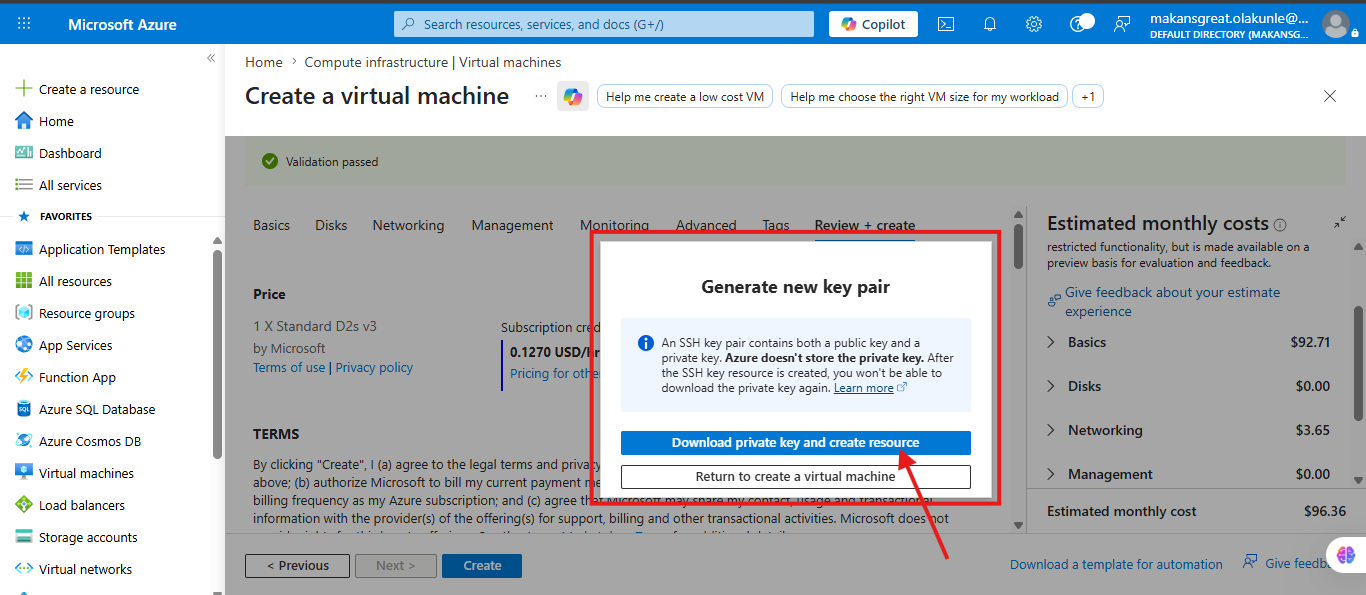
Download private key and create resource, afterwards, the deployment will start.
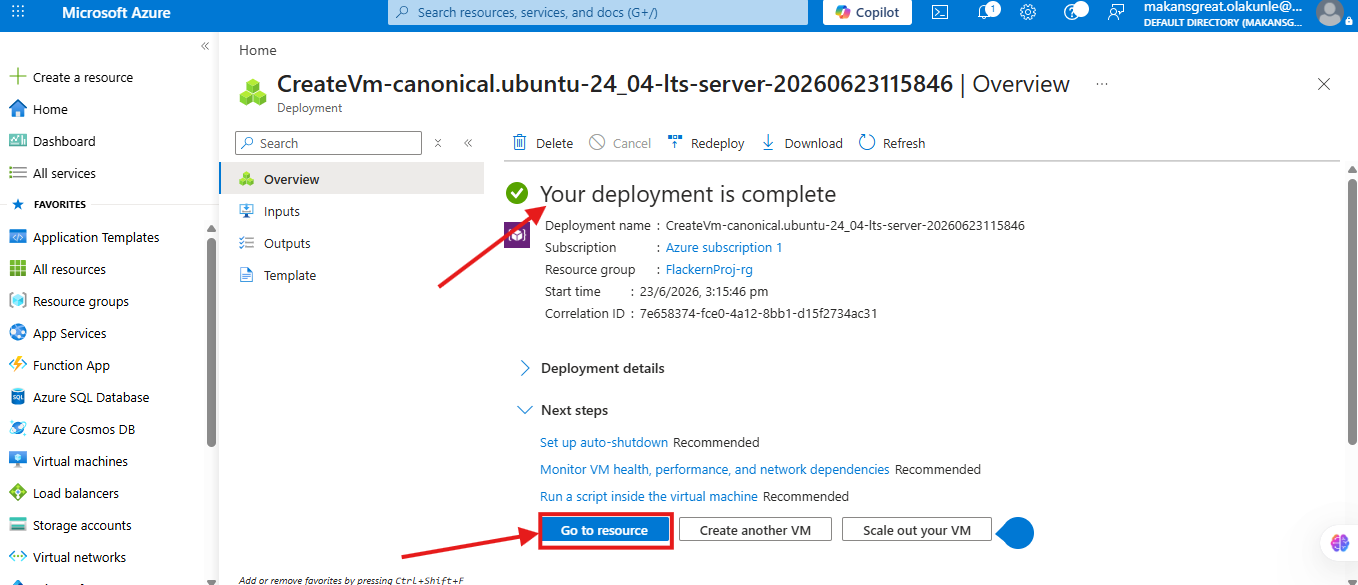
Wait for Deployment: Azure will now provision your virtual machine. This process may take a few minutes. Then the next page will show that your deployment is complete as shown below, then you will click on “Go to Resource”
Next, click on “Connect” and then “Connect”. This will take you to a page with other options to connect your VM.
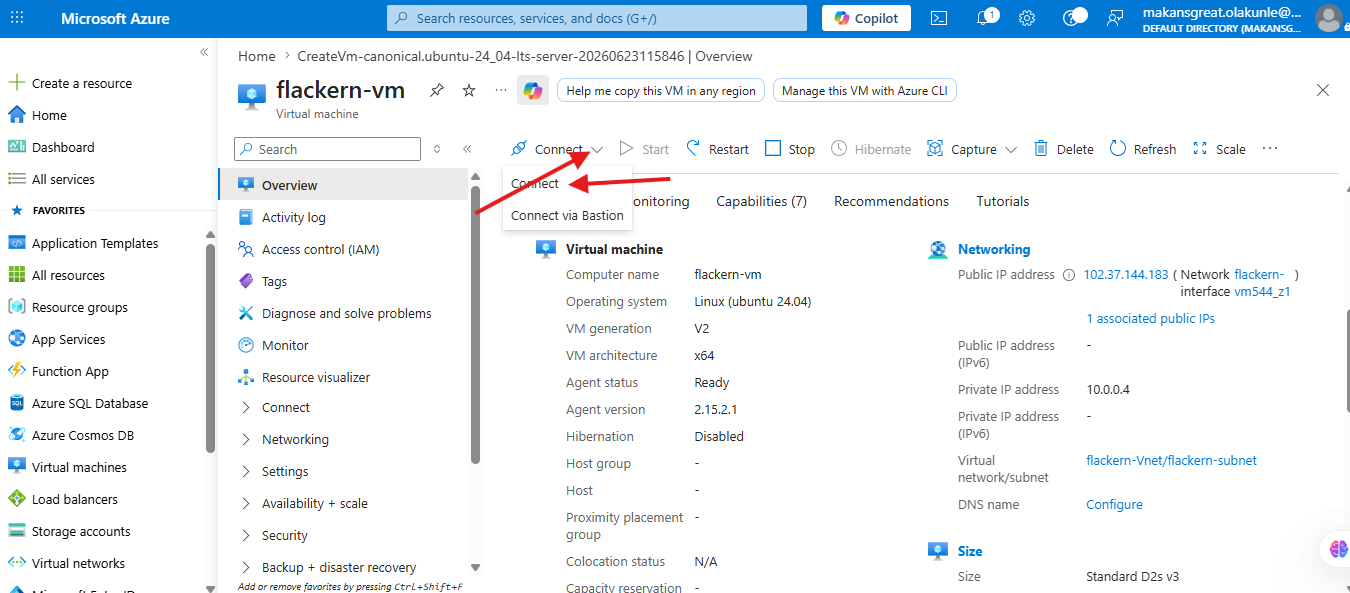
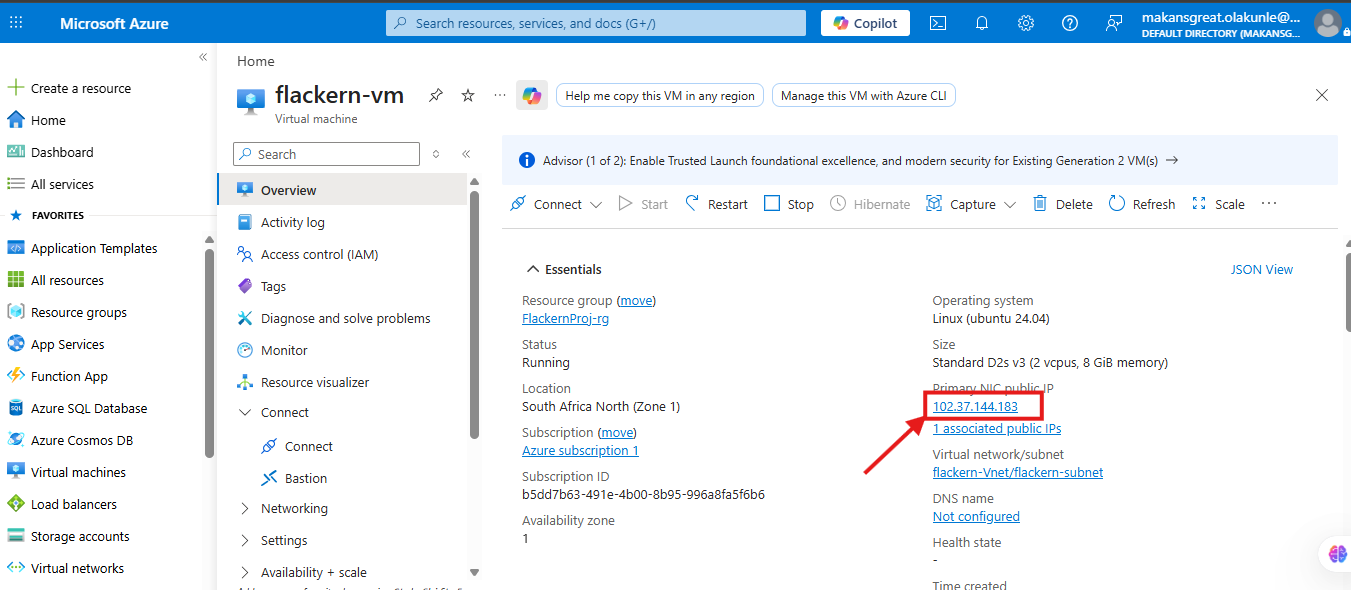
Retrieve Public IP Address: Once the virtual machine is deployed, note down the Public IP address on Azure portal overview page.
Note: Also go to your download and save the downloaded key pair into a file for later use when connecting via SSH.
Step 6: SSH into VM Using Git Bash -Connect via SSH Key Authentication:
Open your Command Line Interface on Windows or Terminal on your Visual studio code using gitbash or power shell
Move the .pem file into a secure folder.
Set permissions:
chmod 600 flackern-vm_key.pem
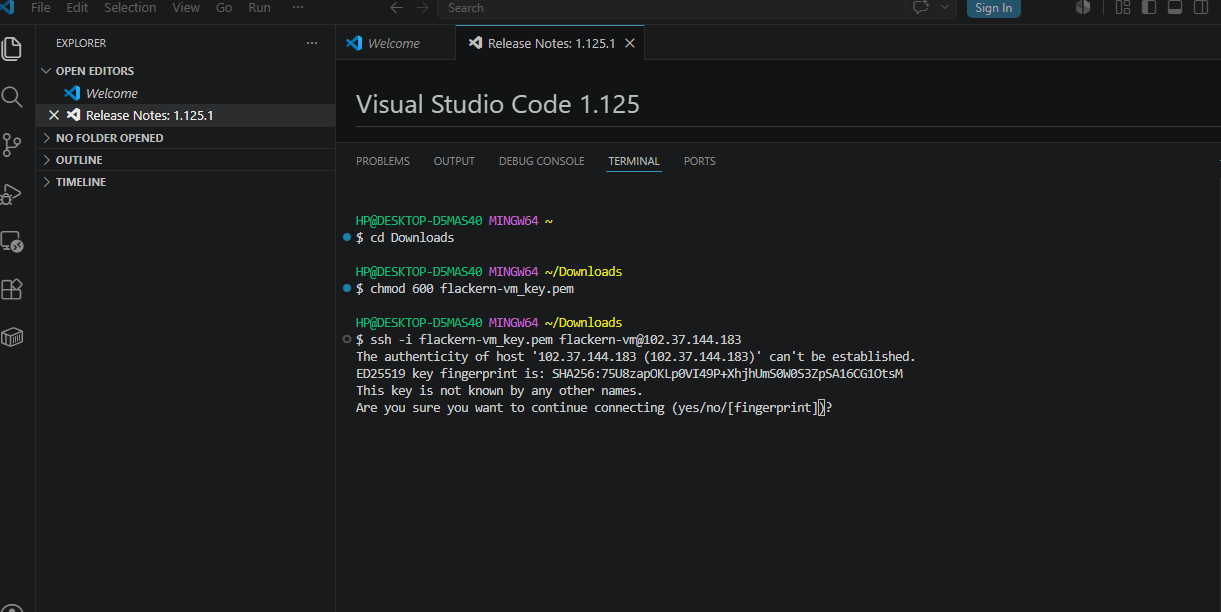
Step 7: SSH into VM Using Azure Cloud Shell
Connect:
ssh -i flackern-vm_key.pem flackern-vm@102.37.144.183
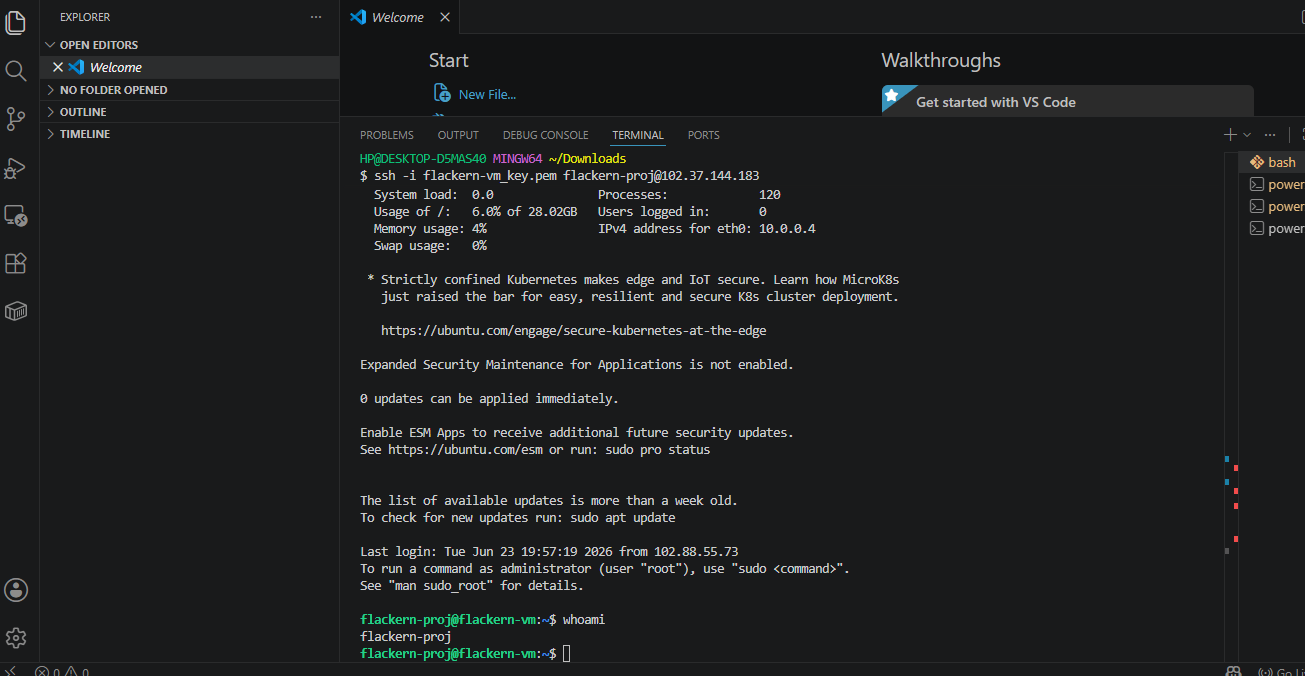
Step 8: Update Ubuntu Packages
Using sudo apt update and click enter.This will update our virtual machine
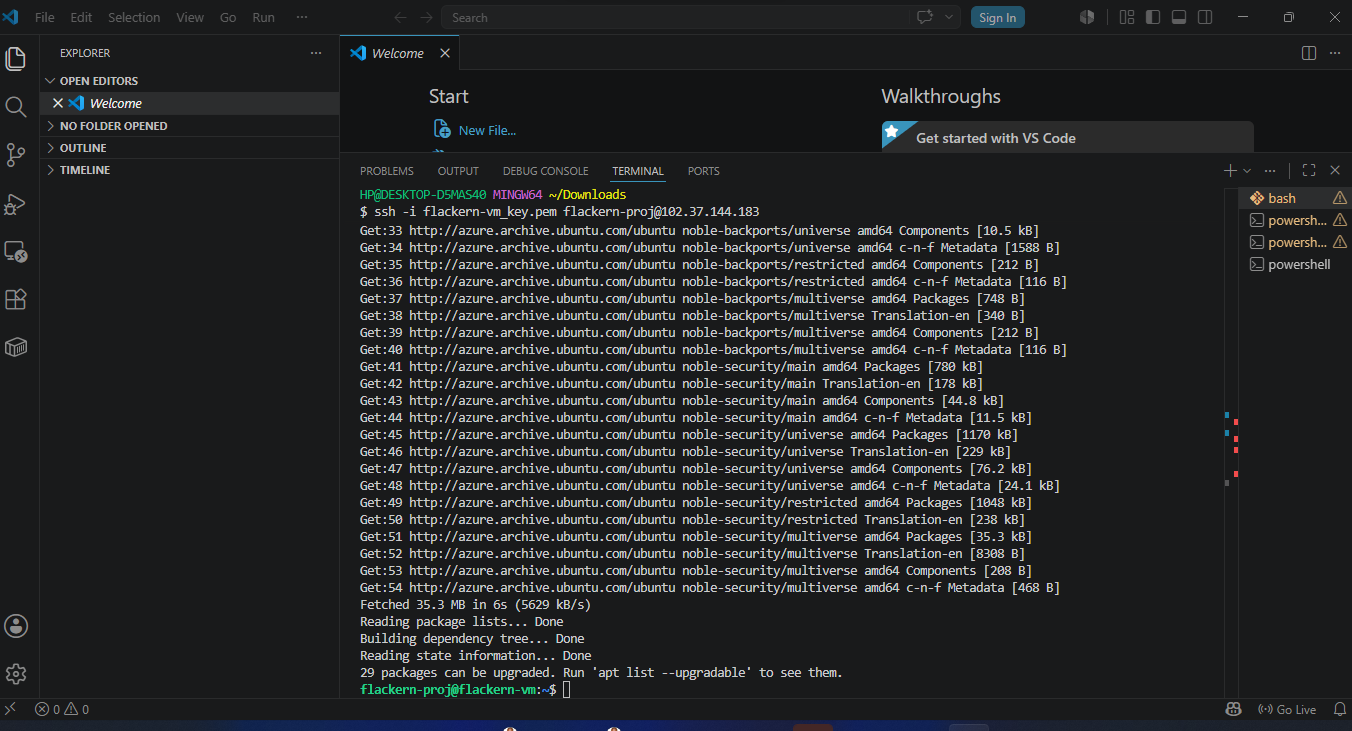
Step 9: Install Apache2
Instal apache2 on our VM and click enter
Install:
sudo apt install apache2 -y
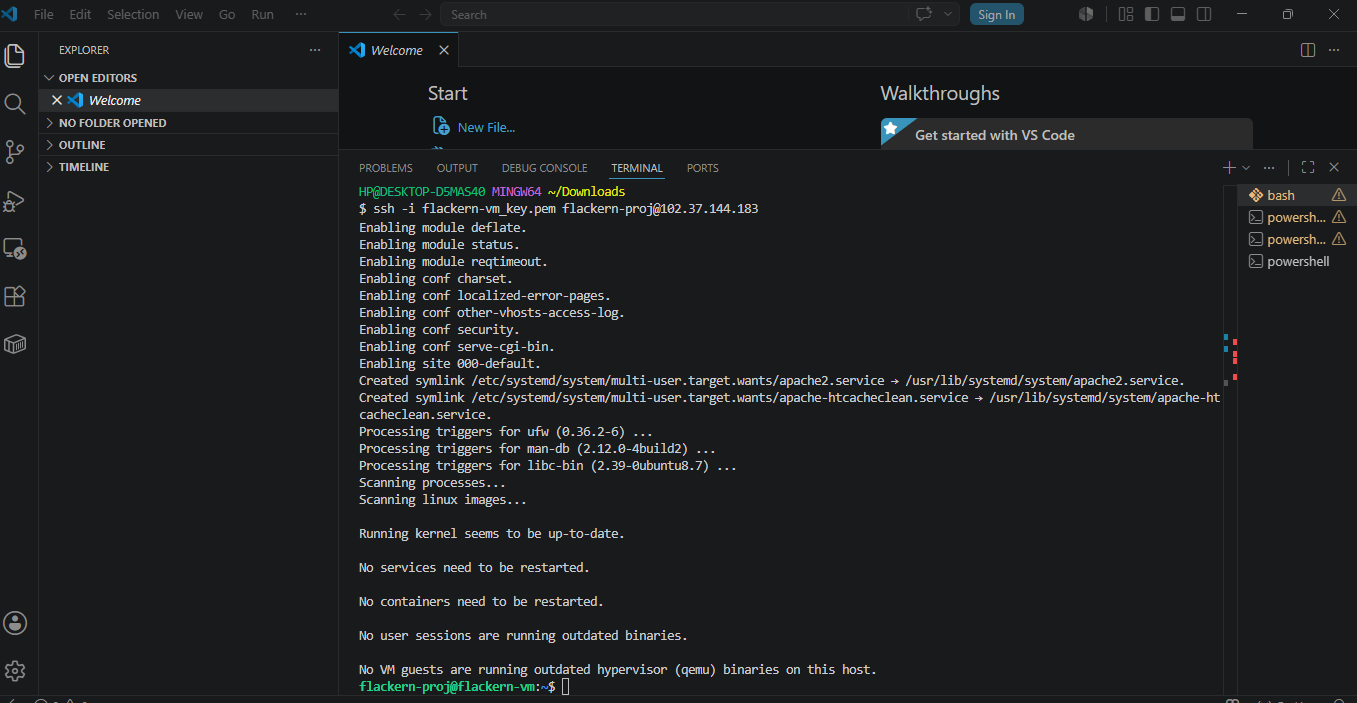
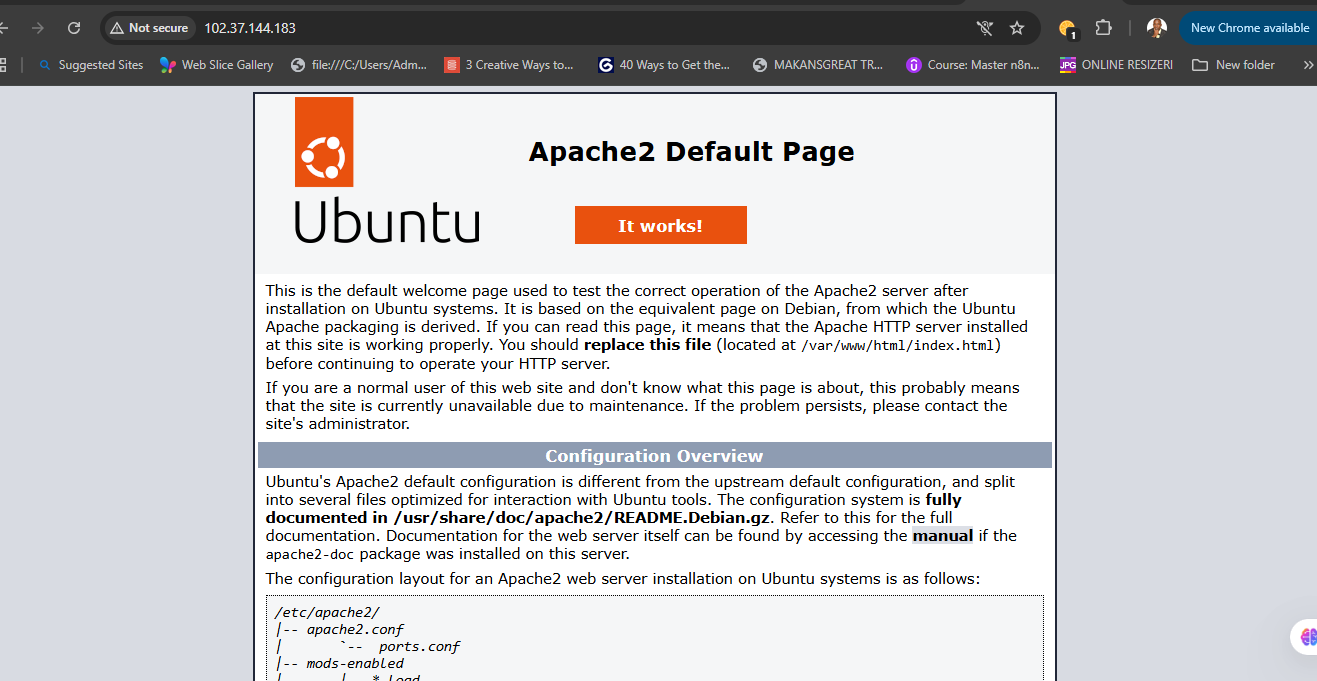
Now let us confirm if apache2! Was actually installed on the virtual machine, we can do this by going to your Azure site and copy the ip address and paste it on the web page and see the result.
Copy ip address
Test Your Web Server
Open a web browser and enter the public IP address you obtained earlier. If apache2 is running correctly, you should see a default welcome page.
Congratulations! You have successfully created a Linux virtual machine on Microsoft Azure and installed the Apache2 web server. This is a foundational step for hosting web applications or deploying other web services.