Hovertank One was the predecessor of DOOM, Wolfenstein, and Quake, by id software. This will probably be the only 3D game in this series, and even then, this is not true 3D. The challenge is to make this in one day, so first let's create our spec. I'll be using Golang and Ebitengine. I'll also be using my own UI code. All other code will be written within on day, and hopefully you can do the same. Choose your own language, game engine, whatever, the idea of the code should be the same.
Shortlist
Here's a small checklist for what we have to implement in the game.
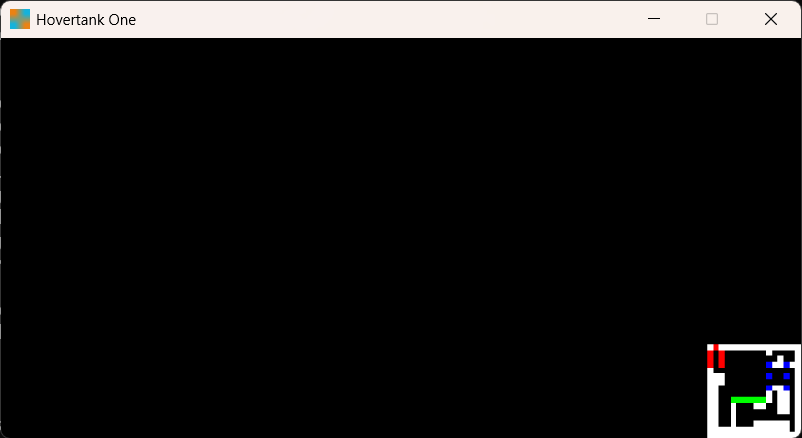
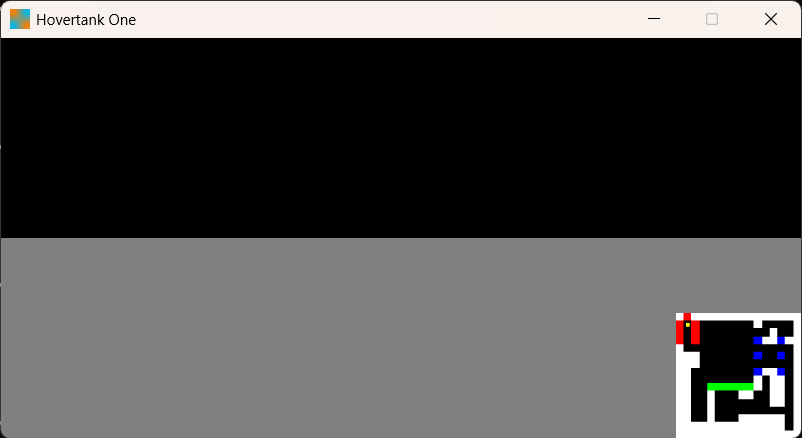
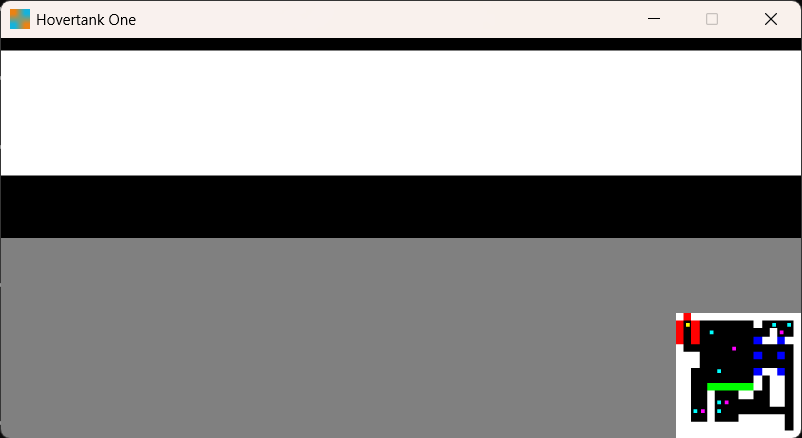
- The ceiling (or sky) is black
- The floor is grey
- The world is grid based
- Lose screen
- Win screen
- Reset logic
- Colored walls
- Different shading depending on wall direction
- Sprite drawing
- Enemy logic
- Shooting logic
- Player movement
- Civilians and civilian logic
- Minimap
- Collision
First Steps
We will first define our tiles, such as empty space, walls, and spawn locations, which will be replaced with empty space.
type Tile struct {
color color.RGBA
solid bool
}
I've also created a grid using the tile codes.
func (g *Game) loadGrid(rawGrid [][]int) {
g.grid = make([][]Tile, len(rawGrid))

for r := range len(rawGrid) {
g.grid[r] = make([]Tile, len(rawGrid[r]))

for c := range len(rawGrid[r]) {
switch TileCode(rawGrid[r][c]) {
case TC_EMPTY:
g.grid[r][c] = Tile{color.RGBA{0, 0, 0, 255}, false}
case TC_WHITE_WALL:
g.grid[r][c] = Tile{color.RGBA{255, 255, 255, 255}, true}
case TC_RED_WALL:
g.grid[r][c] = Tile{color.RGBA{255, 0, 0, 255}, true}
case TC_GREEN_WALL:
g.grid[r][c] = Tile{color.RGBA{0, 255, 0, 255}, true}
case TC_BLUE_WALL:
g.grid[r][c] = Tile{color.RGBA{0, 0, 255, 255}, true}

// Entities
case TC_SPAWN:
g.grid[r][c] = Tile{color.RGBA{0, 0, 0, 255}, false}
case TC_CIVIL:
g.grid[r][c] = Tile{color.RGBA{0, 0, 0, 255}, false}
case TC_ENEMY:
g.grid[r][c] = Tile{color.RGBA{0, 0, 0, 255}, false}
}
}
}
}
To see if this is correct, we'll make a minimap for the bottom right.
func (g *Game) drawMinimap(screen *ebiten.Image) {
// Calculate how big we should make each minimap tile
tileWidth := float32(g.minimap.Bounds().Dx()) / float32(len(g.grid[0]))
tileHeight := float32(g.minimap.Bounds().Dy()) / float32(len(g.grid))

// Draw each tile
for r := range len(g.grid) {
for c := range len(g.grid[r]) {
vector.DrawFilledRect(g.minimap, float32(c)*tileWidth, float32(r)*tileHeight, tileWidth, tileHeight, g.grid[r][c].color, false)
}
}

op := ebiten.DrawImageOptions{}
op.GeoM.Translate(SCREEN_WIDTH-float64(g.minimap.Bounds().Dx()), SCREEN_HEIGHT-float64(g.minimap.Bounds().Dy()))
screen.DrawImage(g.minimap, &op)
}
Now, if we want to start being able to see the world, we need to place the player in it, so let's do that, and spawn them in, and draw them.
type Player struct {
x, y float64
w, h float64
angle float64

shotCooldown int
}

case TC_SPAWN:
    g.grid[r][c] = Tile{color.RGBA{0, 0, 0, 255}, false}
    g.player = &Player{
        x: float64(c)+0.5,
        y: float64(r)+0.5,
        w: 0.5,
        h: 0.5,
    }

// Draw the player
vector.DrawFilledRect(
    g.minimap,
    float32(g.player.x-g.player.w/2)*tileWidth,
    float32(g.player.y-g.player.h/2)*tileHeight,
    float32(g.player.w)*tileWidth,
    float32(g.player.h)*tileHeight,
    color.RGBA{255, 255, 0, 255},
    false,
    )
Now we may as well place the enemies. But first, we must define what an enemy is, load them, and draw them.
type Enemy struct {
x, y float64
w, h float64
img  *ebiten.Image
}

// Loading the enemy
case TC_ENEMY:
    g.grid[r][c] = Tile{color.RGBA{0, 0, 0, 255}, false}
    g.enemies = append(g.enemies, &Enemy{
        x: float64(c)+0.5,
        y: float64(r)+0.5,
        w: 0.5,
        h: 0.5,
    })
And after repeating this for civilians, we get this.

Let's start the raycasting, which will allow us to view the 2D world as 3D. The player will cast rays across their field of view. We use the distance the ray travels to draw a vertical line on screen. We can also use the wall's color. First, we have the mathematics.

Here is a diagram of our player projecting, and where the screen is in 2D space. One thing we must use is the field of view and width of the screen to get the distance between the player and the screen center. This value will be useful later, but let's define it.
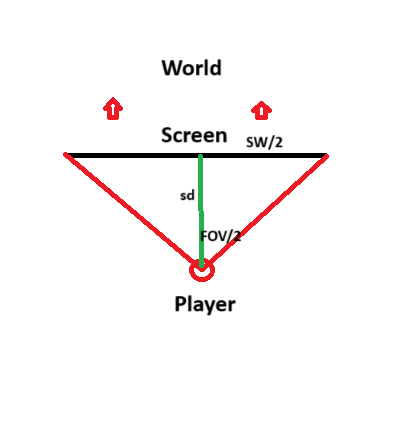
If you know you trigonometry, you'll notice that the tangent of half the field of view is equal to half the screen width over our magic value.
Therefore:
tan(FOV/2) = (SCREEN_WIDTH/2) / SCREEN_DIS
SCREEN_DIS = (SCREEN_WIDTH/2) / tan(FOV/2) // Multiply both sides by SCREEN_DIS and Divide both sides by tan(FOV/2)
Perfect! That's step one done. Now we must cast rays evenly across the screen.
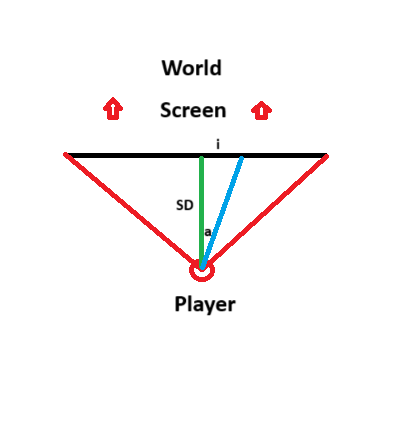
In this image, we know i, and SD (SCREEN_DIS). i will loop over all pixels on the screen, starting from the far left pixel column, to the far right. We just need to calculate a, and luckily for us, we've use similar trigonometry just before.
tan(a) = i / SCREEN_DIS
a = atan(i / SCREEN_DIS) // Apply inverse tangent to both sides
So now we know the angle of each ray we need to shoot. With each ray, we just get the distance and color of the wall we hit, and draw a line based on this information.
func (g *Game) drawWorld(screen *ebiten.Image) {
const FOV = 90
const HALF_FOV = float64(FOV>>1)
const HALF_SCREEN_WIDTH = float64(SCREEN_WIDTH>>1)
const HALF_SCREEN_HEIGHT = float64(SCREEN_HEIGHT>>1)

screenDis := HALF_SCREEN_WIDTH / math.Tan(HALF_FOV)

for i := -HALF_SCREEN_WIDTH; i < HALF_SCREEN_WIDTH; i++ {
a := math.Atan(float64(i)/screenDis) + g.player.angle
dis, clr := g.castRay(a)

// Didn't hit anything
if dis == -1 {
continue
}

vector.DrawFilledRect(screen, float32(i+HALF_SCREEN_WIDTH), 10, 1, 100, clr, false)
}
}
We'll add the height calculation later, but now we're ready to cast rays! We cast 2 on each iteration, one for horizontal grid lines, and one for vertical, starting with horizontal. We need the start position of the ray, and how far it travels on each loop iteration. First, the ratio between x and y movemeny.
ratio := math.Cos(a) / math.Sin(a)
Now, we need to find the distance in the y coordinate from our player's position, and the next horizontal line.
iter := 0
if a == 0 || a == math.Pi { // Perfectly parallel
    // Don't even try
    iter = VIEW_DIS
} else if a > math.Pi { // Looking upwards
    ratio := math.Cos(a) / math.Sin(a)
    sy := float64(int(g.player.y))
    sx := g.player.x + (sy-g.player.y)*ratio
    dy := -1.0
    dx := dy * ratio
} else { // Looking downwards
    ratio := math.Cos(a) / math.Sin(a)
    sy := float64(int(g.player.y))+1
    sx := g.player.x + (sy-g.player.y)*ratio
    dy := 1.0
    dx := dy * ratio
}
iter will be our counter to see how many times we move the ray forward. In both viewing cases, we first calculate the ratio between moving vertically and horizontally. We round up or down bases on which way we're looking, giving us our starting position. We then get the distance to the next grid line (always 1) and get the correct ratio for x movement.
We want to simply do 3 thing on each loop iteration.
- Are we out of bounds?
- Have we hit a wall?
- Move on.
for iter < VIEW_DIS {
    // Out of bounds?
    if sx < 0 ||
        sy < 0 ||
        sy > float64(len(g.grid)) ||
        sx > float64(len(g.grid[0])) {
        break
    }

    // Check grid collisions
    hit, clr := g.getGridCollision(sx, sy)
    if hit {
        horColor = clr
        horHit = true
        disX := sx-g.player.x
        disY := sy-g.player.y
        horDis = math.Sqrt(disX*disX + disY*disY)
        break
    }

    // Move on
    sx += dx
    sy += dy
    iter++
}
We copy the above for vertical check. Now, we just return the nearest collision.
// Get correct data
if !horHit && !verHit {
    return -1, color.RGBA{0, 0, 0, 0}
}

if !horHit || verDis < horDis {
    return verDis, verColor
}

return horDis, horColor

As you can see, we get the color of the wall we're looking at. Now we just have to use the distance to the wall to calculate the visual height.
height := float32(WALL_HEIGHT / dis * screenDis )
vector.DrawFilledRect(screen, float32(i+HALF_SCREEN_WIDTH), float32(HALF_SCREEN_HEIGHT)-height/2, 1, height, clr, false)
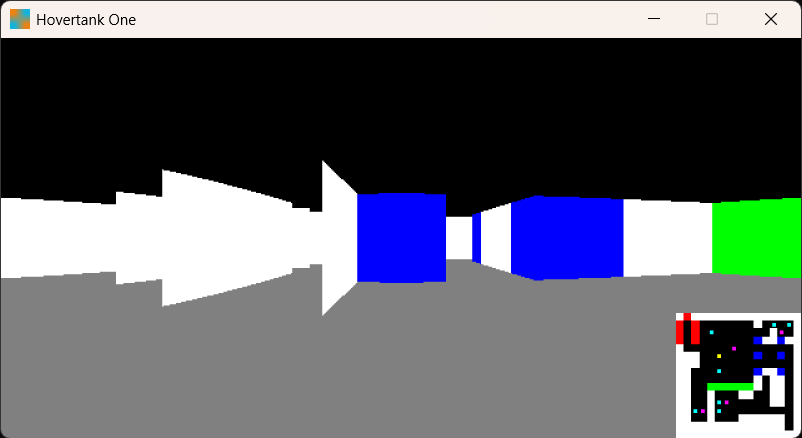
It would be way cooler if we could move the player ourselves, so let's write that now.
func (p *Player) update(g *Game) {
if ebiten.IsKeyPressed(ebiten.KeyA) {
p.angle -= 0.04
}

if ebiten.IsKeyPressed(ebiten.KeyD) {
p.angle += 0.04
}

if ebiten.IsKeyPressed(ebiten.KeyW) {
dx := math.Cos(p.angle) * 0.1
dy := math.Sin(p.angle) * 0.1
p.x += dx
p.y += dy
}

if ebiten.IsKeyPressed(ebiten.KeyS) {
dx := math.Cos(p.angle) * 0.1
dy := math.Sin(p.angle) * 0.1
p.x -= dx
p.y -= dy
}
}
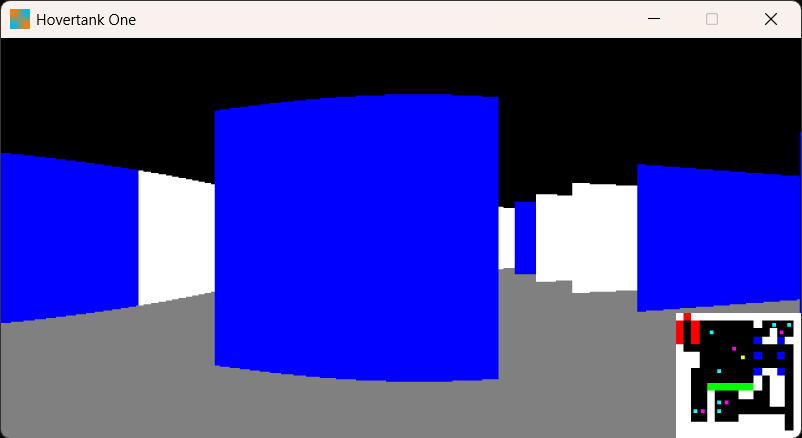
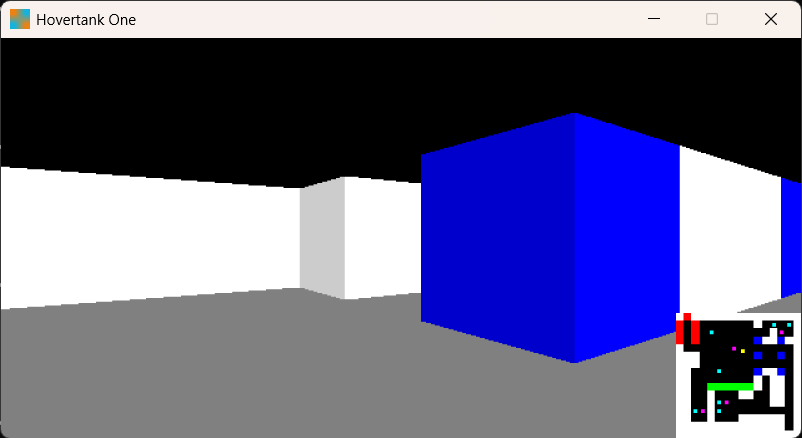
We've got a warping issue here, as a flat wall should appear, well, flat. The reason for this is because the rays furthest from the center will have to travel further to hit this wall. Therefore, we need to help out these rays so that our visuals think they hit sooner.
a = g.player.angle - a
dis *= math.Cos(a)
Now for the civilians. Our civilians are going to be angry blobs. Let's loop over all civilians, and draw an image where they are.
func (g *Game) drawEntities(screen *ebiten.Image) {
const FOV = math.Pi/2
const HALF_FOV = float64(FOV/2)
const HALF_SCREEN_WIDTH = float64(SCREEN_WIDTH>>1)

screenDis := HALF_SCREEN_WIDTH / math.Tan(HALF_FOV)

for _, civil := range g.civils {
dx := civil.x - g.player.x
dy := civil.y - g.player.y
dis := math.Sqrt(dx*dx + dy*dy)

// Relative angle to civil
a := math.Acos(dx/dis)
if dy < 0 {
a = -a
}
a -= g.player.angle
if a > HALF_FOV && a < math.Pi*2-HALF_FOV {
// Civil isn't in our view
continue
}

// What pixel column the center of the enemy will be in
i := math.Tan(a) * screenDis + HALF_SCREEN_WIDTH

dis *= math.Cos(a)
height := CIVIL_HEIGHT * screenDis / dis
maxHeight := WALL_HEIGHT * screenDis / dis
op := ebiten.DrawImageOptions{}
op.GeoM.Scale(height/float64(imgH), height/float64(imgH))
op.GeoM.Translate(i-float64(height/2), HALF_SCREEN_HEIGHT+maxHeight/2-height)
screen.DrawImage(img, &op)
}
}
All we're doing here is getting the angle to the civilian, checking they're in our view, then drawing an image where they should be. Etra logic is required to place the civilian on the floor.
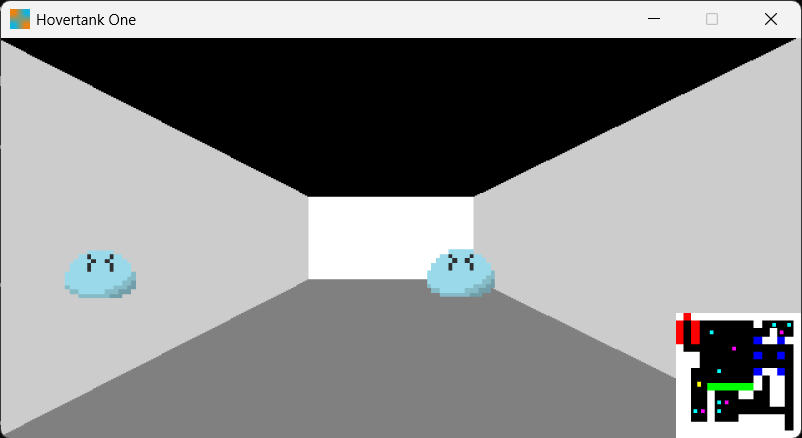
Looks good! But the one on the left is in the wall, so we must fix occlusion. We find the distance to the walls, then just check if the enemy is behind them.
// Z buffer definition
zBuffer := [SCREEN_WIDTH]float64{}

// On each ray case
zBuffer[int(i+HALF_SCREEN_WIDTH)] = dis

// Passing info between drawing functions
zBuffer := g.drawWorld(screen)
g.drawEntities(screen, zBuffer)

// Occlusion
if zBuffer[int(i)] < dis && zBuffer[int(i)] != -1 {
    continue
}
This works quite well, and will work for our make in a day case. Now we must be able to save these civilians!
func (p *Player) saveCivils(g *Game) {
for i := 0; i < len(g.civils); i++ {
civil := g.civils[i]
dx := civil.x - p.x
dy := civil.y - p.y
dis := math.Sqrt(dx*dx + dy*dy)
if dis < 1 {
// Save the civil!
g.civils = slices.Delete(g.civils, i, i+1)
i--
}
}
}

if len(g.civils) == 0 {
    g.phase = WIN
}
As soon as we get close enough to a civilian, we delete them. Then in the game's update we can simply check if there are any civilians left. And this works!
After generalising sprite drawing code, we can easily draw enemies.
func (g *Game) drawEntities(screen *ebiten.Image, zBuffer [SCREEN_WIDTH]float64) {
const CIVIL_HEIGHT = 0.4
const ENEMY_HEIGHT = 0.8

civilImg := g.vis.GetImage("civil")
for _, civil := range g.civils {
g.drawSprite(screen, civilImg, CIVIL_HEIGHT, civil.x, civil.y, zBuffer)
}

enemyImg := g.vis.GetImage("enemy")
for _, enemy := range g.enemies {
g.drawSprite(screen, enemyImg, ENEMY_HEIGHT, enemy.x, enemy.y, zBuffer)
}
}
We can use similar code used for saving civilians to check if we've lost
func (p *Player) checkKilled(g *Game) {
for i := 0; i < len(g.enemies); i++ {
enemy := g.enemies[i]
dx := enemy.x - p.x
dy := enemy.y - p.y
dis := math.Sqrt(dx*dx + dy*dy)
if dis < 0.3 {
// We die!
g.phase = LOSE
}
}
}
Nice, but now we need defense! We can case a drawing ray, ignore color, and use it for the shot angle and distance, to find if we hit any enemies.
func (p *Player) shoot(g *Game) {
maxDis, _ := g.castRay(p.angle)
if maxDis == -1 {
maxDis = 99999.9
}

const FOV = math.Pi/2
const HALF_FOV = float64(FOV/2)

for i := 0; i < len(g.enemies); i++ {
enemy := g.enemies[i]
dx := enemy.x - g.player.x
dy := enemy.y - g.player.y
dis := math.Sqrt(dx*dx + dy*dy)

if dis > maxDis {
continue
}

// Relative angle to enemy
a := math.Acos(dx/dis)
if dy < 0 {
a = -a
}
a -= g.player.angle
a = boundAngle(a)
if a > HALF_FOV && a < math.Pi*2-HALF_FOV {
// Enemy isn't in our view
continue
}

// Horizontal offset (0 means we hit the enemies center)
offset := math.Abs(math.Tan(a) * dis)

if offset > 0.3 {
continue
}

// We hit the enemy!
g.enemies = slices.Delete(g.enemies, i, i+1)
i--
}
}
This mashing of code uses the offset to determine a hit. An offset of 0 means a perfect hit, with 1 meaning you were a whole tile off. Let's get the enemy to chase the player, so we'll use Dijkstra's to find them first.
func (e *Enemy) update(g *Game) {
// Try to move to next position
if e.x != e.nextX {
if math.Abs(e.nextX - e.x) < 0.01 {
e.x = e.nextX
} else if e.nextX > e.x {
e.x += 0.01
} else {
e.x -= 0.01
}
return
}

if e.y != e.nextY {
if math.Abs(e.nextY - e.y) < 0.01 {
e.y = e.nextY
} else if e.nextY > e.y {
e.y += 0.01
} else {
e.y -= 0.01
}
return
}

startX := int(e.x)
startY := int(e.y)
endX := int(g.player.x)
endY := int(g.player.y)

type SpaceInfo struct {
visited bool
dis int
parentX, parentY int
}

type Pos struct {
x, y int
parentX, parentY int
}

spaceInfo := make([][]SpaceInfo, len(g.grid))
for r := range len(g.grid) {
spaceInfo[r] = make([]SpaceInfo, len(g.grid[0]))
for c := range len(g.grid) {
spaceInfo[r][c].dis = 99999
}
}

spaceInfo[startY][startX].dis = 0
spaceInfo[startY][startX].parentX = startX
spaceInfo[startY][startX].parentY = startY

queue := []Pos{{startX, startY, startX, startY}}

var pos Pos

for len(queue) != 0 {
pos = queue[0]
queue = queue[1:]

if pos.x < 0 || pos.y < 0 || pos.y >= len(g.grid) || pos.x >= len(g.grid[0]) {
continue
}

if g.grid[pos.y][pos.x].solid {
continue
}

if pos.x == endX && pos.y == endY {
break
}

newDis := getMovementDistance(startX, startY, pos.x, pos.y)

if spaceInfo[pos.y][pos.x].visited {
if spaceInfo[pos.y][pos.x].dis <= newDis {
continue
}
}

spaceInfo[pos.y][pos.x].visited = true
spaceInfo[pos.y][pos.x].dis = newDis
spaceInfo[pos.y][pos.x].parentX = pos.parentX
spaceInfo[pos.y][pos.x].parentY = pos.parentY

queue = append(queue, Pos{pos.x-1, pos.y, pos.x, pos.y})
queue = append(queue, Pos{pos.x+1, pos.y, pos.x, pos.y})
queue = append(queue, Pos{pos.x, pos.y-1, pos.x, pos.y})
queue = append(queue, Pos{pos.x, pos.y+1, pos.x, pos.y})
}

// Couldn't find path
if pos.x != endX || pos.y != endY {
return
}

curTile := spaceInfo[pos.parentY][pos.parentX]
nextTile := spaceInfo[curTile.parentY][curTile.parentX]

for curTile.parentX != startX || curTile.parentY != startY {
pos.x = curTile.parentX
pos.y = curTile.parentY
curTile = nextTile
nextTile = spaceInfo[curTile.parentY][curTile.parentX]
}

// Now we have the position of the next tile, set the enemy there
e.nextX = float64(pos.x)+0.25
e.nextY = float64(pos.y)+0.25
}
Just a bit of code... Either way, it works! Now we have a fairly playable game. For collision, we can just check that the player isn't trying to move into a wall.
// Player update
newX := p.x
newY := p.y

if ebiten.IsKeyPressed(ebiten.KeyW) {
    dx := math.Cos(p.angle) * 0.05
    dy := math.Sin(p.angle) * 0.05
    newX += dx
    newY += dy
}

if ebiten.IsKeyPressed(ebiten.KeyS) {
    dx := math.Cos(p.angle) * 0.05
    dy := math.Sin(p.angle) * 0.05
    newX -= dx
    newY -= dy
}

if !g.checkCollide(newX, newY, p.w, p.h) {
    p.x = newX
    p.y = newY
}

func (g *Game) checkCollide(x, y, w, h float64) bool {
c := int(x)
r := int(y)
t := g.getTileAtPos(float64(c), float64(r))
if t != nil {
if t.solid {
return true
}
}

c = int(x+w)
r = int(y)
t = g.getTileAtPos(float64(c), float64(r))
if t != nil {
if t.solid {
return true
}
}

c = int(x)
r = int(y+h)
t = g.getTileAtPos(float64(c), float64(r))
if t != nil {
if t.solid {
return true
}
}

c = int(x+w)
r = int(y+h)
t = g.getTileAtPos(float64(c), float64(r))
if t != nil {
if t.solid {
return true
}
}

return false
}
And that's it, the last check on the checklist.
Done
Wow, I decided to come back with a tougher one here, and it was quite fun. Hopefully from this you understand the rendering we used, and would be able to tinker with the logic yourself. Which leads me to your challenges.
Your Next Steps
You've go the code here for you to look at and modify, so here are some ideas for you.
- Walls can be any color
- Add different enemy types
- Walls with different heights
- Textured walls
- Jumping
- Non-perpendicular walls
I haven't had the spare day to make one of these in a while, so hopefully I get another one soon, any suggestions would help!