Argo CD has become the go-to tool for adopting GitOps in Kubernetes environments. Here at Octopus Deploy, we are huge fans of it; in fact, we're lead maintainers of the Argo project.
In a previous article, we looked at connecting an Argo CD instance running on a Self-Hosted Azure Kubernetes Service (AKS) to Octopus Deploy. While this was neat, AWS still leads the cloud infrastructure market at around 29% as of Q3 2025, according to Synergy Research Group, so if you have been wondering how to replicate that tutorial on EKS, you're in the right place.
Why connect Argo CDs on EKS to Octopus Cloud?
Running Argo CD on EKS gives you GitOps-driven deployments into Kubernetes, but Argo CD alone does not cover the full delivery picture. On the other end of that picture is Octopus, which coordinates the release process around it: approvals, environment progression, runbooks, and a single view across Kubernetes and everything else you ship.
Octopus Cloud customers get a mostly plug-and-play experience because Octopus has already configured the communication rules on its side, and the Helm commands generated by the connection wizard handle the rest (assuming no egress restrictions sit in front of the Argo CD cluster).
In our previous blog, a lot of the steps came about as a result of needing to open up certain ports in order to establish connectivity with your Octopus server; the majority of this goes away when you run in AWS and use Octopus Cloud.
Prerequisites
In order to follow along with this portion of the tutorial, you will need the following tools installed locally.
- Terraform, for provisioning ArgoCD and the Argo CD Gateway onto the cluster
- Helm, for installing the gateway chart
- kubectl, for interacting with the cluster
- ArgoCD CLI, for generating an auth token for the Octopus gateway account
- An Octopus API key, for accessing the Octopus Deploy REST API
Step 1: Provision a Kubernetes cluster
If you already have a cluster, feel free to skip to the next section. However, if you don't, the following lines will use the EKS CLI, to create one.
To follow along, run the following commands:
Create a cluster configuration:
cat << 'EOF' > cluster.yaml
apiVersion: eksctl.io/v1alpha5
kind: ClusterConfig

metadata:
  name: basic-cluster
  region: eu-north-1

nodeGroups:
  - name: ng-1
    instanceType: m5.large
    desiredCapacity: 10
    volumeSize: 80
    ssh:
      allow: true # will use ~/.ssh/id_rsa.pub as the default ssh key
  - name: ng-2
    instanceType: m5.large
    desiredCapacity: 2
    volumeSize: 100
    ssh:
      publicKeyPath: ~/.ssh/id_rsa.pub
EOF
The cluster configuration above will provision two nodes with m5.large as the instance type, feel free to tweak the configuration as you see fit.
Create the cluster by running:
eksctl create cluster -f cluster.yaml --timeout 45m
NOTE: The --timeout flag here is to ensure the CLI does not timeout before the cluster is done being provisioned.
Finally, you can obtain the Kubeconfig for the cluster created by running:
eksctl utils write-kubeconfig --cluster=basic-cluster --region=eu-north-1
Step 2: Install ArgoCD
The next step is to install ArgoCD. Using the helm chart is the most straightforward means of installing.
Head back to your terminal and run the following command:
helm install argocd argo-cd \
  --repo https://argoproj.github.io/argo-helm \
  --create-namespace \
  --namespace argocd \
  --wait \
  --timeout 10m \
  --values - << 'EOF'
configs:
  cm:
    accounts.octopus: apiKey
  rbac:
    policy.default: "role:readonly"
    policy.csv: |
      g, admin, role:admin
      p, octopus, applications, get, *, allow
      p, octopus, applications, sync, *, allow
      p, octopus, clusters, get, *, allow
      p, octopus, logs, get, */*, allow
EOF
The output is similar to:
NAME: argocd
LAST DEPLOYED: Fri Apr 15 14:32:08 2026
NAMESPACE: argocd
STATUS: deployed
REVISION: 1
TEST SUITE: None
NOTES:
The command will install Argo CD into a namespace called argocd, the extra values file tacked on sets up the account Octopus will use to talk to it.
accounts.octopus: apiKey creates a dedicated octopus user in Argo CD and enables API key authentication for it, so Octopus has its own identity rather than piggybacking on admin.
The rbac block then scopes what that user can do: policy.default: "role:readonly" makes read-only the baseline for any account without an explicit grant, and the policy.csv lines grant the octopus user only the permissions it needs.
The values above become relevant once we install the Octopus Argo gateway.
What is the Octopus Argo gateway?
Simply put, the Octopus Argo gateway is a component required to establish a secure, TLS-encrypted connection between an Argo CD instance (running in a Kubernetes cluster) and the Octopus Deploy.
In contrast to self-hosted setups where you need to create firewall rules and potentially consider what certs to use to secure the communication, the Octopus Argo gateway handles it all.
Generate an authentication token
In order for the gateway to authenticate with the ArgoCD instance you just deployed, an authentication token is required. To create one, run the following commands:
Grab the auto-generated admin password
ARGOCD_PASSWORD=$(kubectl get secret argocd-initial-admin-secret \
  -n argocd \
  -o jsonpath='{.data.password}' | base64 --decode)
```

**Port-forward the Argo CD server to localhost:18080**

```bash
kubectl port-forward svc/argocd-server -n argocd 18080:443 &
PF_PID=$!
sleep 5
Log in as admin
argocd login localhost:18080 \
  --username admin \
  --password "$ARGOCD_PASSWORD" \
  --insecure \
  --grpc-web
Mint a token for the octopus account
argocd account generate-token \
  --account octopus \
  --insecure \
  --grpc-web
Be sure to copy and save the token.
Clean up the port-forward
kill $PF_PID
Step 3: Link your cluster
From here on out, installing the Octopus Argo gateway is only a few clicks.
Within the sidebar on the left side of your Octopus dashboard, click on the tab Argo CD Instances.
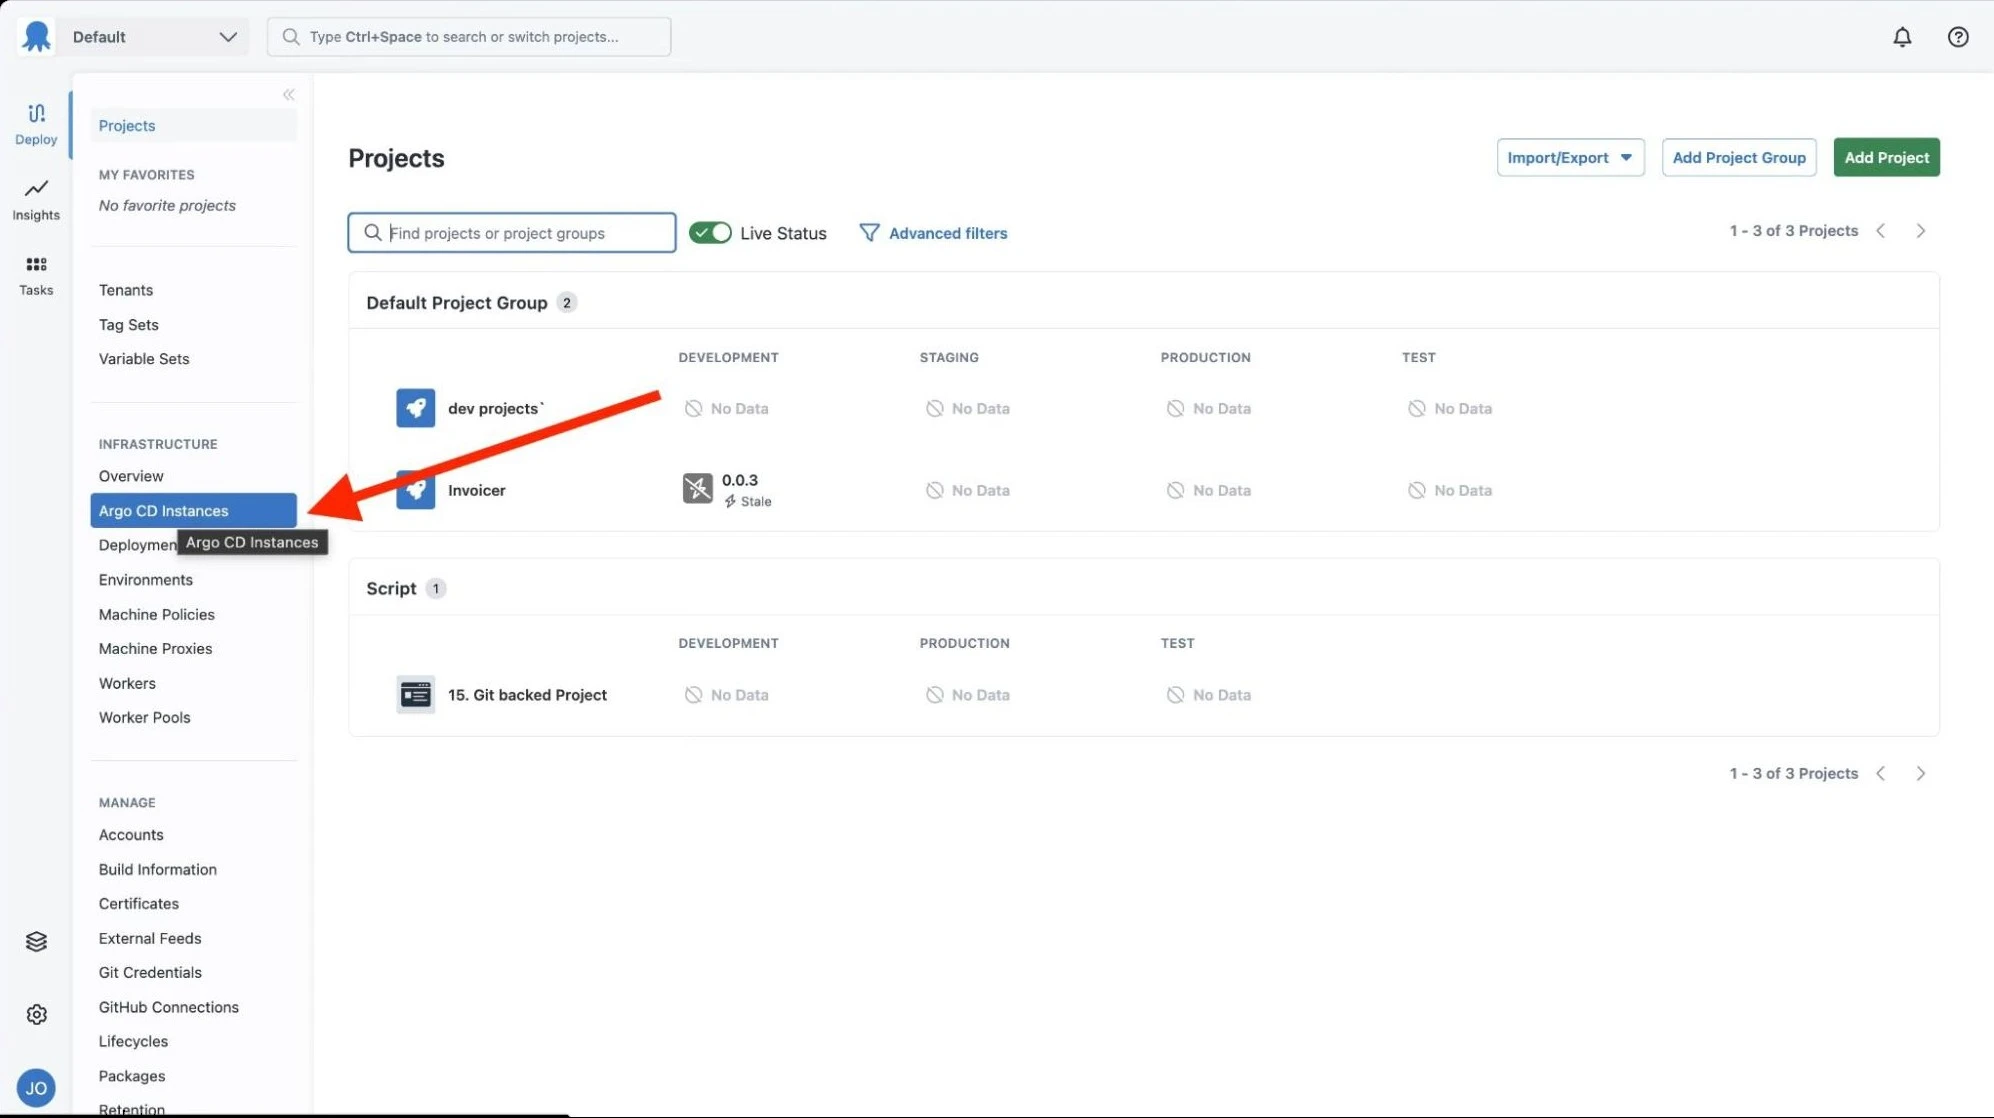
Figure 1: Octopus dashboard displaying the Argo CD Instances sidebar menu option
Within the Argo CD instance tab click on Add Argo Instance.

Figure 2: Screenshot of the Argo Instance button
Up next, you should be greeted with the following menu.
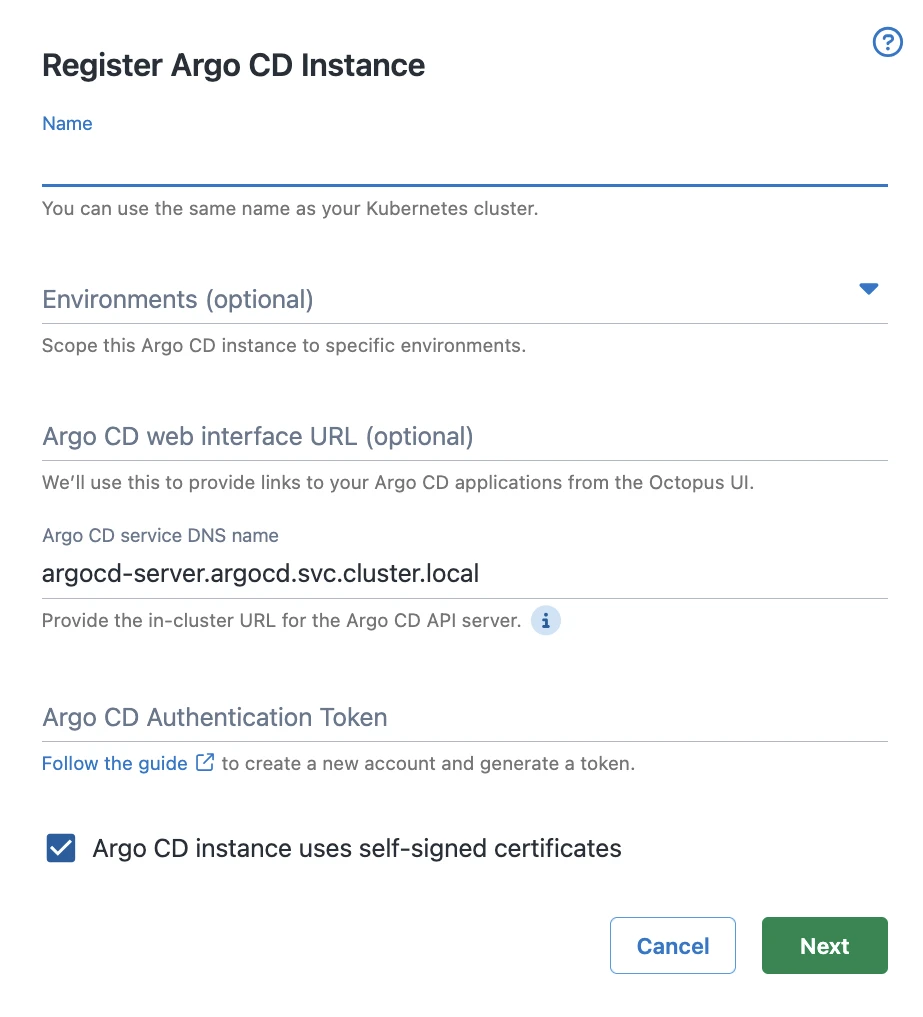
Figure 3: Screenshot showing the Argo CD instance registration form
Enter a name for this cluster's connection, and if you wish you can select an environment for the ArgoCD instance. Leave the DNS name as the default unless you modified it during the Helm install.
Paste in the authentication token you generated earlier and hit next.
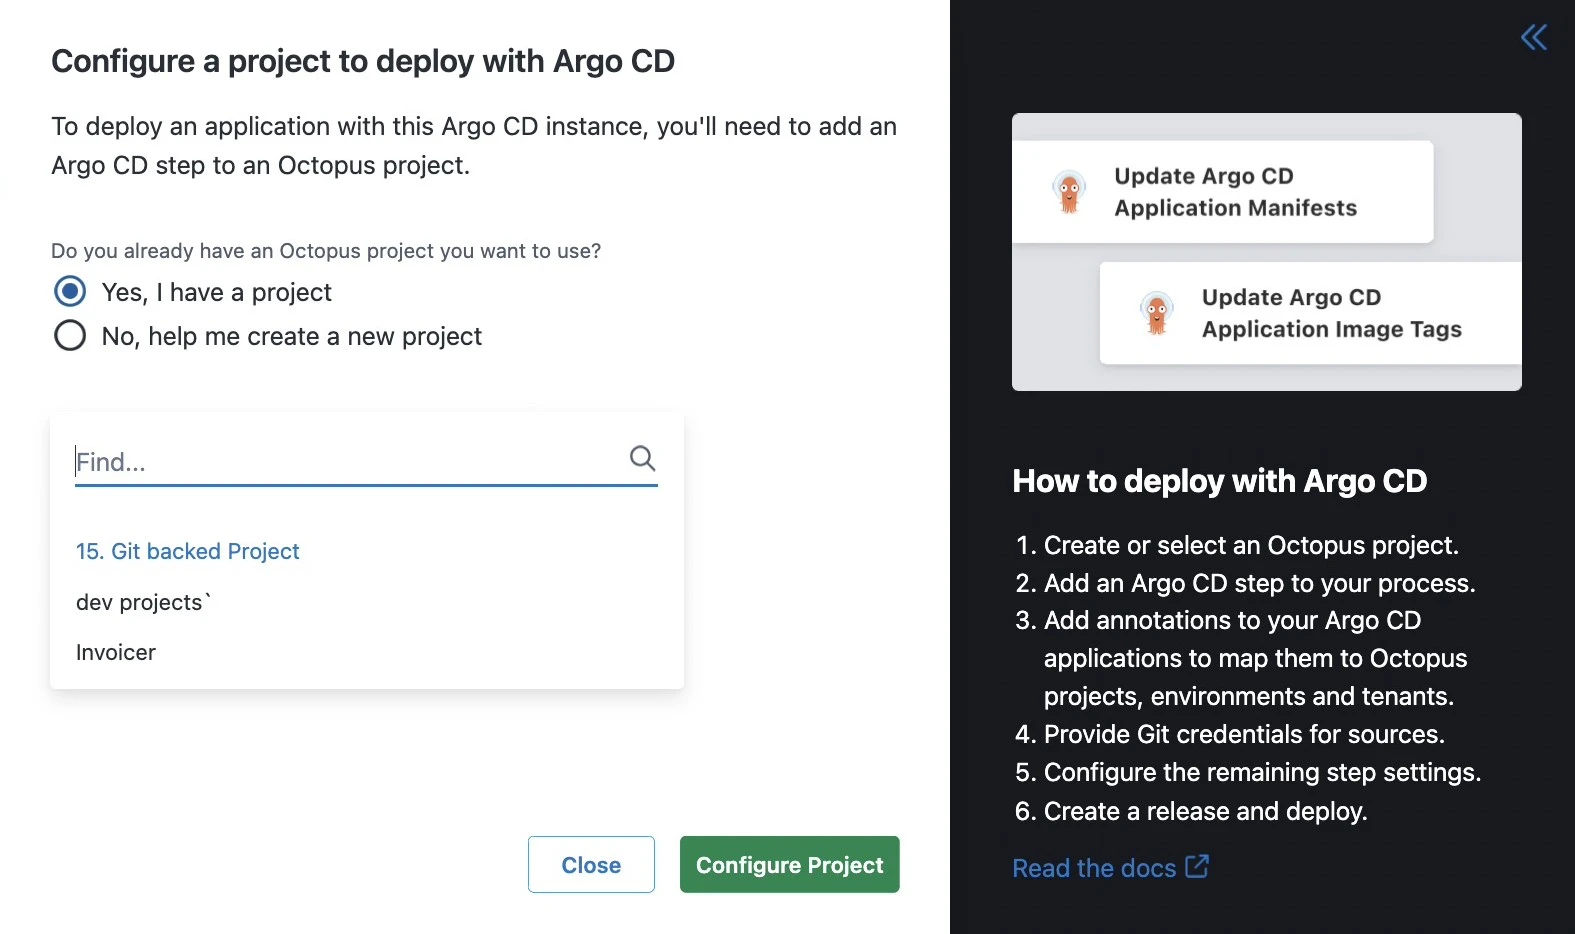
Figure 4: Configuring a project to deploy with Argo CD
Select which project you would like to connect your Argo instance to and hit Configure Project.
Right after the configuration wizard, it will return a Helm install command which looks something like this.
helm install --atomic \
  --create-namespace --namespace octo-argo-gateway-eks-dev \
  --version "*.*" \
  --set registration.octopus.name="EKS-dev" \
  --set registration.octopus.serverApiUrl="https://<your-octopus-instance>.octopus.app/" \
  --set registration.octopus.serverAccessToken="<your-octopus-server-access-token>" \
  --set registration.octopus.environments="{development}" \
  --set registration.octopus.spaceId="Spaces-1" \
  --set gateway.octopus.serverGrpcUrl="grpc://<your-octopus-instance>.octopus.app:8443" \
  --set gateway.argocd.serverGrpcUrl="grpc://argocd-server.argocd.svc.cluster.local" \
  --set gateway.argocd.insecure="true" \
  --set gateway.argocd.plaintext="false" \
  --set gateway.argocd.authenticationToken="<your-argocd-token>" \
  eks-dev \
  oci://registry-1.docker.io/octopusdeploy/octopus-argocd-gateway-chart
Paste the command in your terminal and in a couple of seconds your cluster should be connected!
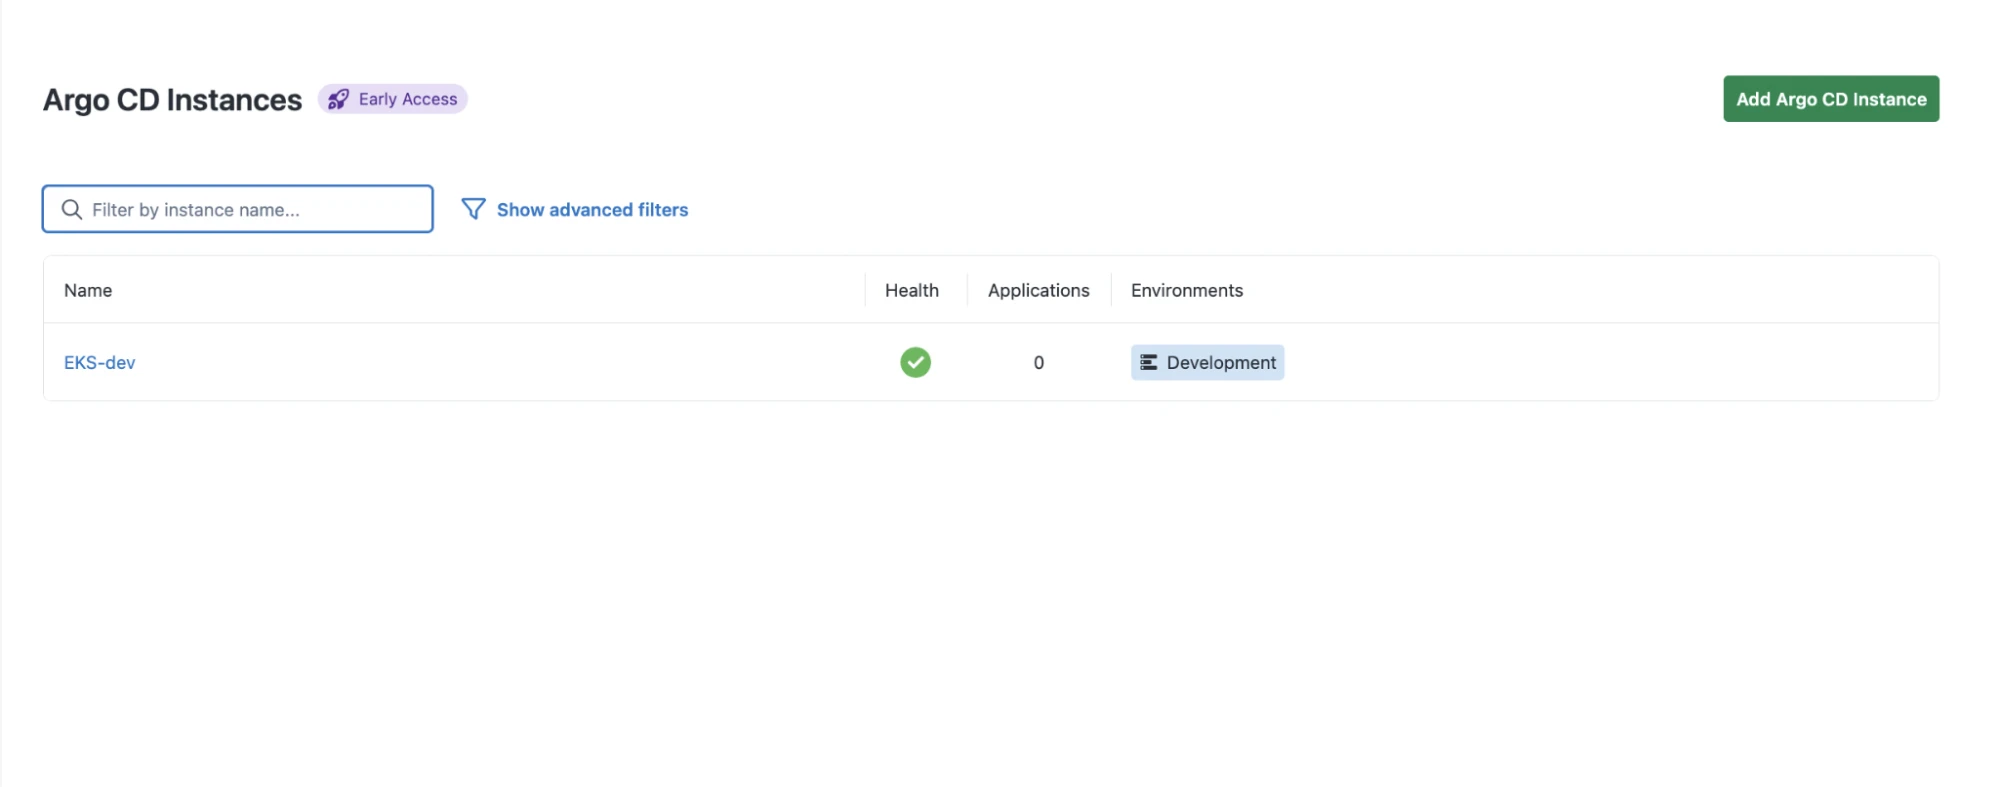
Figure 5: Confirmation of a connected cluster in the Argo CD Instance tab
When do I pick Octopus Cloud over self-hosted?
If you caught our last blog on connecting an AKS cluster to a self-hosted Octopus server, you might be wondering which path fits your setup.
Octopus Cloud makes sense when you want the connection to just work. The wizard generates the Helm command, you paste a token, and you are done. If your team does not have a strong reason to run Octopus on your own infrastructure, this is a reasonable path.
Self-hosted Octopus makes sense when the answer to "can the server live in our VPC?" is "it has to." which usually comes down to data residency rules, existing on-premises infrastructure you need to keep using, or security policies that will not let a third party hold your deployment control plane.
You pay for that control with the networking work in Shawn's post: opening inbound ports, handling internal DNS, dealing with certs signed by your own CA, and configuring load balancers for gRPC. None of it is hard, but it is work.
Wherever your clusters live, Octopus fits
In this post, we walked through connecting an EKS cluster to Octopus Cloud.
We also looked at some of the tradeoffs between doing this in a self-hosted environment versus the cloud.
Whichever path fits your constraints, the outcome is the same. Argo CD keeps doing GitOps. Octopus handles approvals, environment progression, runbooks, and everything outside Kubernetes that you still need to ship.
Spin up a free Octopus Cloud instance and try the Argo CD integration for yourself, or book a demo if you want a walkthrough.
Happy deployments!