In this second part of our React Router v7 tutorial, we will dive deeper into the routing system: how to nest views within a shared layout, how to navigate without reloading the page using Link, and how to add visual transitions for a smoother experience.
If you're coming from the previous tutorial, you can leave the project as it is, but if you want to ensure everything is clean or start from the same point, you can run the following commands:
## Repository link https://github.com/kevinccbsg/react-router-tutorial-devto
git reset --hard
git clean -d -f
git checkout 01-outlet-nested-routes-links
Initial route structure
Let's first prepare our routes file. We'll modify the src/AppRoutes.tsx file to use the Component property instead of element for our main pages. We use Component instead of element when we want to directly pass a reference to the component without needing JSX ().
The code will look like this:
// filepath: /root/brikev/react-router-tutorial-devto/src/AppRoutes.tsx
import { createBrowserRouter } from "react-router";
import ContactsPage from "./pages/Contacts";
import ContactForm from "./pages/ContactForm";

const AppRoutes = createBrowserRouter([
  {
    path: "/",
    Component: ContactsPage,
  },
  {
    path: "/contacts/new",
    Component: ContactForm,
  },
  {
    path: "/about",
    element: <div>About</div>,
  },
  {
    path: "*",
    element: <div>Not Found</div>,
  },
]);

export default AppRoutes;
As you can see, we simply indicate which component should be displayed for each route.
Create our pages
Now let's create the ContactsPage and ContactForm components. To organize ourselves better, we'll save them in a new folder src/pages.
src/pages/Contacts.tsx
// filepath: /root/brikev/react-router-tutorial-devto/src/pages/Contacts.tsx
import { ScrollArea } from "@/components/ui/scroll-area";
import { Button } from "@/components/ui/button";

const contacts = [ // mock data
  {
    "id": "1",
    "firstName": "Jane",
    "lastName": "Doe",
    "username": "jane_doe",
    "avatar": "https://i.pravatar.cc/150?img=1",
    "email": "*Emails are not allowed*",
    "phone": "+1 555-1234",
    "favorite": true
  },
  {
    "id": "2",
    "firstName": "John",
    "lastName": "Smith",
    "username": "john_smith",
    "avatar": "https://i.pravatar.cc/150?img=12",
    "email": "*Emails are not allowed*",
    "phone": "+1 555-5678",
    "favorite": true
  }
];

const ContactsPage = () => {
  return (
    <div className="h-screen grid grid-cols-[300px_1fr]">
      {/* Sidebar */}
      <div className="border-r p-4 flex flex-col gap-4">
        <Button className="w-full" variant="secondary" asChild>
          <a href="/contacts/new">
            New
          </a>
        </Button>
        <ScrollArea className="flex-1">
        <div className="flex flex-col gap-1 mt-4">
          {contacts.map(contact => (
            <Button
              key={contact.id}
              className="justify-start"
              asChild
            >
              <a href={`/contacts/${contact.id}`}>
                {contact.firstName} {contact.lastName}
              </a>
            </Button>
          ))}
        </div>
      </ScrollArea>
      </div>
      {/* Detail View */}
      <div className="p-8">
        Contact page
      </div>
    </div>
  );
};

export default ContactsPage;
src/pages/ContactForm.tsx
// filepath: /root/brikev/react-router-tutorial-devto/src/pages/ContactForm.tsx
import { Button } from '@/components/ui/button';
import { Input } from '@/components/ui/input';
import { Label } from '@/components/ui/label';

const ContactForm = () => {
  return (
    <div className="max-w-md mx-auto">
      <h1 className="text-2xl font-bold mb-4">Create New Contact</h1>
      <form className="space-y-4">
        <div>
          <Label className="mb-2" htmlFor="firstName">First Name</Label>
          <Input type="text" id="firstName" name="firstName" required />
        </div>
        <div>
          <Label className="mb-2" htmlFor="lastName">Last Name</Label>
          <Input type="text" id="lastName" name="lastName" required />
        </div>
        <div>
          <Label className="mb-2" htmlFor="username">Username</Label>
          <Input type="text" id="username" name="username" required />
        </div>
        <div>
          <Label className="mb-2" htmlFor="email">Email</Label>
          <Input type="email" id="email" name="email" required />
        </div>
        <div>
          <Label className="mb-2" htmlFor="phone">Phone</Label>
          <Input type="tel" id="phone" name="phone" required />
        </div>
        <div>
          <Label className="mb-2" htmlFor="avatar">Avatar (Optional)</Label>
          <Input type="url" id="avatar" name="avatar" />
        </div>
        <Button type="submit">
          Create Contact
        </Button>
      </form>
    </div>
  );
};

export default ContactForm;
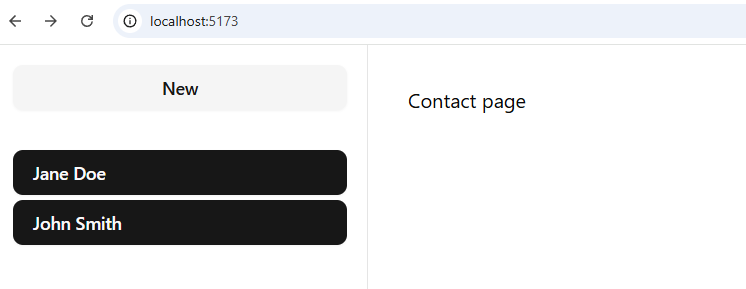
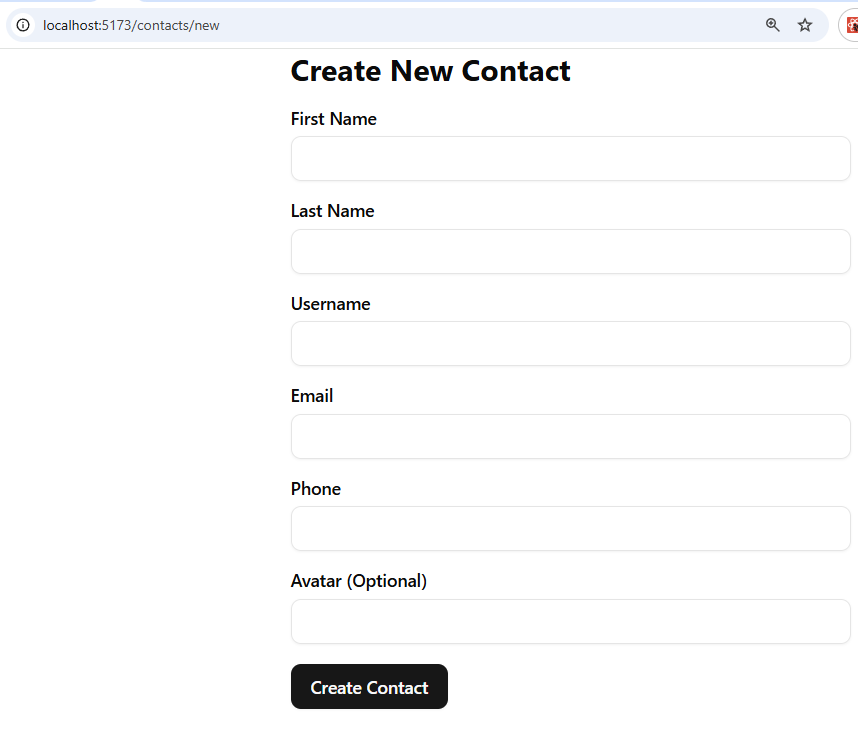
If you visit / or /contacts/new, you should see both pages, but... something is not right:
The form is displayed as a standalone page, without maintaining the sidebar layout. Also, when using the "New" link, we see a full page reload, indicating that we don't yet have a properly configured SPA navigation.
Nest routes within a layout
Now that we have both pages, let's make the /contacts/new route not standalone but rendered within the main contacts page layout (i.e., within ContactsPage).
// filepath: /root/brikev/react-router-tutorial-devto/src/AppRoutes.tsx
import { createBrowserRouter } from "react-router";
import ContactsPage from "./pages/Contacts";
import ContactForm from "./pages/ContactForm";

const AppRoutes = createBrowserRouter([
  {
    path: "/",
    Component: ContactsPage,
    children: [
      {
        path: "contacts/new",
        Component: ContactForm,
      },
    ],
  },
  {
    path: "/about",
    element: <div>About</div>,
  },
  {
    path: "*",
    element: <div>Not Found</div>,
  },
]);

export default AppRoutes;
We now have the nested route, but it won't display until we specify where the children should appear. For that, we use the Outlet component.
Display child routes with Outlet
Within the ContactsPage component, let's import and place Outlet exactly where we want the child pages to be displayed:
// filepath: /root/brikev/react-router-tutorial-devto/src/pages/Contacts.tsx
// Import the component
import { Link, Outlet } from "react-router";
// ...existing code...
{/* Detail View */}
<div className="p-8">
  <Outlet />
</div>
SPA navigation with Link
So far, we've used <a> for links, but that causes a full page reload. To enable client-side navigation (without reloading), we need to use the Link component from react-router.
Instead of this:
<a href="/contacts/new">New</a>
Do this:
<Link to="/contacts/new" viewTransition>
  New
</Link>
<Link to={`/contacts/${contact.id}`} viewTransition>
  {contact.firstName} {contact.lastName}
</Link>
The viewTransition prop enables automatic route transition animations (if the browser supports it). Very useful for making navigation feel smoother! By default, it does a fade-in, but this can be customized much further. We can discuss this in a future post.
Recap
So far, we've achieved:
- A main route with a layout
- Nested routes displayed within that layout
- Using
Link instead of a to avoid reloads
- Enabling visual transitions between routes
What's next?
In the next part, we will do something very powerful: render dynamic data based on the URL and learn how to use loaders to fetch data.
Let's dive into the magic of React Router v7!
See you in part 3.
