Building Intelligent Applications with Microsoft's Latest AI Stack
Introduction
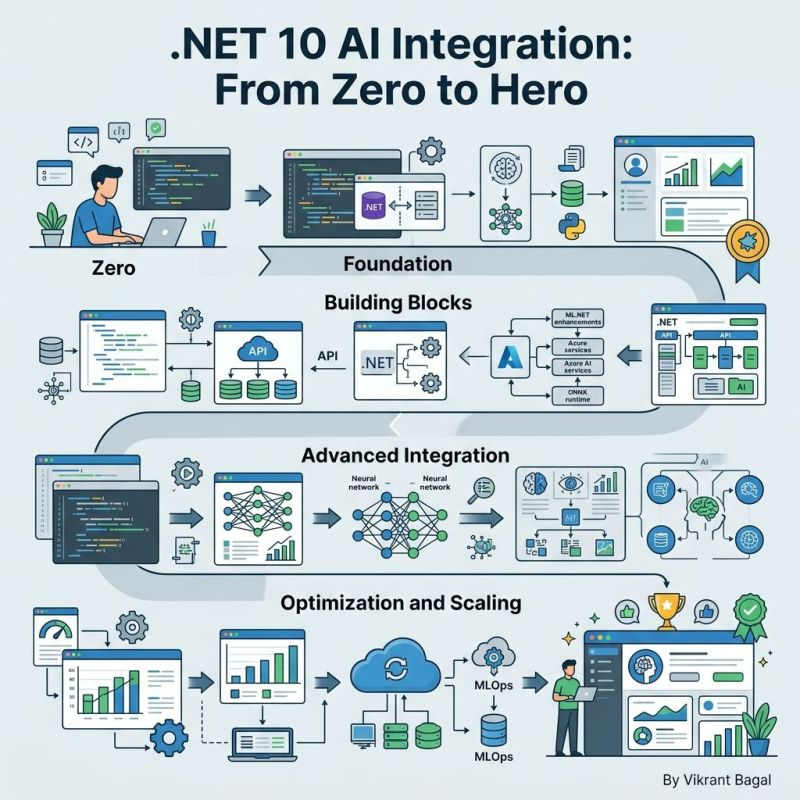
The release of .NET 10 marks a paradigm shift in how we build intelligent applications. With native AI integration, unified abstractions, and production-ready frameworks, .NET 10 makes AI development more accessible than ever. This comprehensive guide will take you from zero knowledge to building production-ready AI-powered .NET applications.
Why .NET 10 for AI Development?
The AI Revolution in .NET
.NET 10 isn't just another framework update—it's a fundamental reimagining of how AI integrates into the development workflow. Here's why it matters:
- Native AI Support: Built-in AI capabilities without external dependencies
- Performance Excellence: 3-year LTS with enterprise-grade stability
- Unified Abstraction: Single API surface for multiple AI providers
- C# 14 Features: Extension members and modern syntax for cleaner AI code
Key Statistics
- 478,000+ NuGet packages available
- 800+ billion package downloads
- 9,700+ stars on Microsoft Agent Framework
- 26M+ monthly downloads on AI SDK
The .NET 10 AI Stack
Core Components
1. Microsoft.Extensions.AI
The foundation of AI integration in .NET 10, providing:
// Unified AI service abstraction
public interface IChatClient
{
    Task<ChatResponse> GetResponseAsync(
        string message,
        ChatOptions? options = null);
}
Key Features:
- Multi-provider support (Azure OpenAI, OpenAI, GitHub Models)
- Middleware pipeline for cross-cutting concerns
- Streaming responses for real-time applications
- Function calling and tool execution
2. Microsoft Agent Framework
Build sophisticated multi-agent workflows:
// Define specialized agents
var analystAgent = new ChatAgent(
    "Data Analyst",
    "Analyze trends and generate insights");

var writerAgent = new ChatAgent(
    "Content Writer",
    "Create engaging technical content");

// Orchestrate collaboration
var workflow = new AgentWorkflow()
    .AddAgent(analystAgent)
    .AddAgent(writerAgent)
    .Build();
Capabilities:
- Agent orchestration and collaboration
- State management and persistence
- Tool integration and function calling
- Cloud-native deployment patterns
3. Semantic Kernel Integration
Bridge between LLMs and application logic:
// Create kernel with GitHub Models
var kernel = new KernelBuilder()
    .WithGitHubModelsChatCompletion("gpt-4")
    .WithPluginsFromType<CalculatorPlugin>()
    .Build();

// Use natural language to call functions
var result = await kernel.InvokeAsync(
    "Calculate the compound interest for $10,000 at 5% for 10 years");
Step-by-Step Implementation Guide
Step 1: Setting Up Your Project
Basic Project Structure
dotnet new console -n AIIntegrationDemo
cd AIIntegrationDemo
Add Required NuGet Packages
dotnet add package Microsoft.Extensions.AI
dotnet add package Microsoft.SemanticKernel
dotnet add package Microsoft.Extensions.Configuration.UserSecrets
Step 2: Configuring AI Services
Using GitHub Models (Free Tier)
// Program.cs
using Microsoft.Extensions.Configuration;
using Microsoft.Extensions.DependencyInjection;
using Microsoft.Extensions.AI;

var builder = WebApplication.CreateBuilder(args);

// Add GitHub Models configuration
builder.Services.AddGitHubModelsChatClient(
    builder.Configuration["GitHub:Token"],
    "gpt-4"
);

// Add AI chat service
builder.Services.AddChatClient();

var app = builder.Build();
Using Azure OpenAI (Production)
// appsettings.json
{
  "AzureOpenAI": {
    "Endpoint": "https://your-resource.openai.azure.com/",
    "ApiKey": "your-api-key",
    "DeploymentName": "gpt-4"
  }
}

// Program.cs
builder.Services.AddAzureOpenAIChatClient(
    configuration["AzureOpenAI:Endpoint"],
    configuration["AzureOpenAI:ApiKey"],
    configuration["AzureOpenAI:DeploymentName"]
);
Step 3: Building Your First AI Application
Simple Chat Interface
public class ChatService
{
    private readonly IChatClient _chatClient;

    public ChatService(IChatClient chatClient)
    {
        _chatClient = chatClient;
    }

    public async Task<string> GetResponseAsync(string userMessage)
    {
        var response = await _chatClient.GetResponseAsync(userMessage);
        return response.Message.Text;
    }
}

// Usage in API controller
[ApiController]
[Route("api/[controller]")]
public class ChatController : ControllerBase
{
    private readonly ChatService _chatService;

    public ChatController(ChatService chatService)
    {
        _chatService = chatService;
    }

    [HttpPost]
    public async Task<IActionResult> Chat([FromBody] ChatRequest request)
    {
        var response = await _chatService.GetResponseAsync(request.Message);
        return Ok(new { response });
    }
}
Step 4: Advanced Features
Function Calling with AI
// Define available functions
public class WeatherPlugin
{
    [KernelFunction]
    public async Task<string> GetWeatherAsync(string location)
    {
        // Implement weather API call
        return await WeatherService.GetForecast(location);
    }
}

// Register with Semantic Kernel
var kernel = new KernelBuilder()
    .WithPluginsFromType<WeatherPlugin>()
    .Build();

// AI will automatically call the function when needed
var result = await kernel.InvokeAsync(
    "What's the weather in New York tomorrow?");
Multi-Agent Workflows
// Define agent collaboration
public class ResearchAgent
{
    public async Task<ResearchResult> AnalyzeTopicAsync(string topic)
    {
        // Research and gather information
        return await ResearchService.AnalyzeAsync(topic);
    }
}

public class WritingAgent
{
    public async Task<string> WriteArticleAsync(ResearchResult research)
    {
        // Generate content based on research
        return await ContentGenerator.CreateAsync(research);
    }
}

// Orchestrate the workflow
public class BlogGenerationWorkflow
{
    public async Task<string> GenerateBlogPostAsync(string topic)
    {
        var research = await _researchAgent.AnalyzeTopicAsync(topic);
        var article = await _writingAgent.WriteArticleAsync(research);
        return article;
    }
}
Real-World Applications
1. Intelligent Customer Support
public class CustomerSupportAgent
{
    private readonly IChatClient _chatClient;
    private readonly KnowledgeBase _knowledgeBase;

    public async Task<string> HandleQueryAsync(string query)
    {
        // Search knowledge base
        var context = await _knowledgeBase.SearchAsync(query);

        // Generate response with context
        var prompt = $@"
            Based on this knowledge: {context}
            Respond to this customer query: {query}
        ";

        return await _chatClient.GetResponseAsync(prompt);
    }
}
2. Code Generation and Review
public class CodeAssistant
{
    public async Task<string> GenerateCodeAsync(string description)
    {
        var prompt = $@"
            Write C# code for: {description}
            Follow .NET 10 best practices
            Include error handling and logging
        ";

        return await _chatClient.GetResponseAsync(prompt);
    }

    public async Task<List<CodeIssue>> ReviewCodeAsync(string code)
    {
        var prompt = $@"
            Review this C# code for:
            - Security vulnerabilities
            - Performance issues
            - Best practices violations
            - Code smells

            Code to review:
            {code}
        ";

        var response = await _chatClient.GetResponseAsync(prompt);
        return ParseIssues(response);
    }
}
3. Data Analysis and Reporting
public class DataAnalysisAgent
{
    public async Task<AnalysisResult> AnalyzeDataAsync(
        string data,
        string analysisType)
    {
        var prompt = $@"
            Analyze this data using {analysisType}:
            {data}

            Provide:
            1. Key insights
            2. Trends and patterns
            3. Recommendations
            4. Visualizations description
        ";

        var response = await _chatClient.GetResponseAsync(prompt);
        return ParseAnalysisResult(response);
    }
}
JIT Compiler Enhancements
- Better Inlining: Automatic method inlining for small functions
- Method Devirtualization: Eliminates virtual call overhead
- Struct Optimization: Improved argument passing for value types
Hardware Acceleration
// .NET 10 automatically uses AVX10.2 when available
public class VectorOperations
{
    public float[] ProcessVector(float[] data)
    {
        // SIMD-optimized operations
        return Vector.IsHardwareAccelerated
            ? ProcessWithSimd(data)
            : ProcessScalar(data);
    }
}
NativeAOT for AI Workloads
<PropertyGroup>
  <PublishAot>true</PublishAot>
  <RuntimeIdentifier>linux-x64</RuntimeIdentifier>
</PropertyGroup>
AI Service Optimization
Streaming Responses
public async IAsyncEnumerable<string> StreamResponseAsync(
    string prompt,
    [EnumeratorCancellation] CancellationToken cancellationToken)
{
    await foreach (var chunk in _chatClient.StreamResponseAsync(prompt, cancellationToken))
    {
        yield return chunk.Text;
    }
}
Caching Strategies
public class CachedChatService
{
    private readonly IMemoryCache _cache;
    private readonly IChatClient _chatClient;

    public async Task<string> GetCachedResponseAsync(string prompt)
    {
        var cacheKey = $"chat:{prompt.GetHashCode()}";

        return await _cache.GetOrCreateAsync(cacheKey, async entry =>
        {
            entry.AbsoluteExpirationRelativeToNow = TimeSpan.FromHours(1);
            return await _chatClient.GetResponseAsync(prompt);
        });
    }
}
Security Best Practices
1. Secrets Management
// Use user secrets in development
builder.Configuration.AddUserSecrets<Program>();

// Use Azure Key Vault in production
builder.Configuration.AddAzureKeyVault(
    new Uri("https://your-keyvault.vault.azure.net/"),
    new DefaultAzureCredential());
2. Rate Limiting
public class RateLimitedChatService
{
    private readonly IChatClient _chatClient;
    private readonly SemaphoreSlim _rateLimiter = new(10, 10);

    public async Task<string> GetResponseAsync(string prompt)
    {
        await _rateLimiter.WaitAsync();
        try
        {
            return await _chatClient.GetResponseAsync(prompt);
        }
        finally
        {
            _rateLimiter.Release();
        }
    }
}
3. Content Validation
public class SafeChatService
{
    public async Task<string> GetSafeResponseAsync(string prompt)
    {
        var response = await _chatClient.GetResponseAsync(prompt);

        // Validate response
        if (ContainsSensitiveInformation(response))
        {
            throw new SecurityException("Response contains sensitive data");
        }

        return response;
    }
}
Production Deployment
Containerization
FROM mcr.microsoft.com/dotnet/aspnet:10.0 AS base
WORKDIR /app
EXPOSE 80

FROM mcr.microsoft.com/dotnet/sdk:10.0 AS build
WORKDIR /src
COPY . .
RUN dotnet publish -c Release -o /app

FROM base AS final
WORKDIR /app
COPY --from=build /app .
ENTRYPOINT ["dotnet", "YourAIApp.dll"]
Azure Deployment
# Create Azure App Service
az webapp create --resource-group myResourceGroup --plan myPlan --name myAIApp

# Configure environment variables
az webapp config appsettings set \
  --resource-group myResourceGroup \
  --name myAIApp \
  --settings AzureOpenAI:Endpoint="$ENDPOINT" AzureOpenAI:ApiKey="$API_KEY"
Monitoring and Observability
Application Insights Integration
builder.Services.AddApplicationInsightsTelemetry();

public class MonitoredChatService
{
    private readonly TelemetryClient _telemetryClient;

    public async Task<string> GetResponseAsync(string prompt)
    {
        using var operation = _telemetryClient.StartOperation<RequestTelemetry>("ChatRequest");

        try
        {
            var response = await _chatClient.GetResponseAsync(prompt);
            operation.Telemetry.Success = true;
            return response;
        }
        catch (Exception ex)
        {
            _telemetryClient.TrackException(ex);
            throw;
        }
    }
}
AI-Specific Metrics
public class AIMetricsCollector
{
    public void TrackAIInteraction(
        string model,
        int tokensUsed,
        TimeSpan latency)
    {
        // Track AI usage metrics
        _metrics.RecordGauge("ai.tokens.used", tokensUsed);
        _metrics.RecordHistogram("ai.latency.ms", latency.TotalMilliseconds);
        _metrics.RecordCounter("ai.requests.total", 1);
    }
}
Future-Proofing Your AI Applications
1. Provider Abstraction
public interface IAIProvider
{
    Task<string> CompleteAsync(string prompt);
    IAsyncEnumerable<string> StreamCompleteAsync(string prompt);
}

public class MultiProviderChatService
{
    private readonly IEnumerable<IAIProvider> _providers;

    public async Task<string> GetResponseAsync(string prompt)
    {
        // Fallback to different providers
        foreach (var provider in _providers)
        {
            try
            {
                return await provider.CompleteAsync(prompt);
            }
            catch (Exception ex)
            {
                _logger.LogWarning(ex, "Provider {Provider} failed", provider.GetType().Name);
            }
        }

        throw new InvalidOperationException("All AI providers failed");
    }
}
2. Model Versioning
public class VersionedAIChatService
{
    public async Task<string> GetResponseAsync(
        string prompt,
        string modelVersion = "latest")
    {
        var model = _modelRegistry.GetModel(modelVersion);
        return await model.CompleteAsync(prompt);
    }
}
Conclusion
.NET 10 represents a massive leap forward for AI development in the .NET ecosystem. With native AI integration, unified abstractions, and production-ready frameworks, developers can build sophisticated AI-powered applications with unprecedented ease and reliability.
Key Takeaways
- Start Simple: Begin with basic chat completion, then add complexity
- Use the Right Tools: Microsoft.Extensions.AI for abstractions, Agent Framework for workflows
- Think Production: Implement security, monitoring, and optimization from day one
- Stay Updated: The AI landscape evolves rapidly—keep learning
Next Steps
- Experiment: Try the GitHub Models integration (free tier)
- Build: Create a small AI application using the patterns above
- Deploy: Containerize and deploy to Azure or your preferred cloud
- Share: Contribute back to the .NET AI community
Ready to start building? Clone the sample repository and begin your AI journey with .NET 10 today!
For more .NET and AI content, follow me on LinkedIn and check out the official Microsoft .NET AI documentation.
This article was written with the assistance of AI tools running on .NET 10.